Z-Claw AI Assistant
Z-Claw is the smallest AI personal assistant you can build. It runs on the GLYPH-C3 board and lets you talk to an AI to control your home, set reminders, and more.How it Works? (The Simple Version)
Even though it’s tiny, your GLYPH-C3 board is doing some smart work:- Connection: It connects to your WiFi and listens for your messages (via Telegram or a Serial monitor).
- The Brain: It sends your question to an AI Brain (either running on your computer with Ollama or in the cloud).
- Actions: The AI doesn’t just talk—it understands “tools.” For example, if you say “Turn on the light,” the AI tells the board to flick a switch (GPIO pin).
- No Lag: Because the code is written in C, it’s extremely fast and uses very little power.
What You Need
Before starting, make sure you have your hardware and software environment ready.Hardware Required
- GLYPH-C3 board (The main AI device).
- LED (For testing).
- 220 ohm resistor (For testing).
- Breadboard (For testing).
- Jumper wires (For testing).
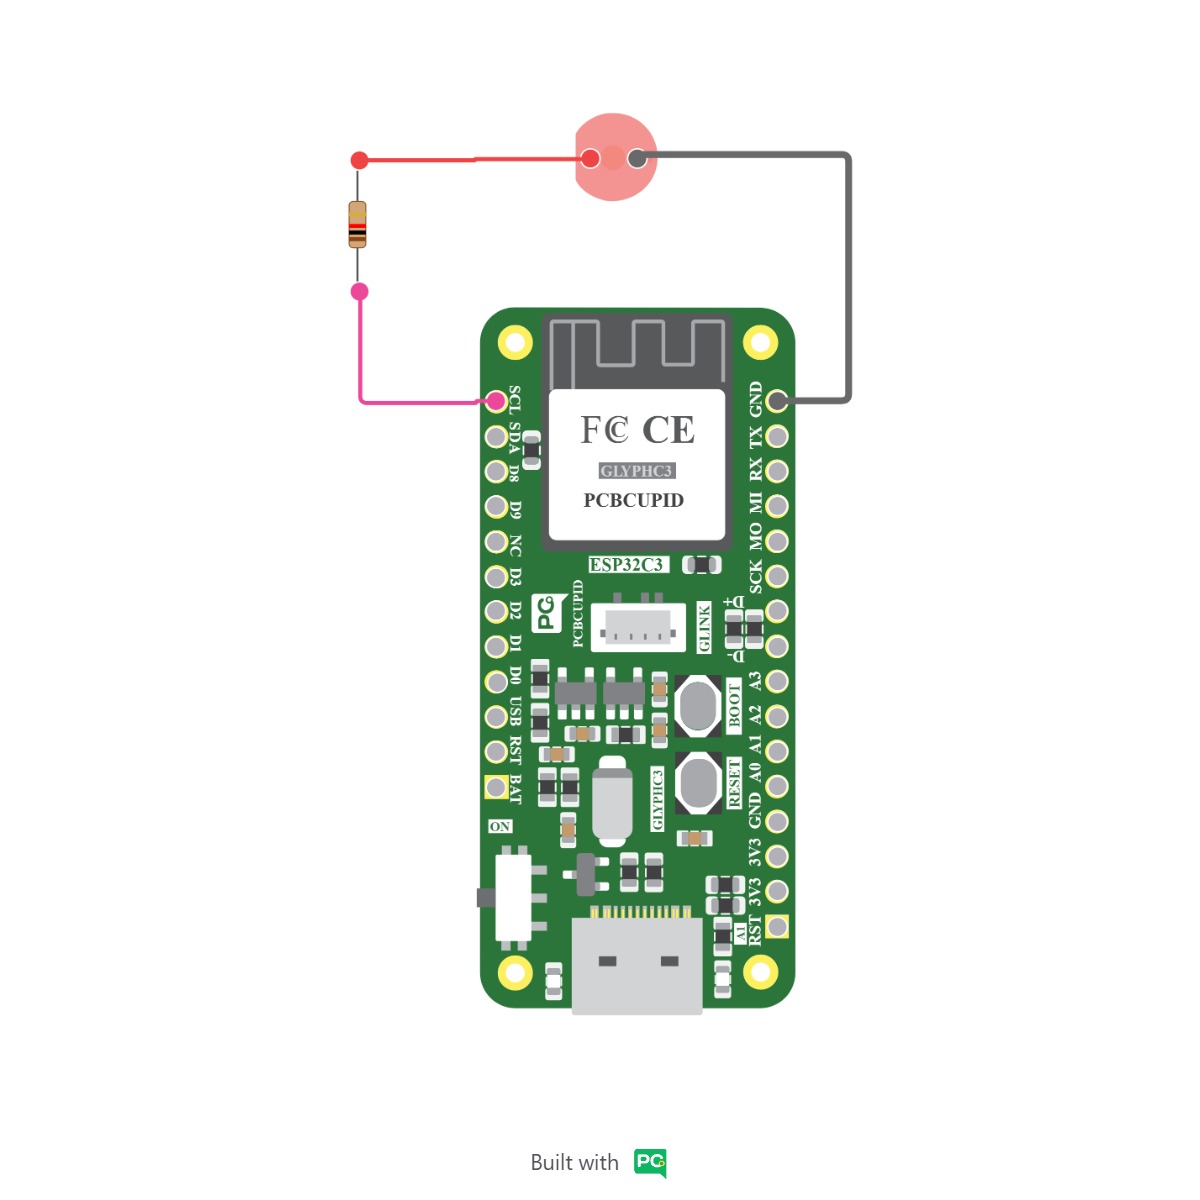
Circuit diagram
Software
- ESP-IDF v5.x: The core development tools from Espressif.
- Git: Required to download the project files.
- Python: Required for the build system and provisioning scripts.
Software Setup
You have two ways to give your assistant a “brain”:- Ollama (Local): No cost, runs on your own computer (Recommended).
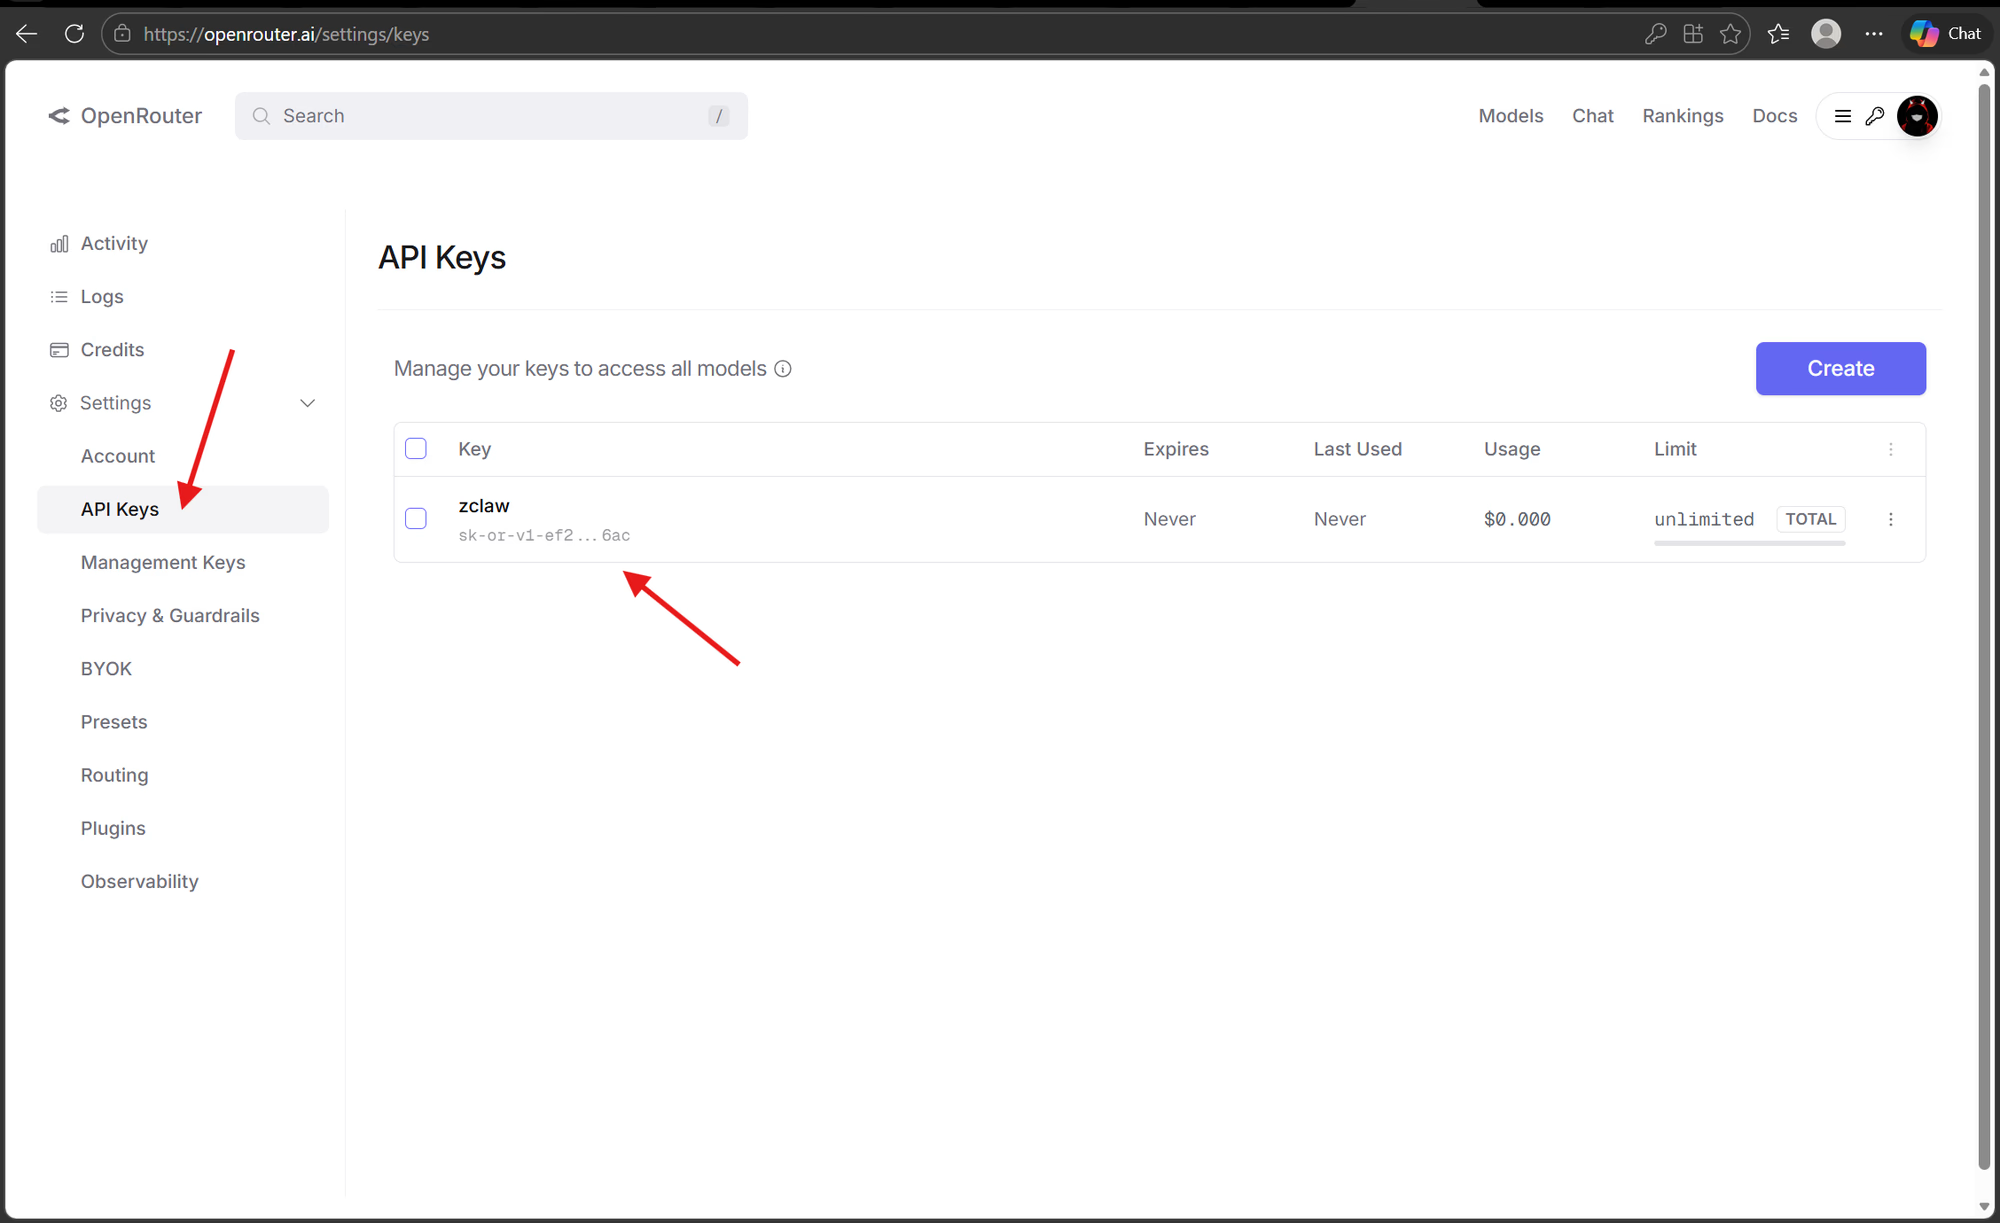
- API Key (Cloud): Uses a paid service like OpenRouter.
Step 1: Get the Code
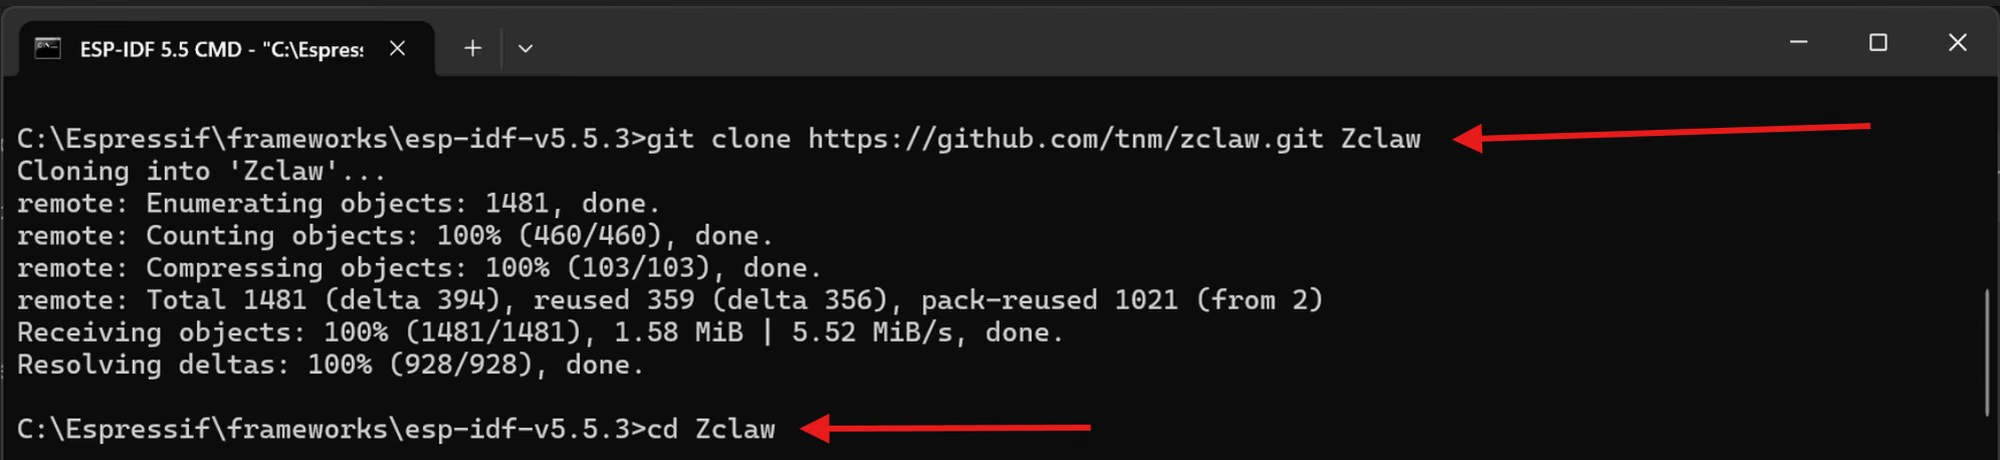
First, we need to download the Z-Claw project files from GitHub to your computer. Go to the Z-Claw GitHub Repository and copy the clone URL.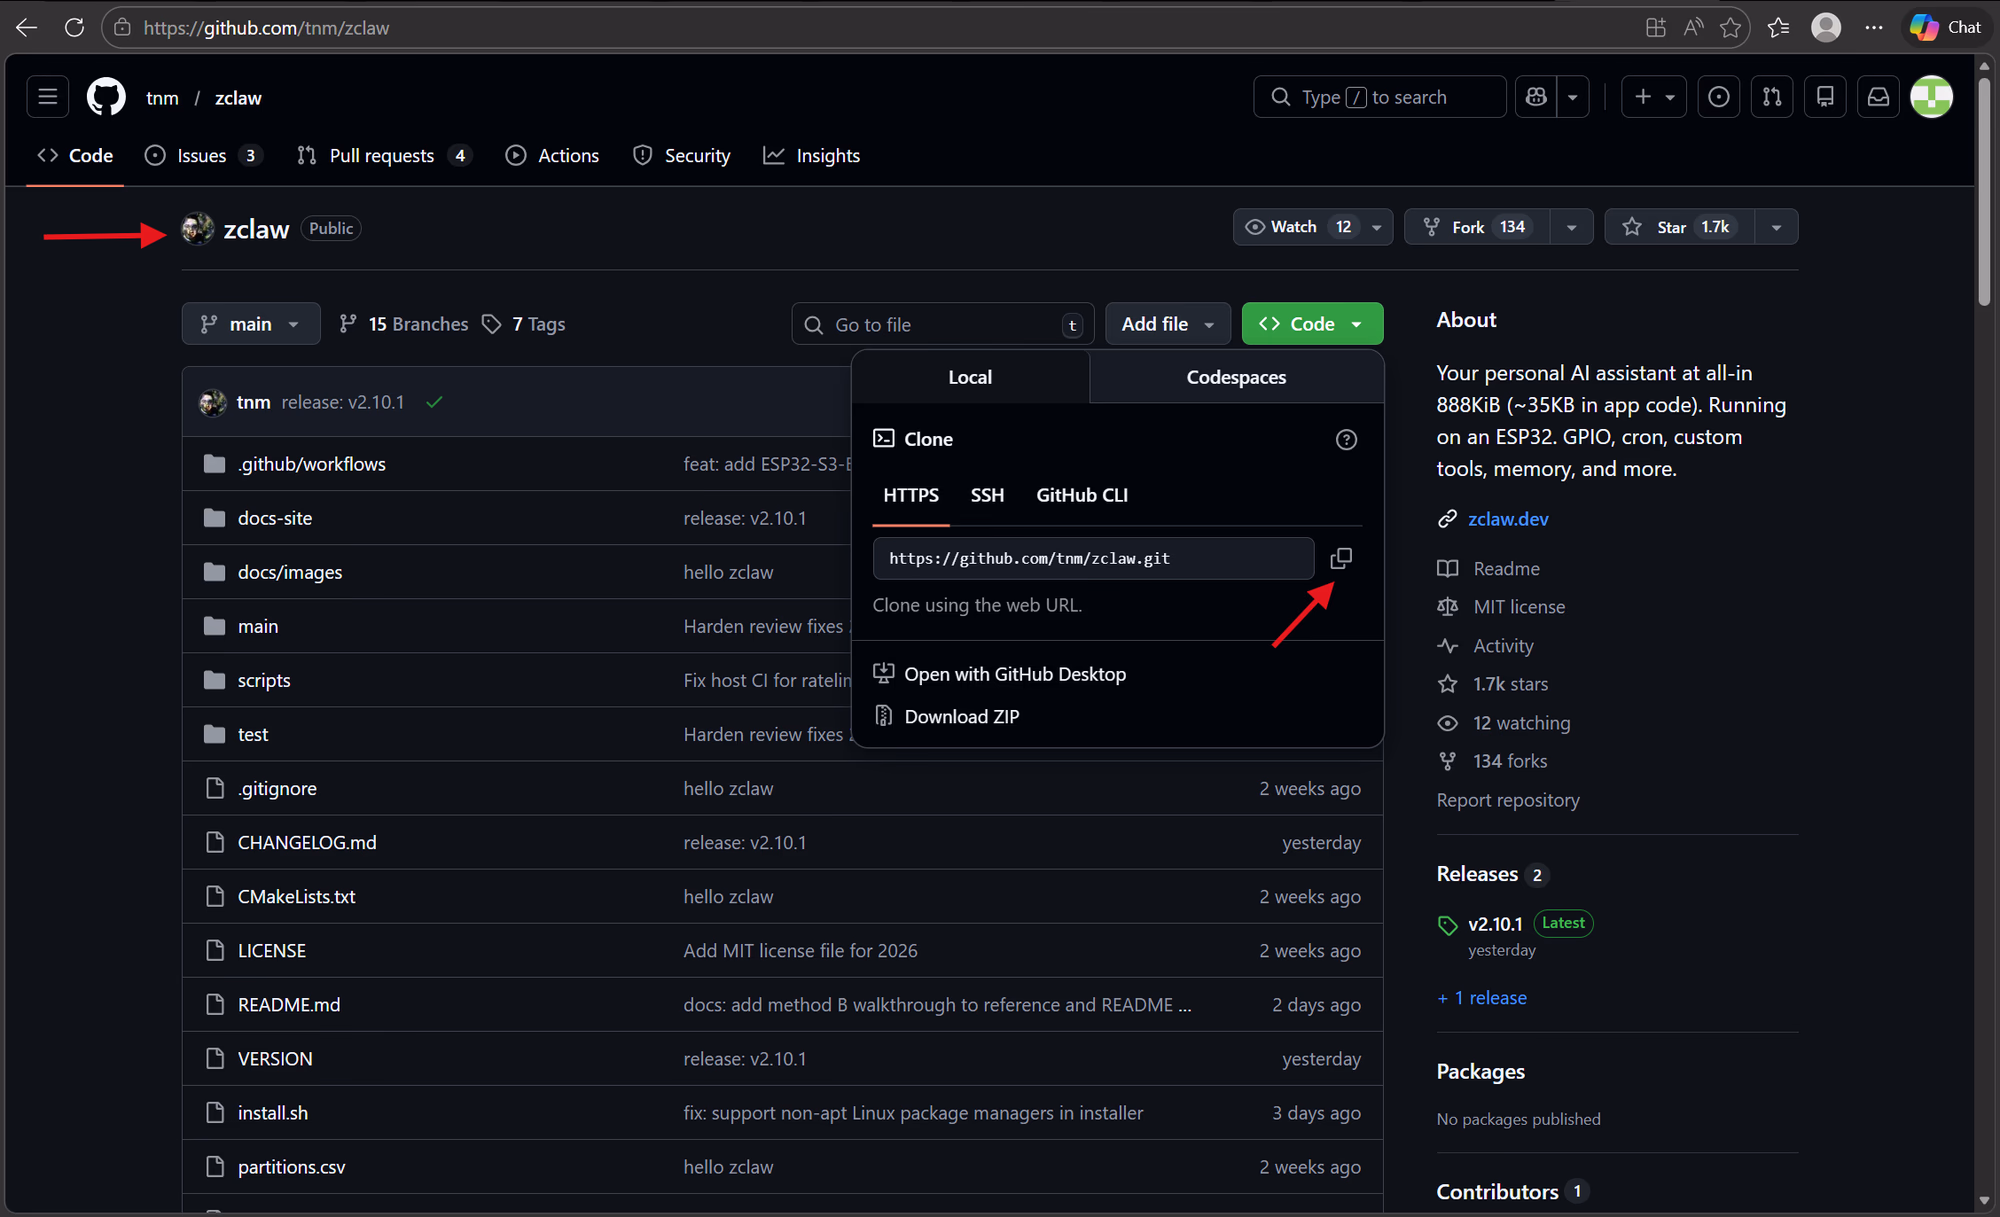 Open your terminal and run:
Step 2: Setup YOUR ESP-IDF Environment
To compile and upload the code, you need the ESP-IDF tools. You have two ways to do this:Option A: ESP-IDF Terminal
If you installed the standalone ESP-IDF 5.x tools, open the ESP-IDF 5.x PowerShell (or CMD) from your Windows Start Menu. Once open, navigate to your project folder:Option B: VS Code Extension
You can also use the official ESP-IDF extension for VS Code. This makes it easier to build and flash using the VS Code interface.For a full guide on setting up the extension, see our ESP-IDF Setup Guide.
Step 3: Set the Target Board
Every ESP32 chip is slightly different. We need to tell the project that we are using the esp32c3 chip (the one inside your GLYPH-C3).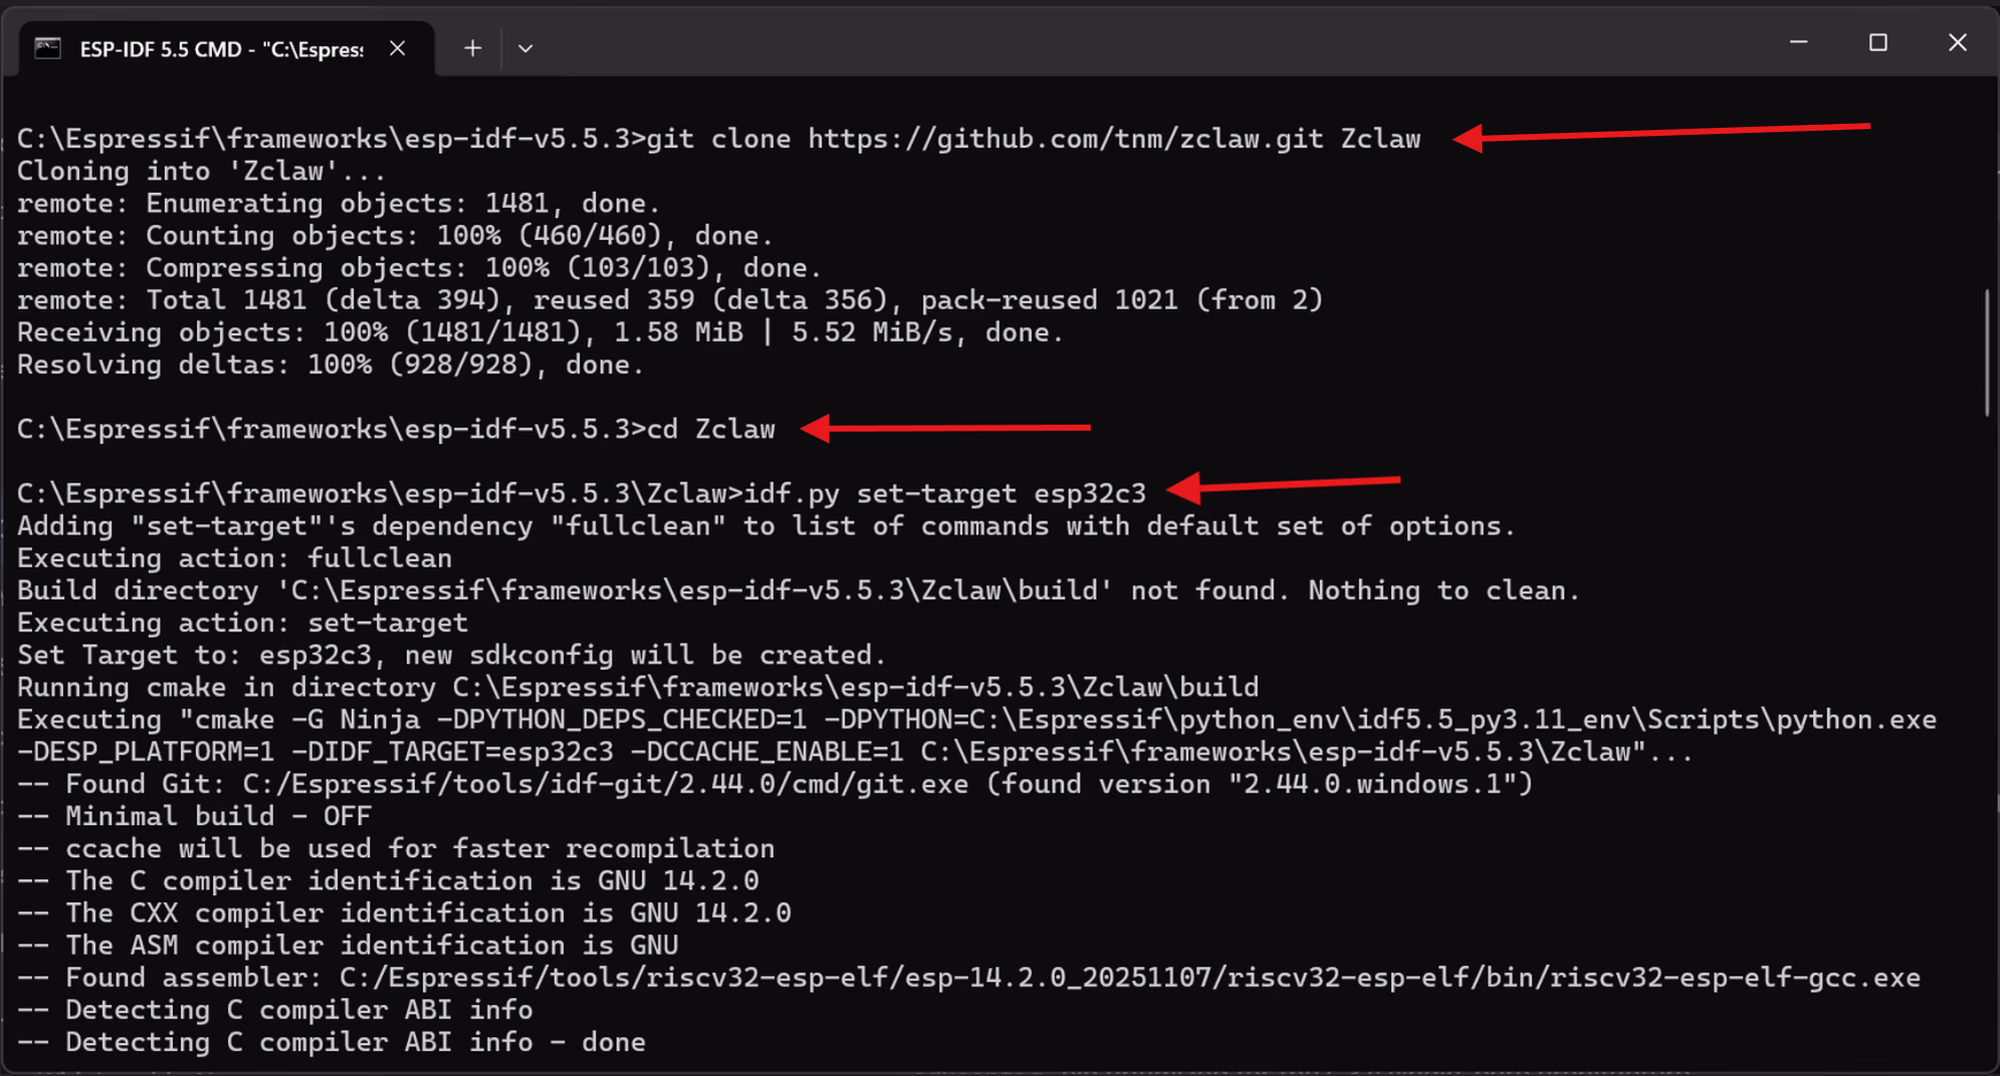
Step 4: Configure Your AI Brain
Before connecting your board, you need to decide which AI “Brain” to use. You will need these details for both the configuration menu below and the provisioning script in Step 7.Prepare Your AI Details
- Option A: Ollama (Local AI): Install Ollama on your computer. Make sure it’s running and keep your computer’s IP address ready (e.g.,
http://192.168.1.50:11434). - Local Device URL: After getting the IP address, you should also have a local device URL ready that you will need to enter in the terminal manually.

- Option B: OpenRouter (Cloud AI)/OpenAI and keep it ready.
Gathering these details now will make the next steps much smoother! You’ll need them again in Step 7.
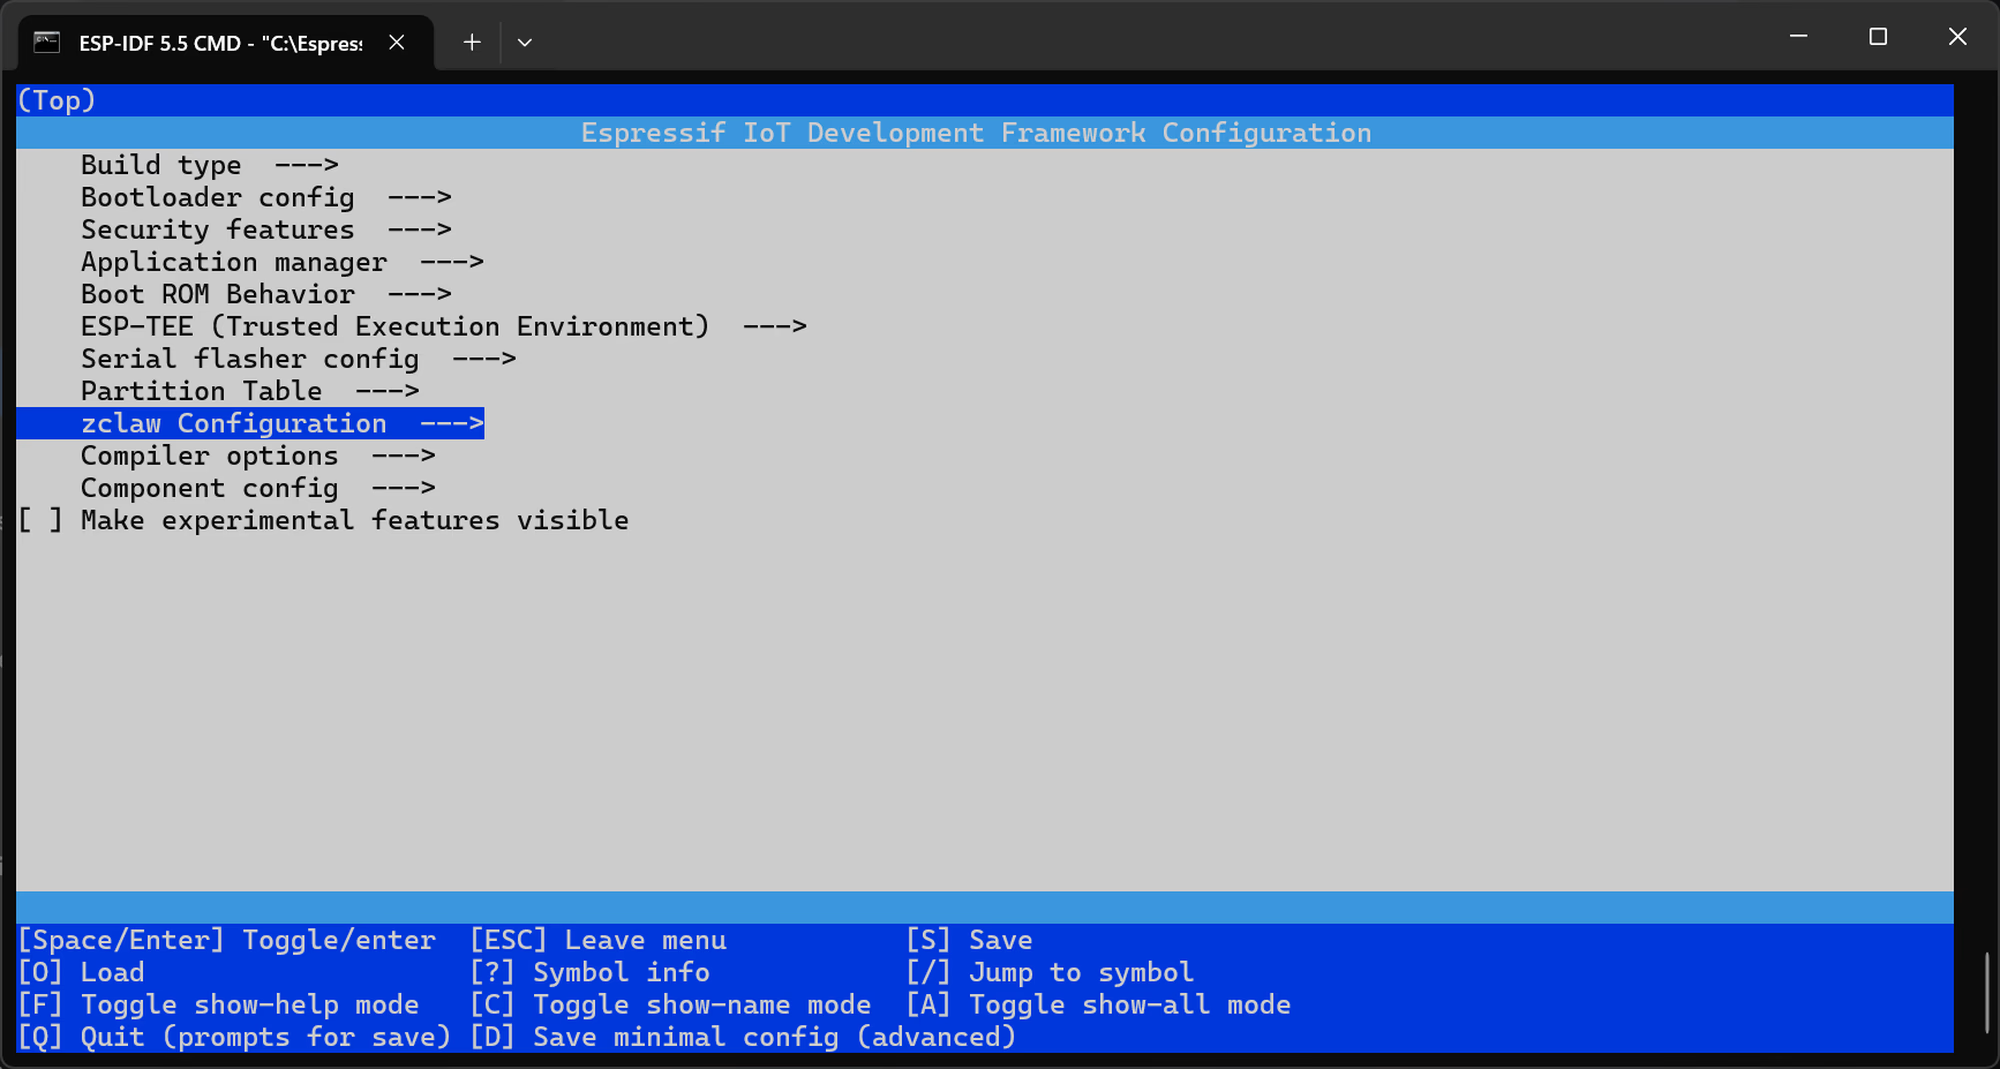
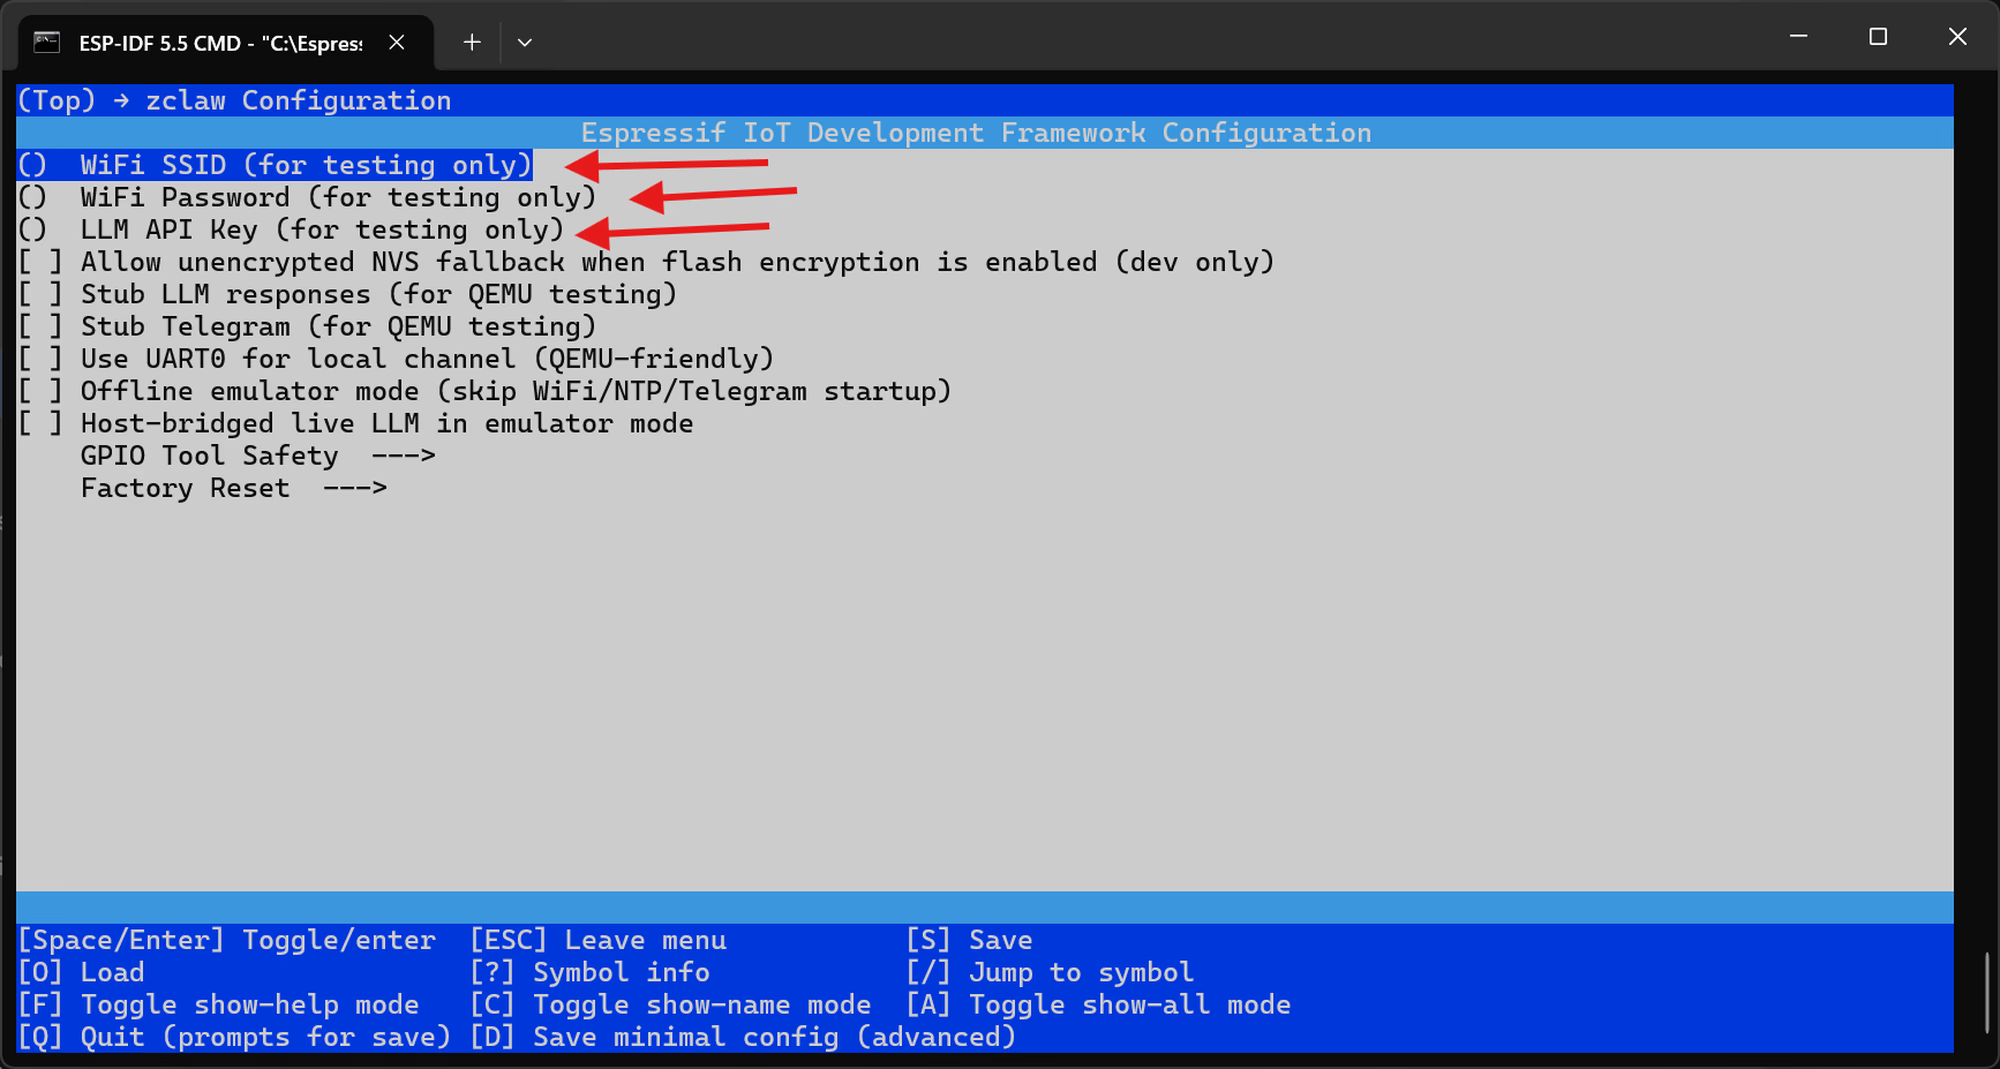
Run the Configuration Menu
Now, open the “Settings” menu to tell your board which AI to talk to:
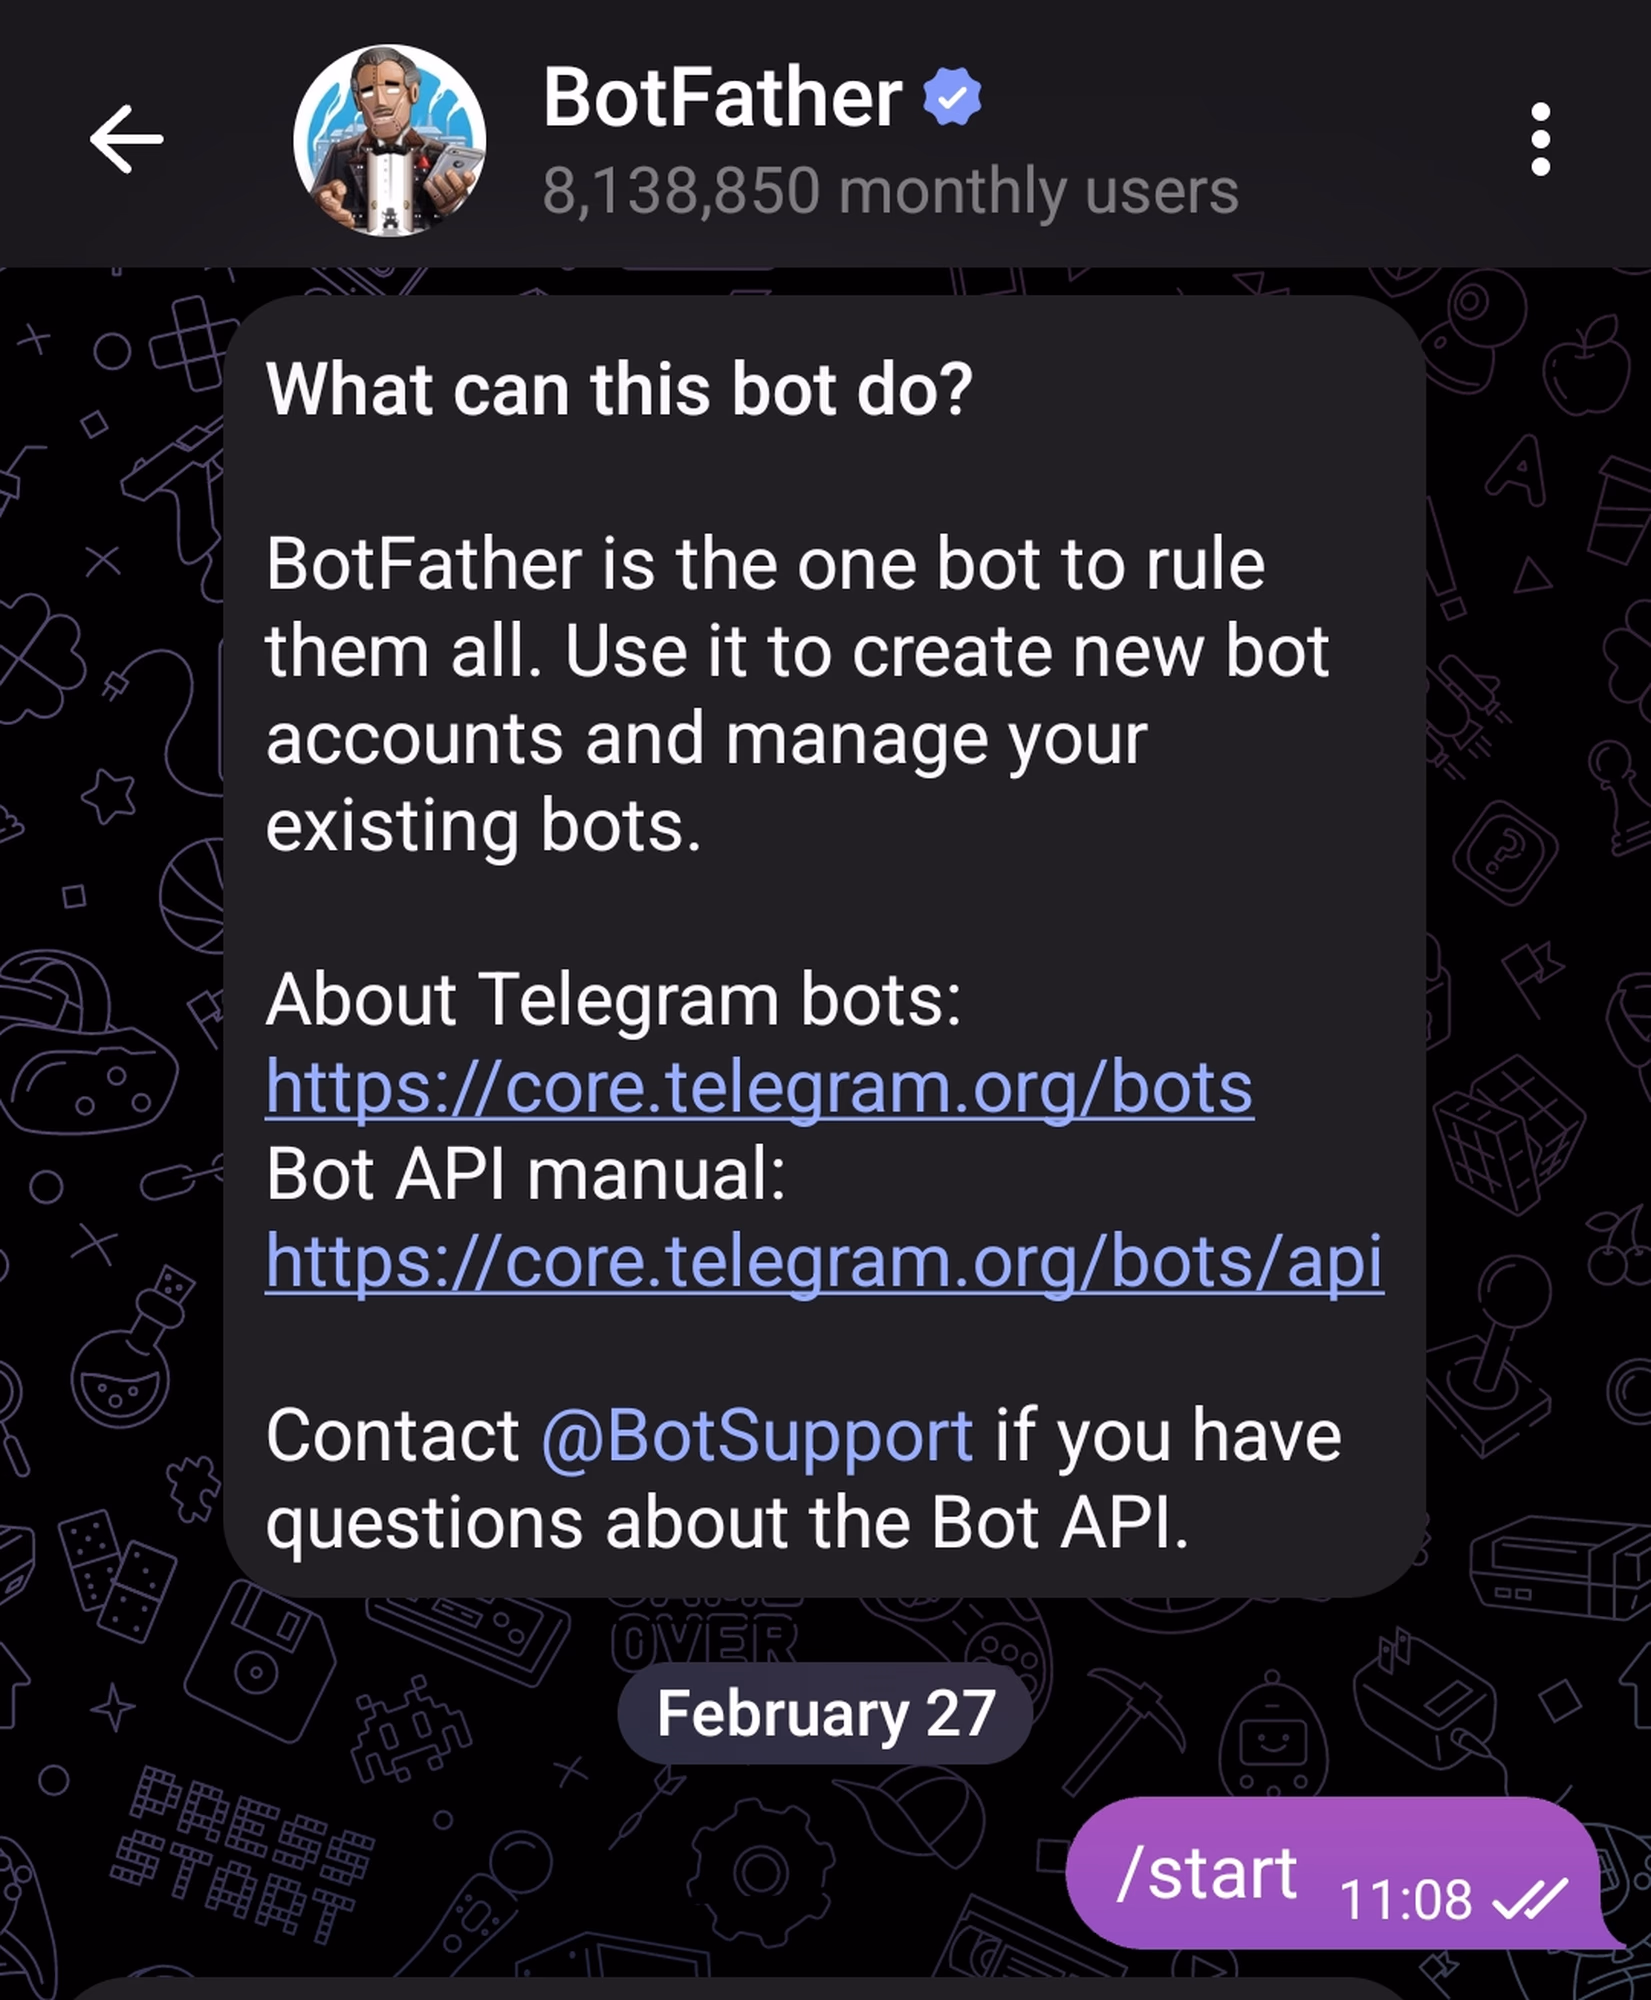
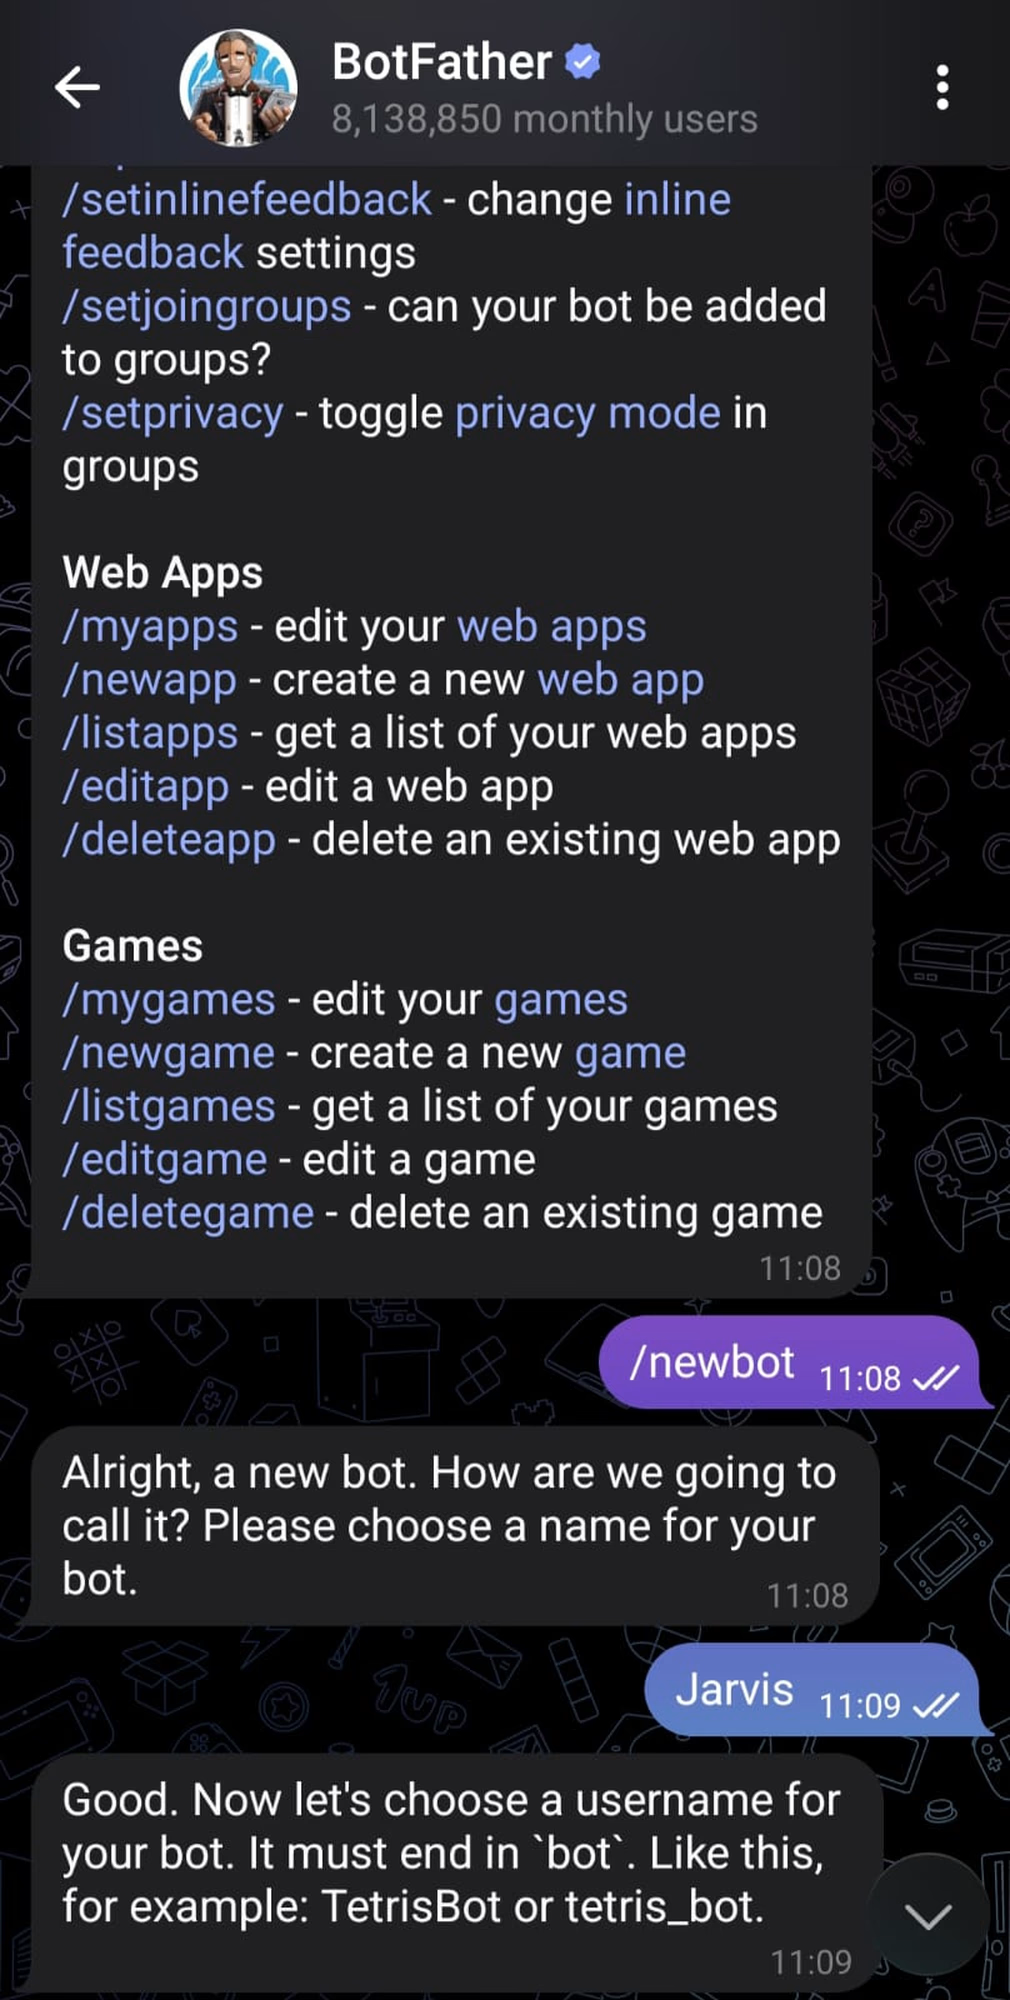
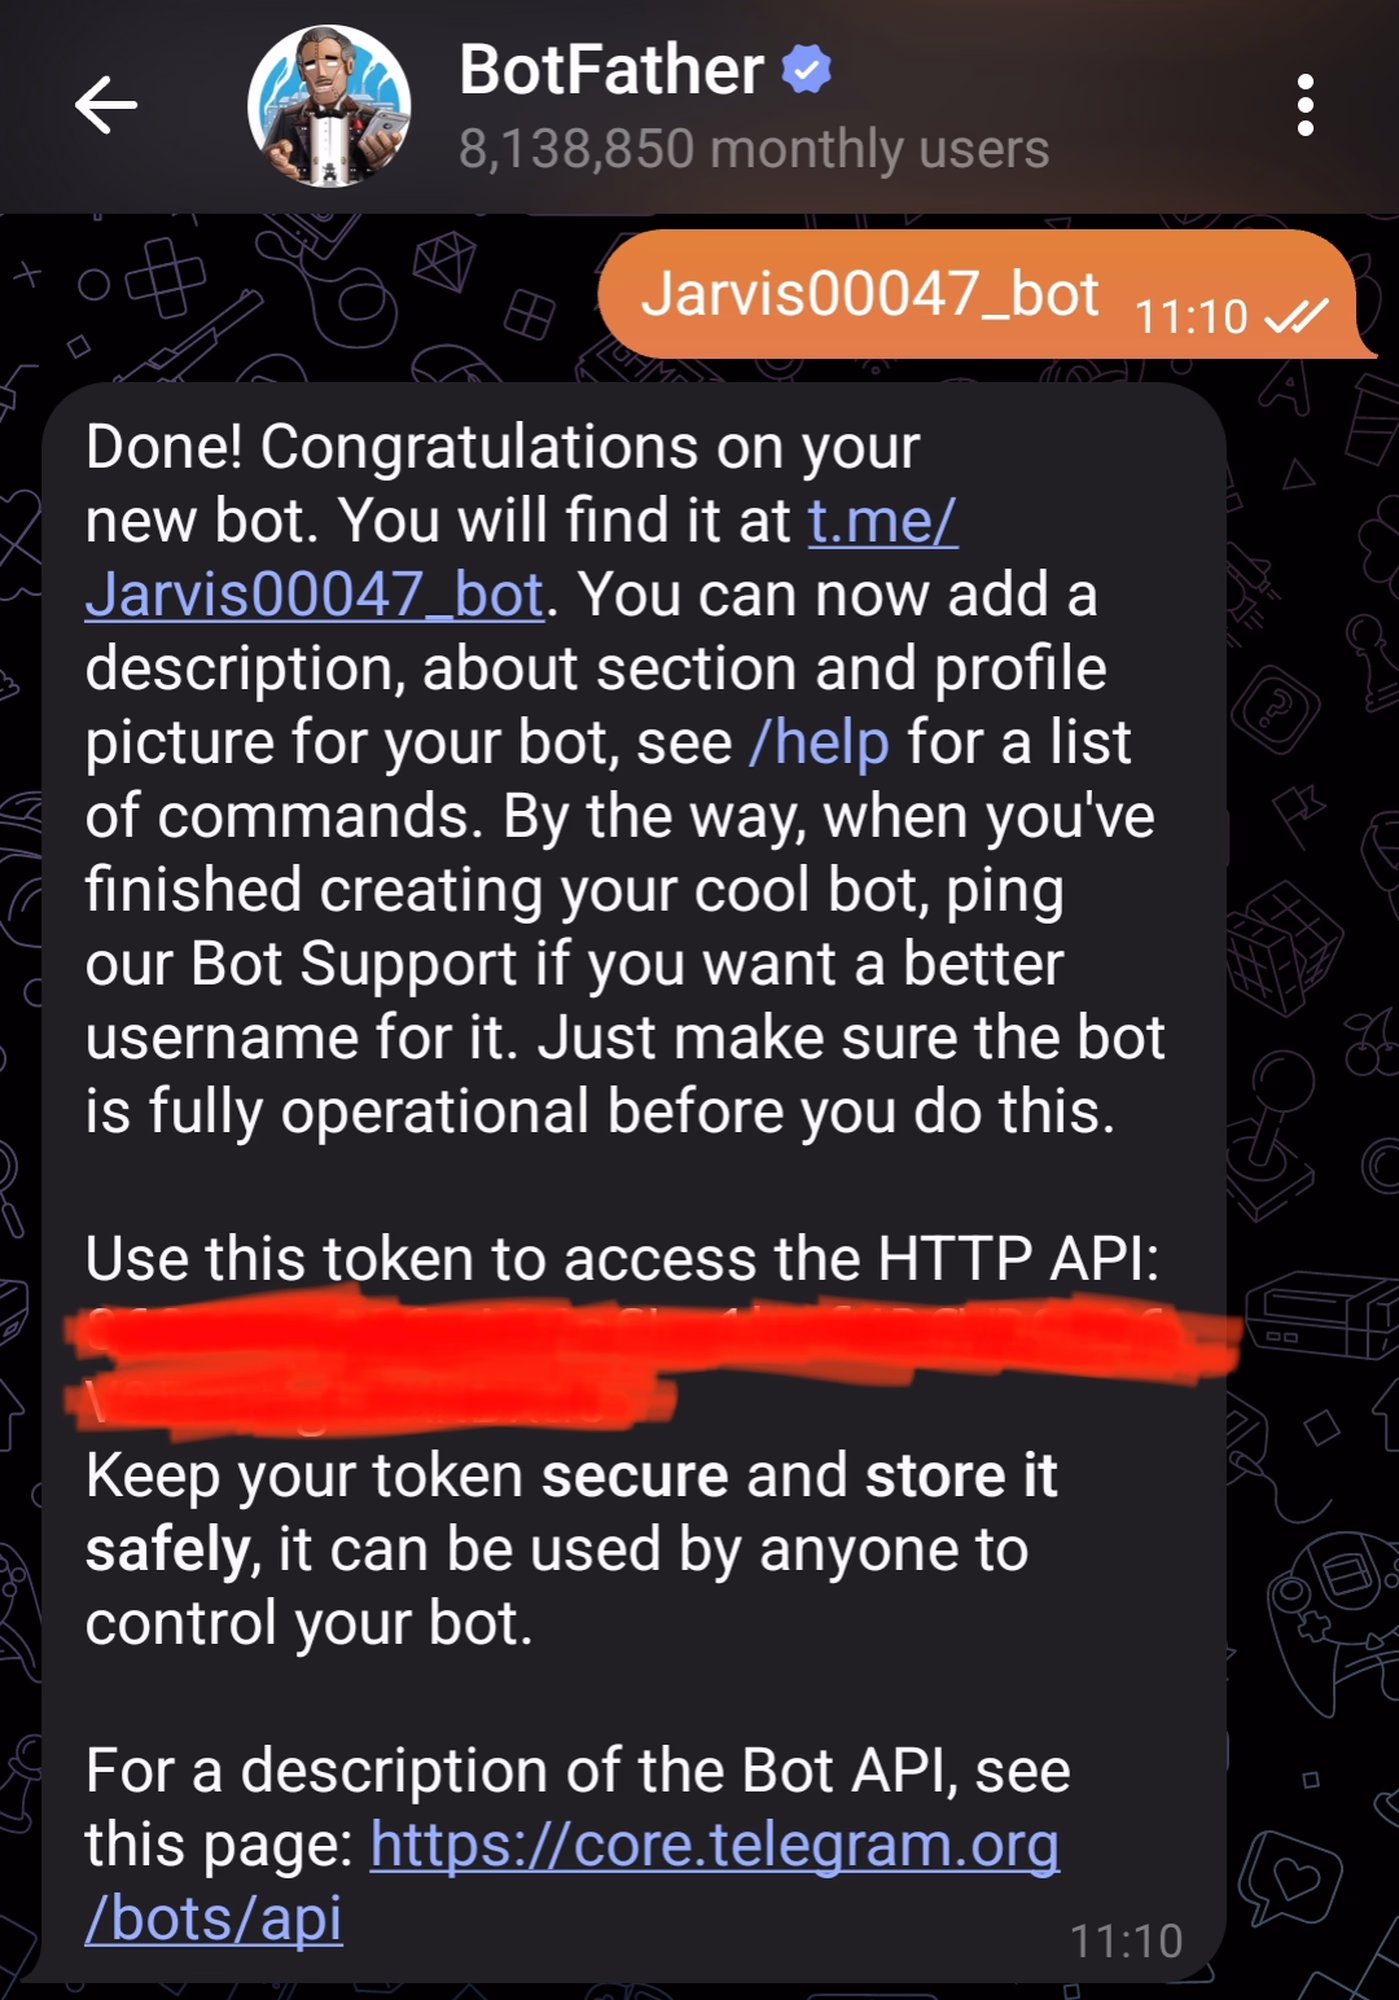
Step 5: Add Telegram Bot
This allows you to message your assistant from your phone using the Telegram app.Save your Bot Token and Chat ID; you’ll need them for the provisioning script in Step 7.
1. Message @BotFather and use /newbot to get a Token.
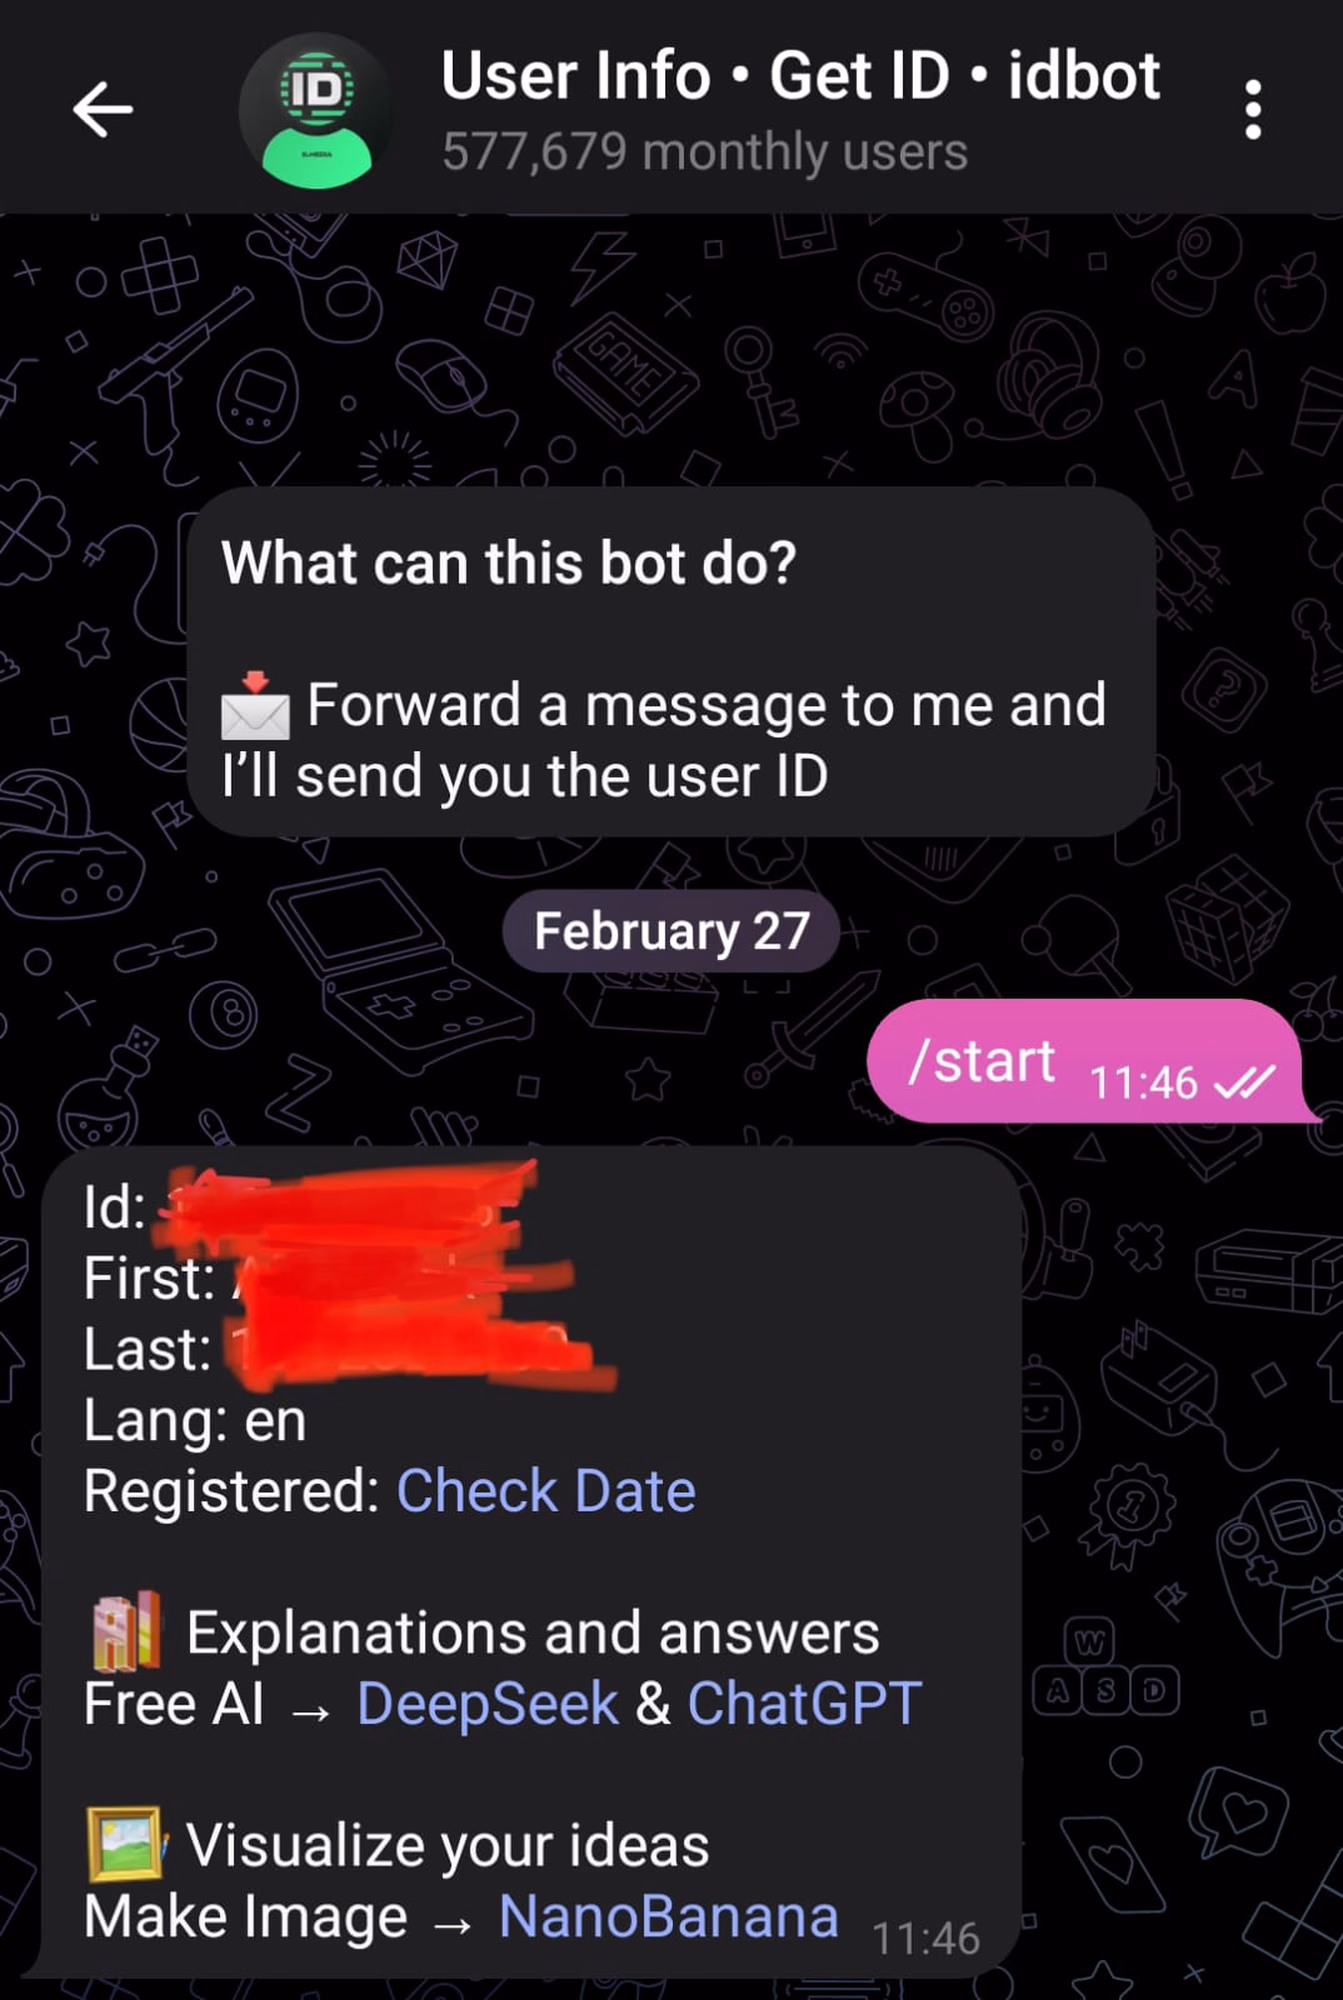
2. Message @userinfobot to get your Chat ID.
Step 6: Build and Flash the Firmware
This command compiles your C code and “burns” the logic onto the ESP32. Run this in your ESP-IDF terminal:Wait for the process to hit 100% and show “Done.”

Step 7: Provision Your Credentials
Now, save your WiFi, Telegram, and LLM details into the board’s memory. Run this command in the same terminal:YOUR_PORT_HERE with your actual port number, e.g., COM145).
Follow the prompts to enter:
- WiFi SSID & Password
- LLM Provider: (e.g.,
openaiorollama) - LLM Model: (e.g.,
qwen2.5:0.5b) - Local Device URL: (e.g.,
http://192.168.1.50:11434) - Telegram Bot Token & Chat ID
Step 8: Start the Assistant (Monitor)
Finally, run this to start the assistant and see the output in real-time: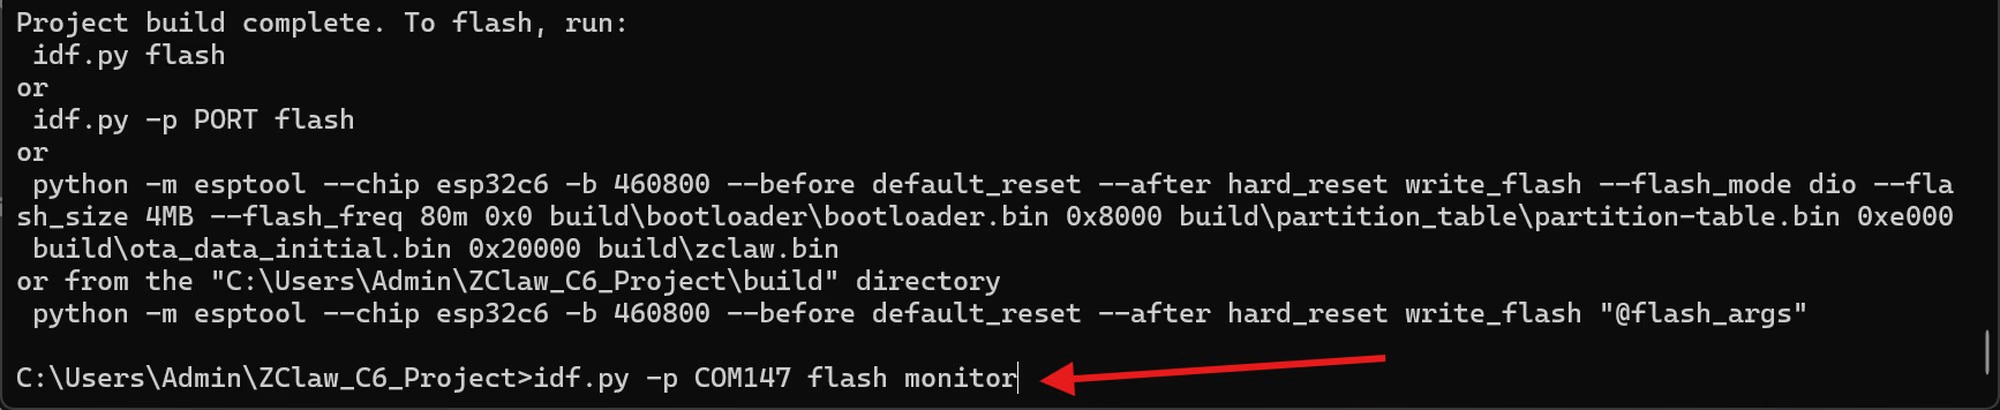
What can I say?
Try talking to your assistant:- “Remind me to water the plants at 8am daily.”
- “What is the temperature?”
- “Turn off the lights (GPIO 2).”