Installing ESP-IDF via VS Code Extension
This guide explains how to set up the ESP-IDF (Espressif IoT Development Framework) development environment using Visual Studio Code (VS Code) and the ESP-IDF extension.
Prerequisites
Before starting, ensure you have the following tools installed:
1. Visual Studio Code (VS Code)
- Download from https://code.visualstudio.com.
2. Git
- Install Git from https://git-scm.com.
3. Python 3.x
- ESP-IDF requires Python 3.7 or later. Install it from https://www.python.org.
Step 1: Install VS Code Extension for ESP-IDF
- Open Visual Studio Code.
-
Access Extensions Marketplace.
- In VS Code, click the Extensions icon on the left sidebar, or press
Ctrl+Shift+X(Windows/Linux) orCmd+Shift+X(macOS). - Search for
ESP-IDFin the search bar.
- In VS Code, click the Extensions icon on the left sidebar, or press
-
Install ESP-IDF Extension.
- Find the official ESP-IDF extension by Espressif Systems and click Install.
Make sure you have the latest version of VS Code for compatibility with the ESP-IDF extension.
Step 2: Set Up ESP-IDF in VS Code
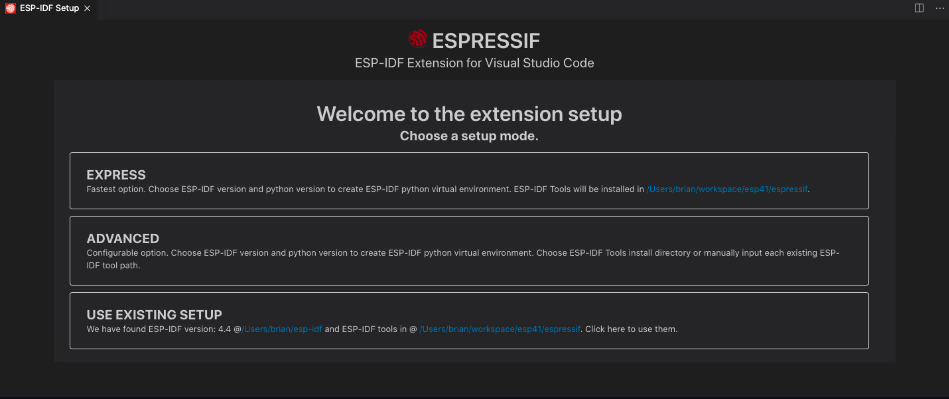
After installing the extension, the ESP-IDF setup wizard will guide you through the installation process.2.1: Open ESP-IDF Setup Wizard
- Launch Command Palette:
- Press
Ctrl+Shift+P(orCmd+Shift+Pon macOS).
- Press
- Search for ESP-IDF Configuration:
- Type
ESP-IDF: Configure ESP-IDF extensionand select it.
- Type
2.2: Install ESP-IDF
- The wizard will ask if you want to install ESP-IDF. Click Yes to proceed.
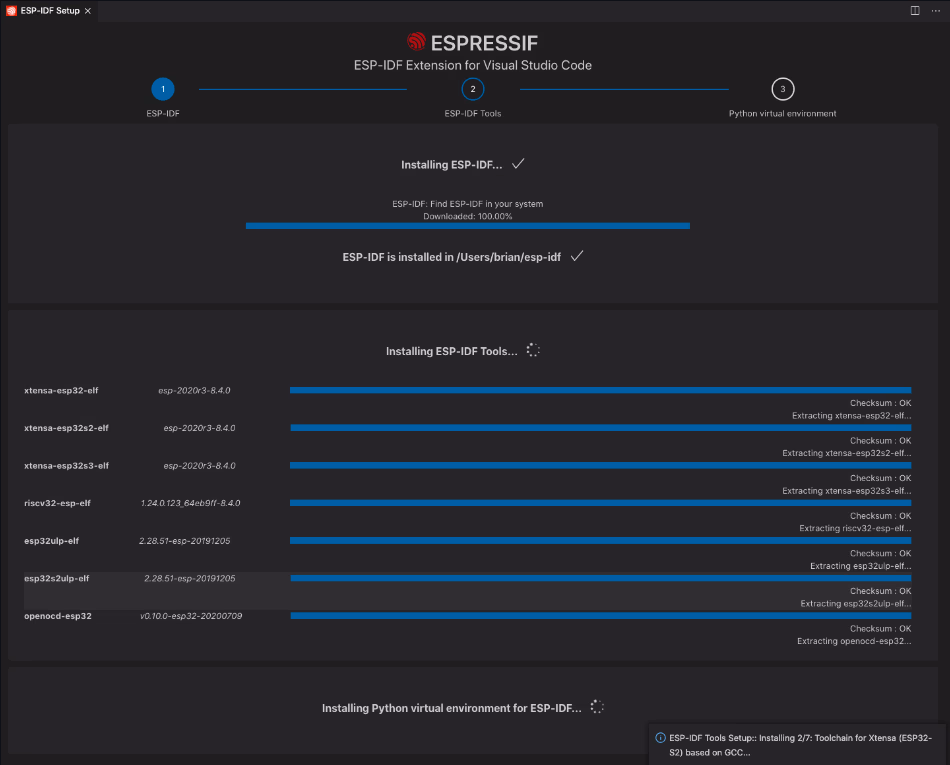
2.3 Toolchain Installation:
- The wizard will also download and configure the required toolchain, including compilers and other essential tools.
- On Windows, it may install MSYS2, a collection of development tools.
- On macOS and Linux, it will configure the necessary packages via the package manager.
Avoid changing system PATH manually. Misconfiguring PATH could interfere with other applications. The ESP-IDF installer handles this automatically.
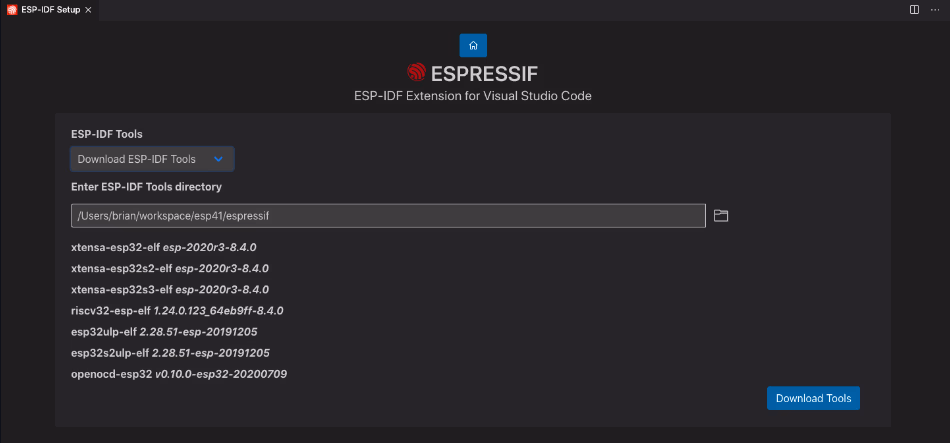
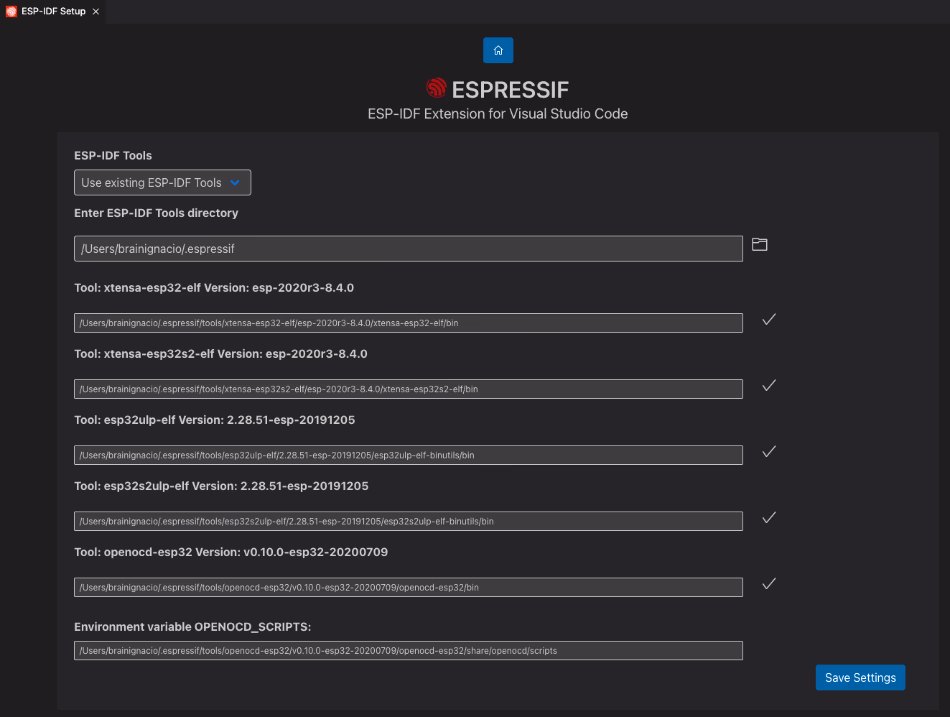
2.4. Verify Installation:
- The wizard will verify that the installation was successful by running a series of checks.

Step 3: Create an ESP-IDF Project
3.1: Start a New Project
-
Open Command Palette(
Ctrl+Shift+PorCmd+Shift+P). -
Create New Project:
- Type
ESP-IDF: Create New Projectand select it.
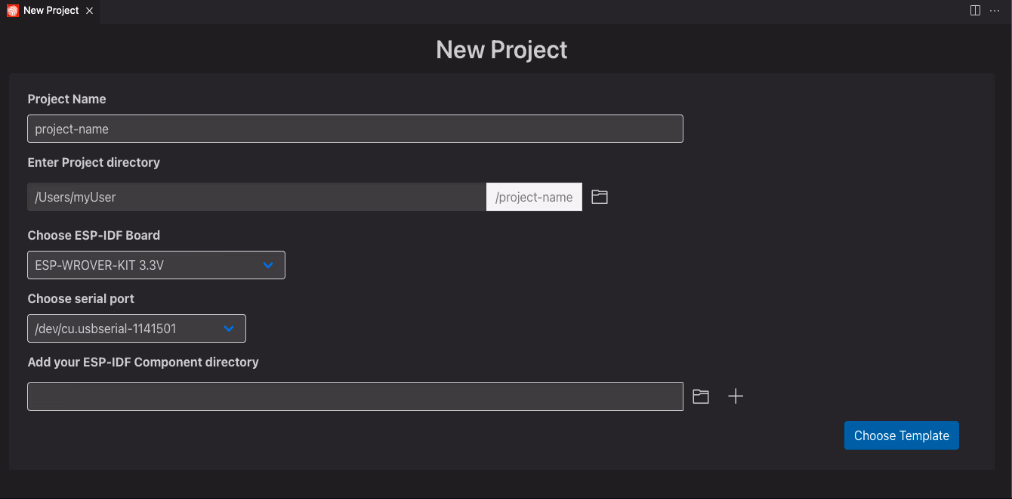
- Type
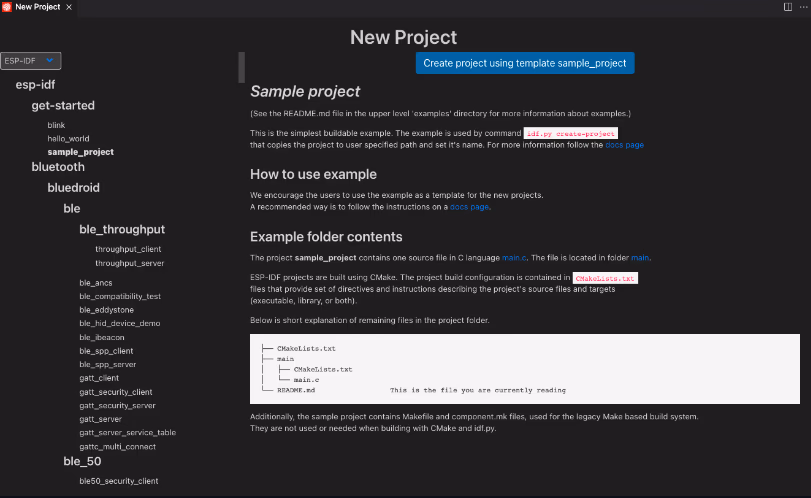
Choose hello_world or blink template for a quick, functional test of your setup.
-
Choose Project Template:
- Pick a template for your project (e.g.,
blink,hello_world).
- Pick a template for your project (e.g.,
-
Pick Folder for Project:
- Choose or create a folder where the project will be created.
3.2: Configure Project
- Once the project is created, go to the ESP-IDF menu in the top bar of VS Code.
- Select ESP-IDF: Set up ESP-IDF tools to configure your project settings.
- Inside the project folder, modify the
mainfiles as needed. You will see aCMakeLists.txtfile and amaindirectory where your code resides.
Step 4: Build and Flash the Project
4.1: Build the Project
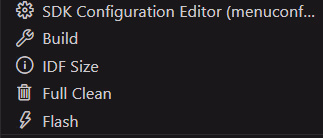

- Open Command Palette(
Ctrl+Shift+PorCmd+Shift+P). - Build Project:
- Type
ESP-IDF: Build Projectand select it. This will start the build process using theidf.py buildcommand.
- Type
4.2: Flash to the Device
-
Connect ESP Device:
- Connect your ESP32 or ESP8266 device to your computer via USB.
-
Flash the Project:
- In the Command Palette, type
ESP-IDF: Flash Projectand select it. This will flash your code to the connected device.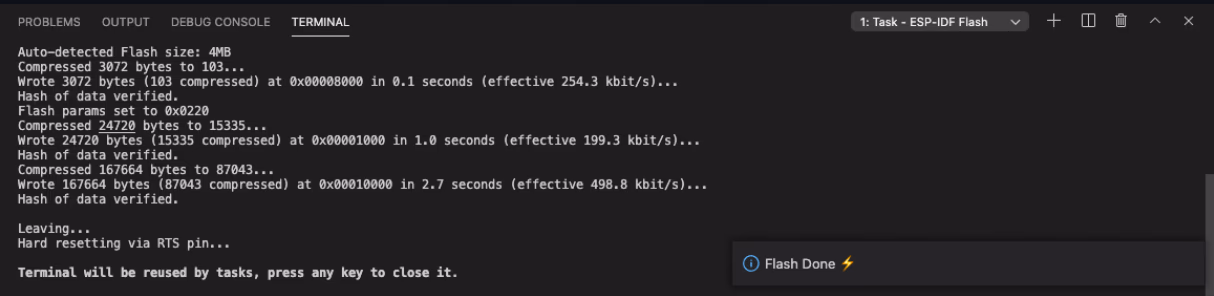
- In the Command Palette, type
-
Select COM/Serial Port:
- Ensure the correct COM port (Windows) or serial port (Linux/macOS) is selected in the
menuconfig.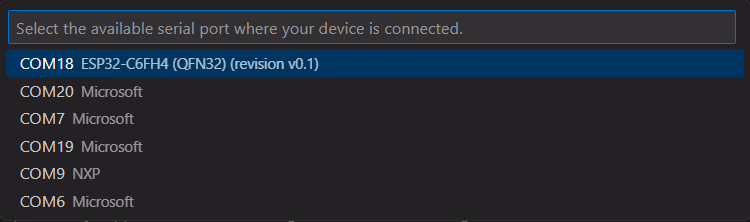
- Ensure the correct COM port (Windows) or serial port (Linux/macOS) is selected in the
Be cautious when flashing devices connected to mains power. Always isolate your ESP device from power sources before flashing.
4.3: Monitor the Output
- Open Serial Monitor:
- In the Command Palette, type
ESP-IDF: Monitorand select it to view serial output from your device.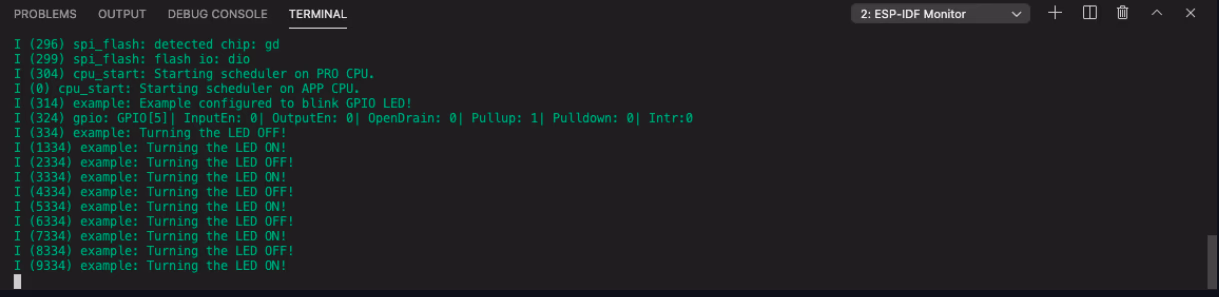
- In the Command Palette, type
Step 5: Additional Tips
- Update ESP-IDF: Periodically run
idf.py updateto keep ESP-IDF up to date. - Verify ESP-IDF Version: Use
idf.py --versionto check the current ESP-IDF version. - Multiple ESP-IDF Versions: You can use specific ESP-IDF versions by setting the path or using version tags (e.g.,
v4.4,v5.0).
Troubleshooting
- Python Errors: If you see Python-related issues, make sure you are using a supported version of Python (3.7 or later).
- Toolchain Issues: Ensure that the toolchain has been properly installed and added to the system PATH.
- Permission Issues: On Linux or macOS, make sure you have the proper permissions for files and directories. You may need to run some commands with
sudoon these systems.
Avoid using sudo on commands unless required. Misuse of elevated privileges can compromise your system.