ESP32 Voice Chatbot
Think of this as your own mini Alexa/Google Assistant, but built by you. You press a button, speak something, and the AI replies back through the speaker.How it Works? (The Simple Version)
Even though it’s small, your ESP32 is performing a complex workflow:- ESP32 records your voice when you press the button.
- That audio is sent to Deepgram → converts speech to text.
- The text is sent to n8n → acts like a middleman.
- n8n sends it to Groq AI → generates a reply.
- The reply is sent back to Deepgram → converted into audio.
- ESP32 receives the audio and plays it through the speaker.
What You Need
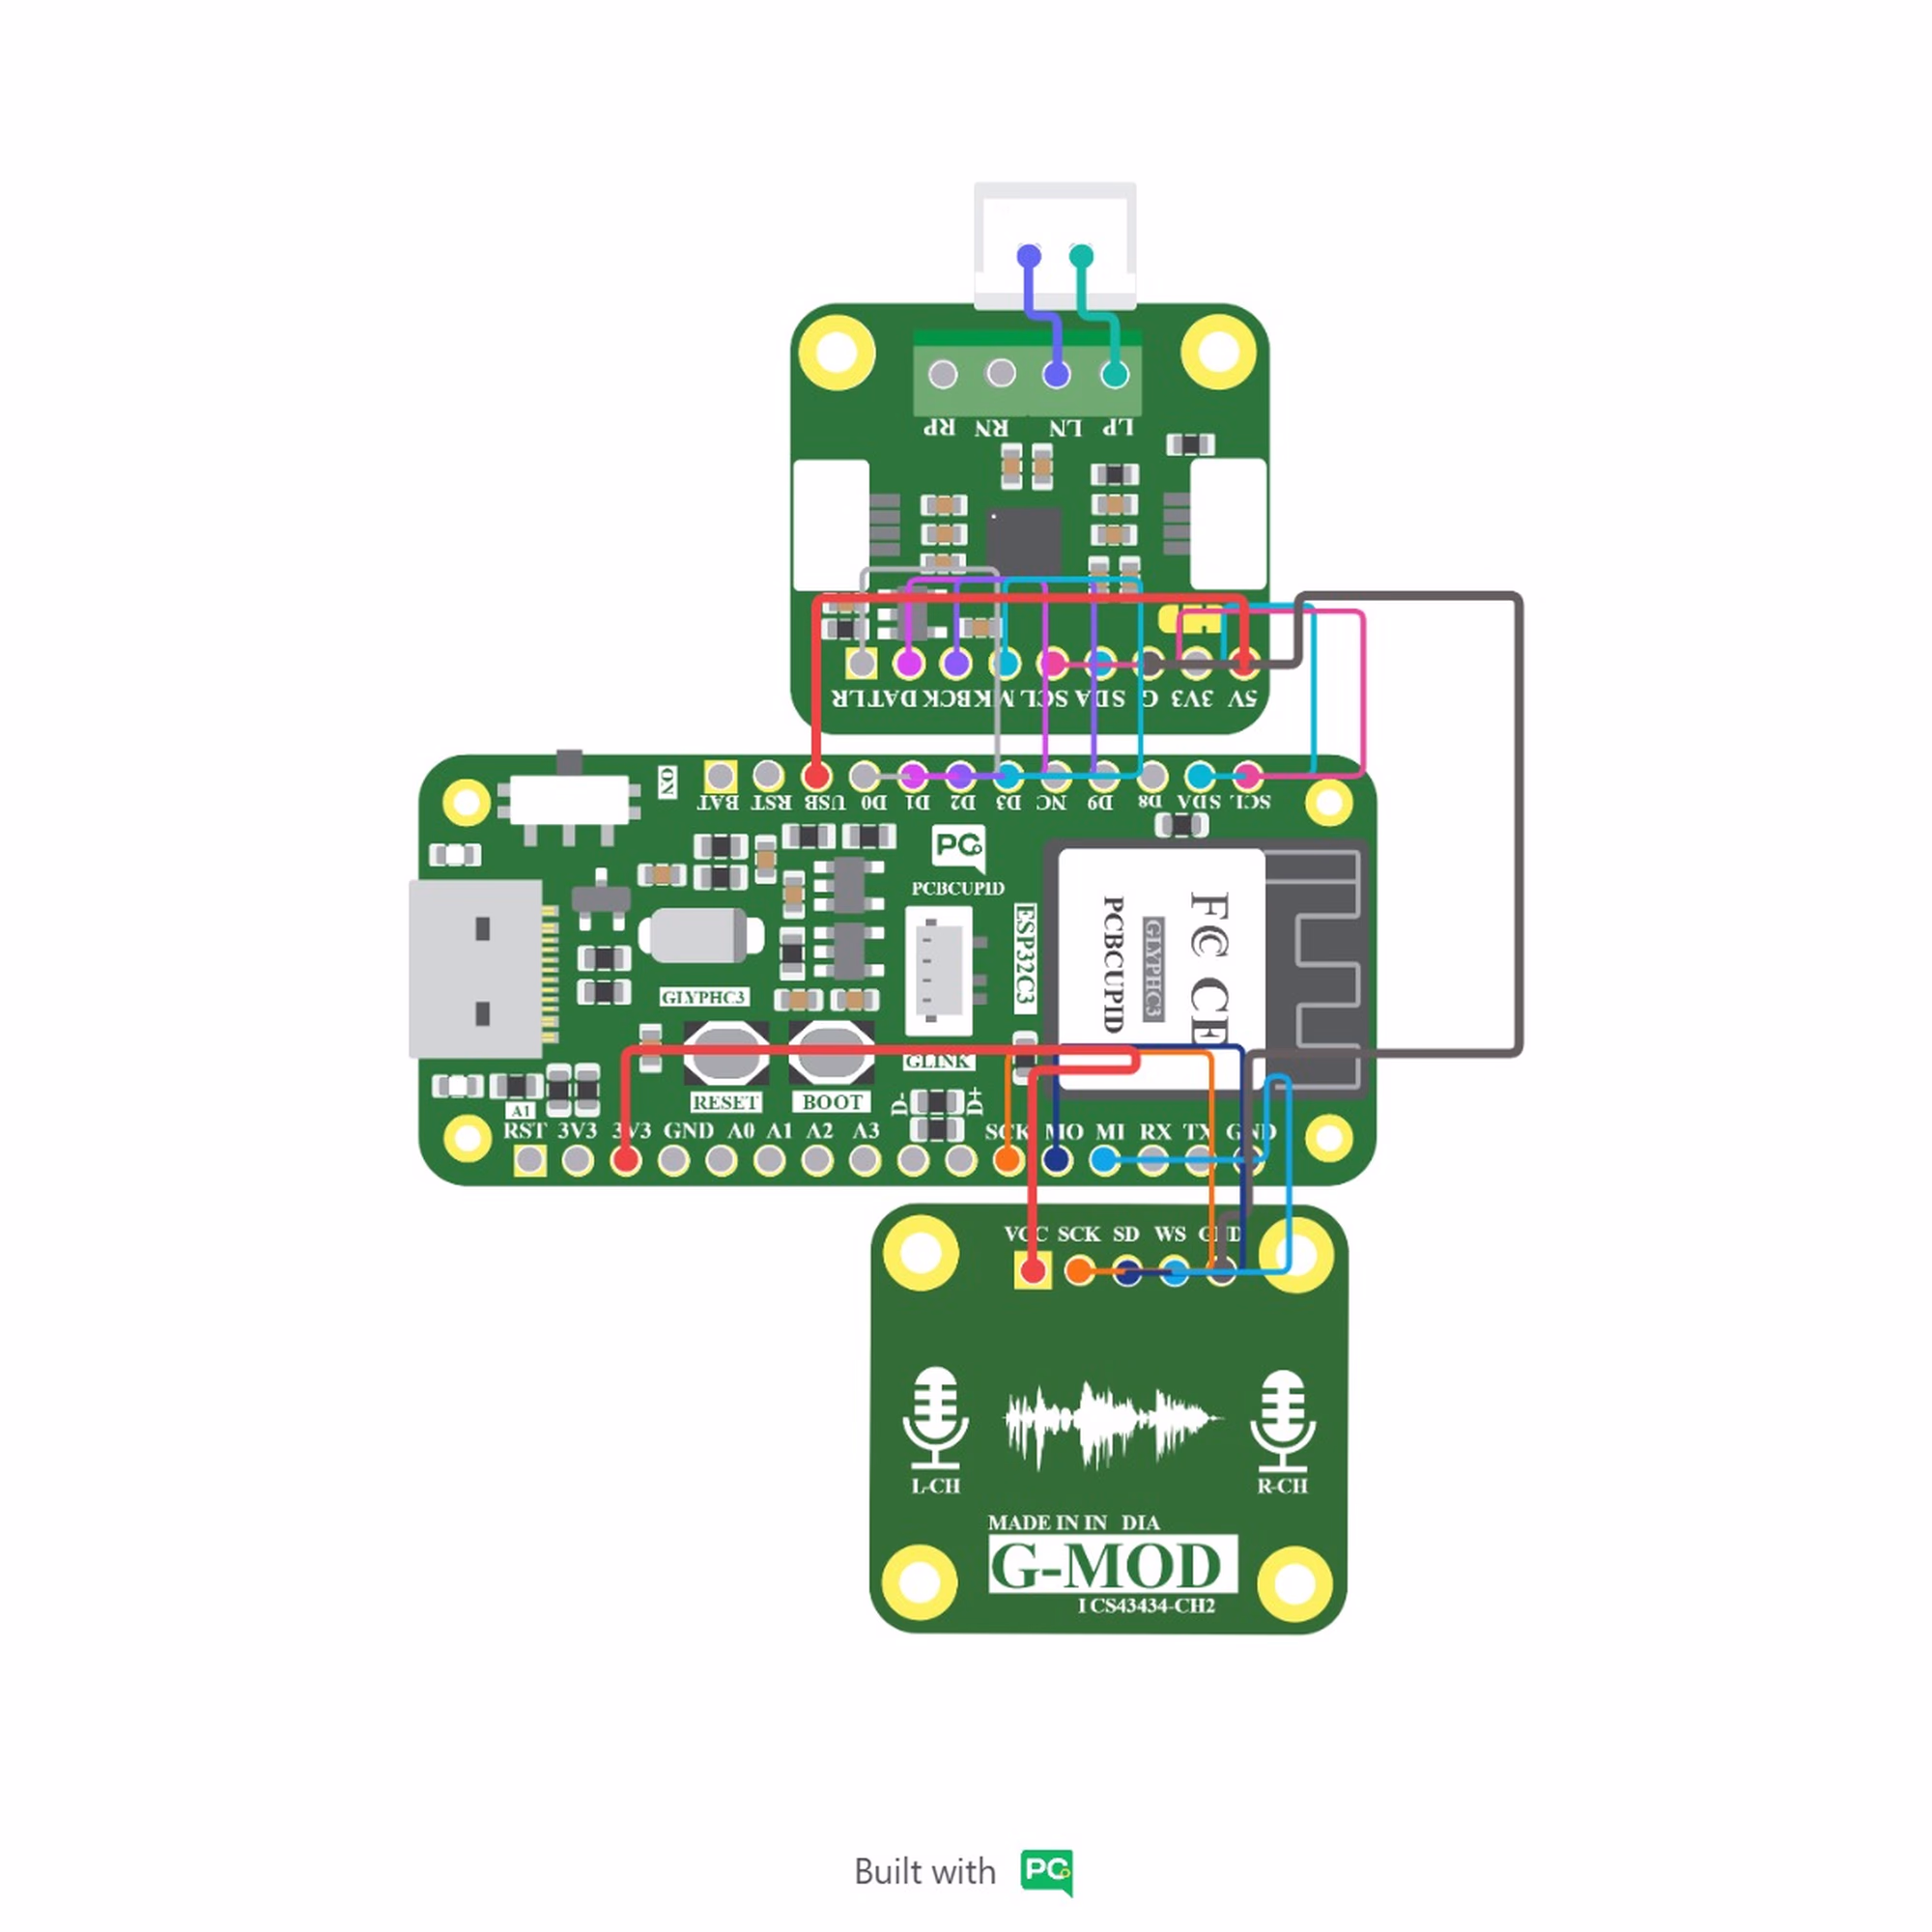
Before starting, make sure you have everything ready.Hardware Required
- ESP32-C3 board (your main device).
- I2S microphone (to capture your voice).
- Small speaker (to hear responses).
- USB cable (for power + uploading code).
Software
- VS Code with PlatformIO extension.
- Node.js (v18 or v20).
- n8n: Workflow automation.
- Deepgram Accounts: For voice (speech ↔ text).
- Groq Accounts: For AI responses.
Software Setup
Step 1: Install Everything
Take this step slow — this is your foundation.- Install VS Code: This is where everything will happen.
- Install PlatformIO: Open VS Code → go to Extensions → Search PlatformIO and install it.
- Install Node.js (v18 or v20): Required to run n8n.
- Install n8n: Open your terminal and run:
Step 2: Get API Keys
Now you’re connecting your project to real services.- Go to Deepgram → create account → copy API key.
- Go to Groq → create account → copy API key.
Think of API keys like passwords that allow your device to use these services.
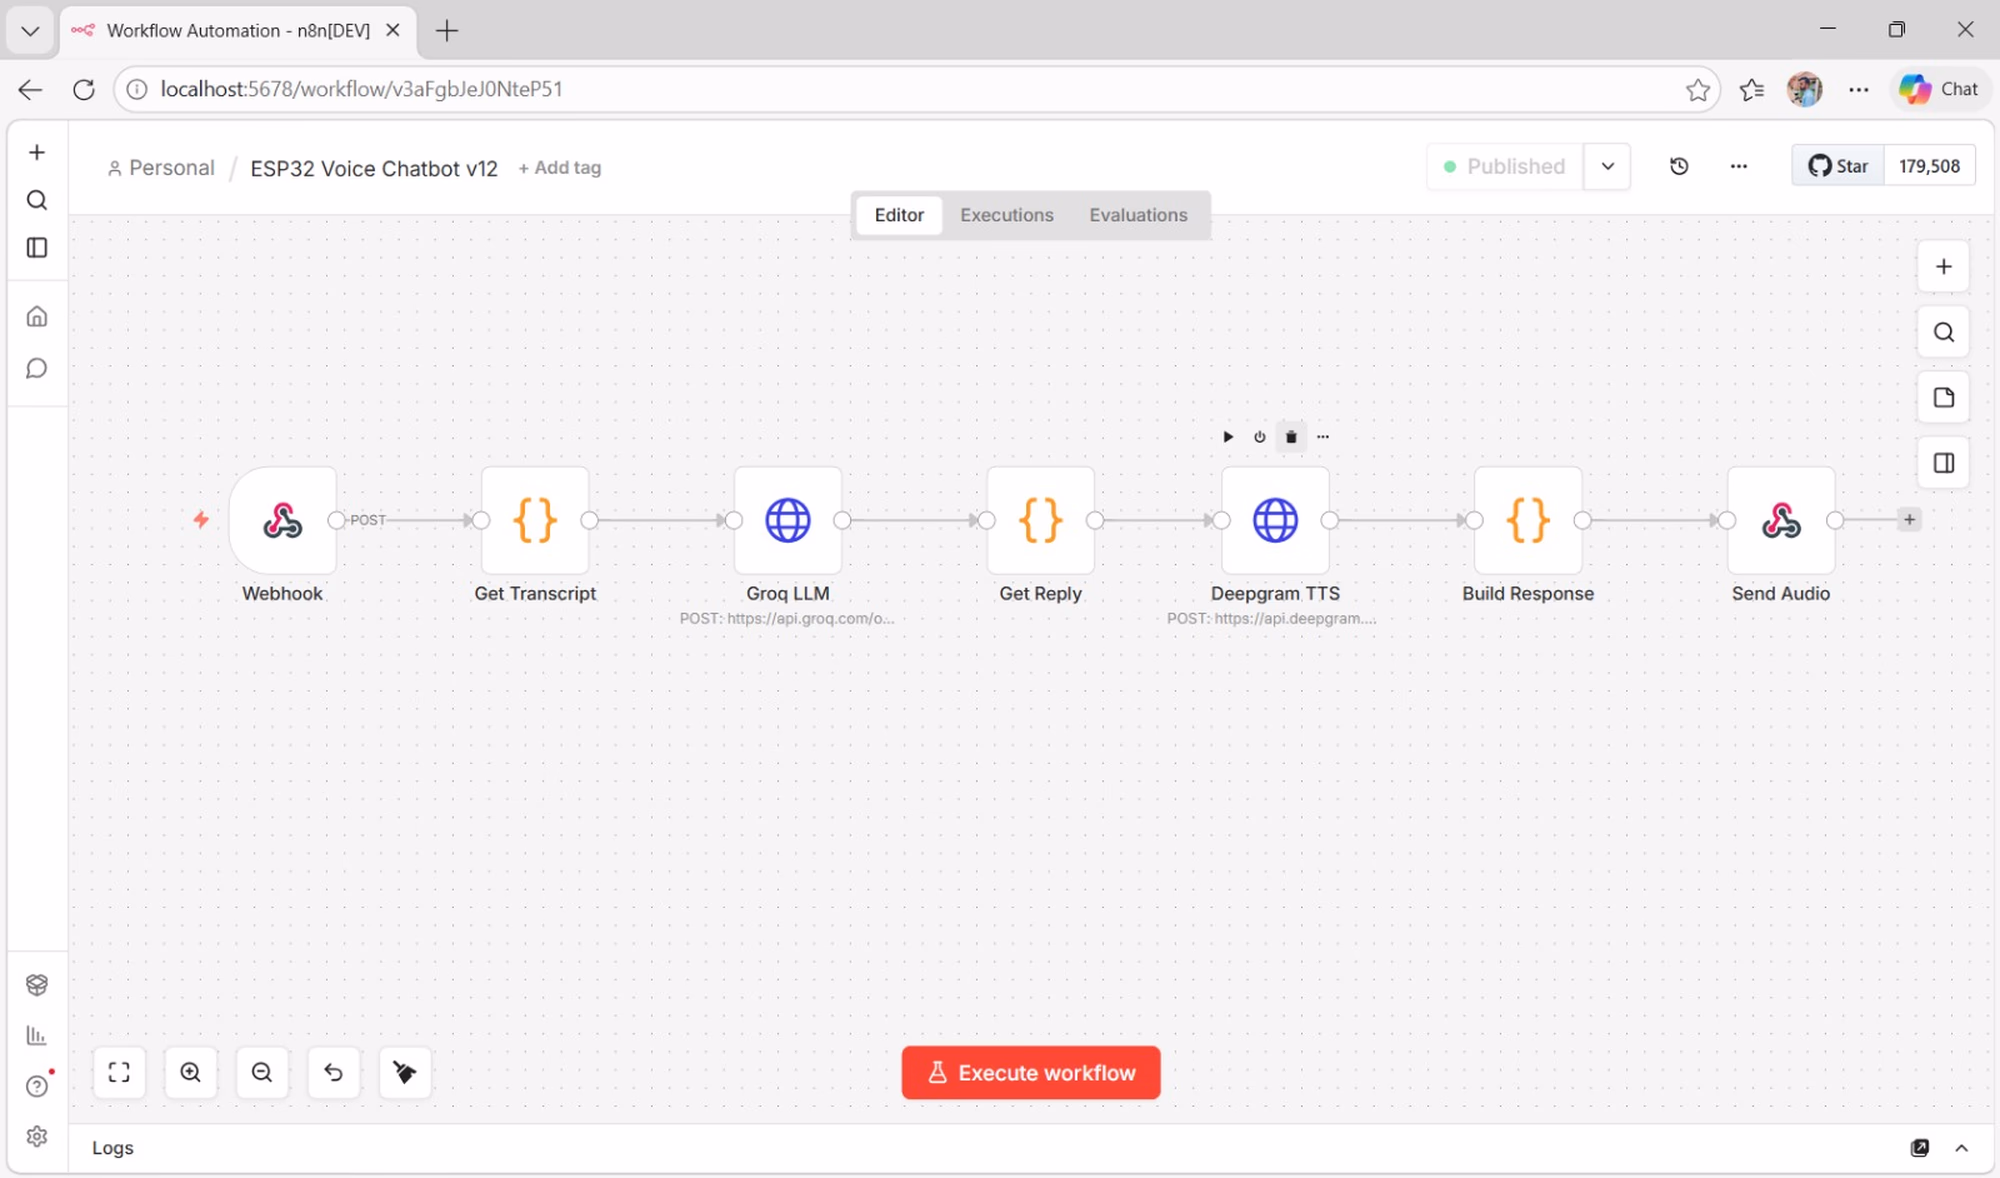
Step 3: Setup n8n (The Brain)
n8n is what connects everything together.-
Start n8n: Run this in your terminal:
Open in browser:
http://localhost:5678 -
Import Workflow:
- Go to Workflows → Click Import.
- Copy the JSON code below and paste it into the import box.
- Click Save and turn it Active (ON).
-
Add Your API Keys:
- Open Groq node → Replace the existing key with yours.
- Open Deepgram node → Replace with your key.
-
Test It (curl command):
Run this command in your terminal:
- If you get audio → everything is working!
Step 4: Setup ESP32 Code
Now we move to the device itself.-
Create Project Structure:
Your folder should look like this:
-
Configure platformio.ini:
-
Add Required Library:
Download the NAU8325 library and place it inside
lib/. Without this, your speaker won’t work. -
Full Arduino Source Code:
Copy the code below into your
main.cppfile.
- Update Your Settings:
Inside
main.cpp, update:
Step 5: Upload Code to ESP32
Now bring your device to life.- Connect ESP32 using USB.
- Open project in VS Code.
- Click Upload (or run
pio run --target upload).
Step 6: First Boot & Monitor
Open the Serial Monitor (115200 baud). You should see:[READY] Hold BOOT to speak
👉 This means WiFi is connected and the AI is ready to listen!
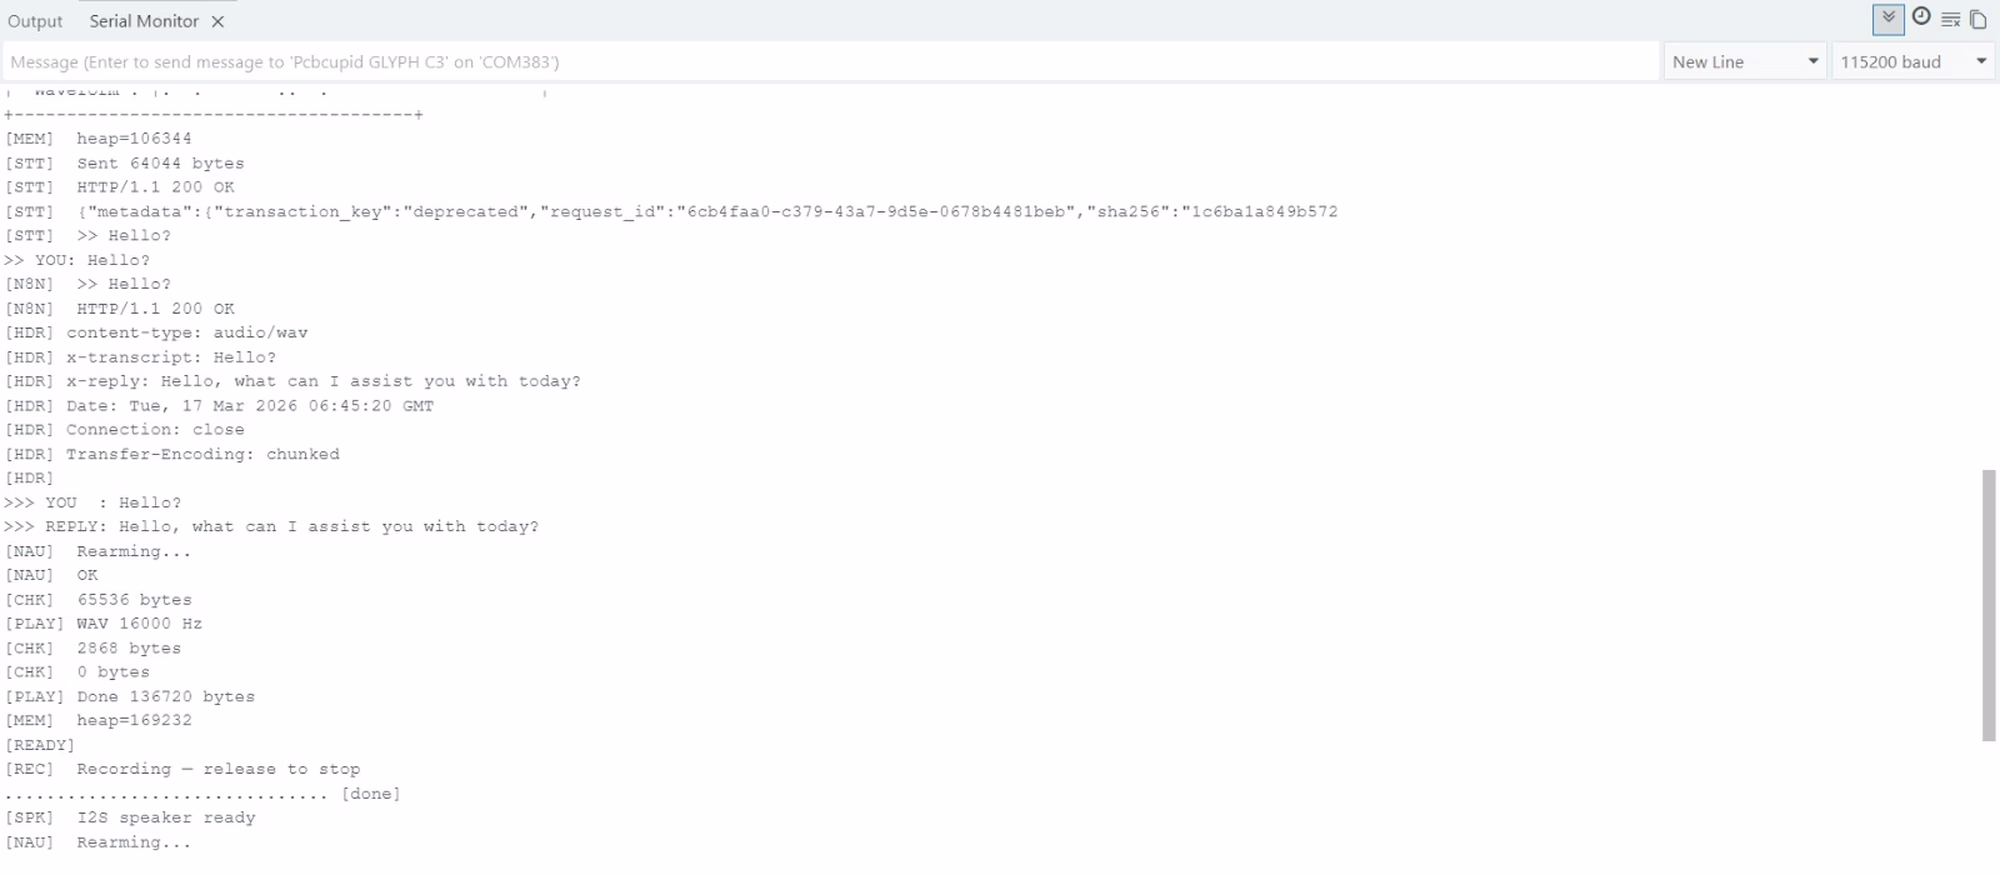
Step 7: How to Use
Voice Mode (Main Feature)
- Hold the BOOT button.
- Speak clearly into the microphone.
- Release the button.
- Wait a second for the AI response.
Text Mode (Testing)
Type your message in the Serial Monitor and press Enter.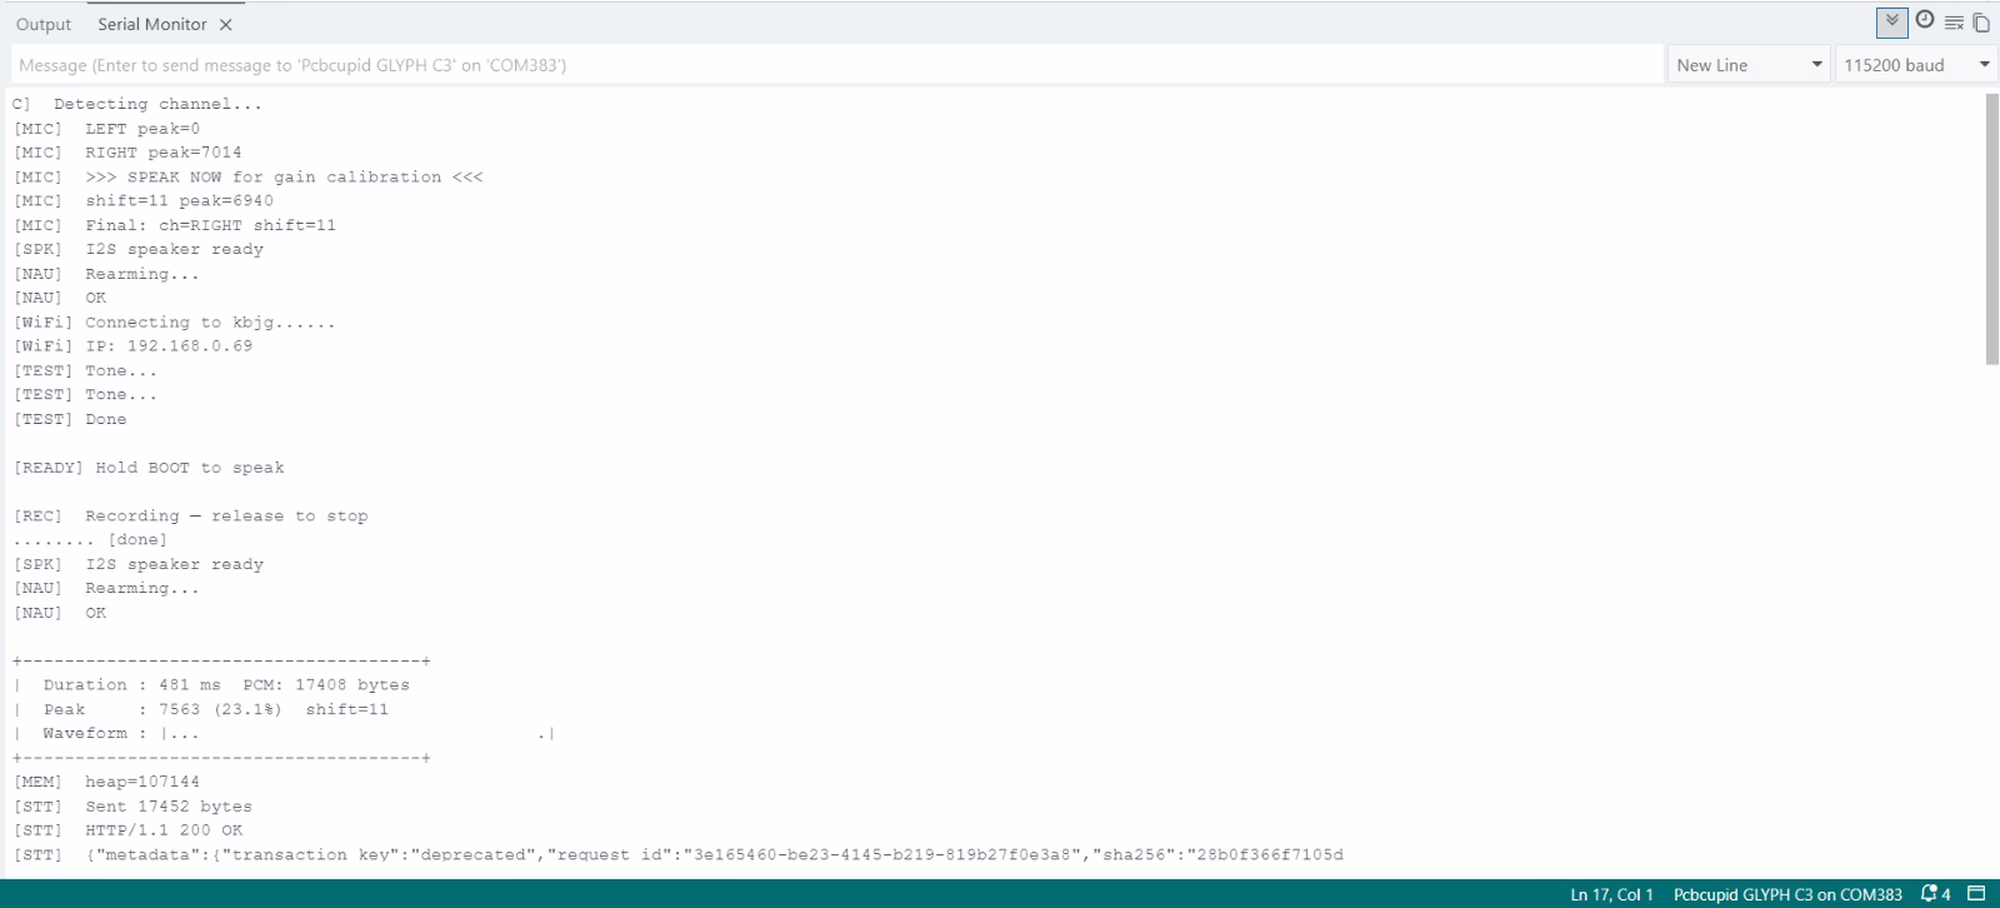
❗ Common Issues (Quick Fixes)
| Issue | Check |
|---|---|
| No Sound | Check speaker wiring & amplifier logs. |
| No Response | Ensure n8n is running & WiFi is connected. |
| Not Understanding | Speak louder, hold button longer, check Deepgram API key. |
| Server Not Opening | Check http://YOUR_IP:5678 - fix server first. |
Customization (Make It Yours)
Change AI Personality
Inside n8n, update the prompt:"You are a smart assistant. Reply in one short sentence."