Using MQ2 Gas Sensor with GLYPH-C6 Board
The MQ2 gas sensor is widely used for detecting LPG, methane, hydrogen, carbon monoxide, alcohol, smoke, and propane. It provides an analog voltage output that varies depending on the concentration of detected gases.
The MQ2 sensor consists of a heating element and a gas-sensitive material (usually SnO₂ – Tin Dioxide).
- Wide Gas Detection Range – Detects multiple gases, including LPG, CO, CH4, and H2.
- High Sensitivity & Fast Response – Quickly reacts to gas concentration changes.
- Analog & Digital Output – Provides proportional voltage output and a digital HIGH/LOW threshold output.
- Low Power Consumption – Ideal for battery-powered devices.
Working Principle:
- The heating element maintains a high temperature (~200-300°C) to activate the sensor.
- When target gases are present, the surface of SnO₂ reacts with the gas molecules.
- This changes the resistance (Rs) of the sensor based on gas concentration.
- The sensor outputs a voltage signal, which can be read using an ESP32-C6 ADC pin.
Step 1: Hardware Required
-
GLYPH Board
-
MQ2 Gas Sensor Module
-
Jumper Wires
-
Breadboard
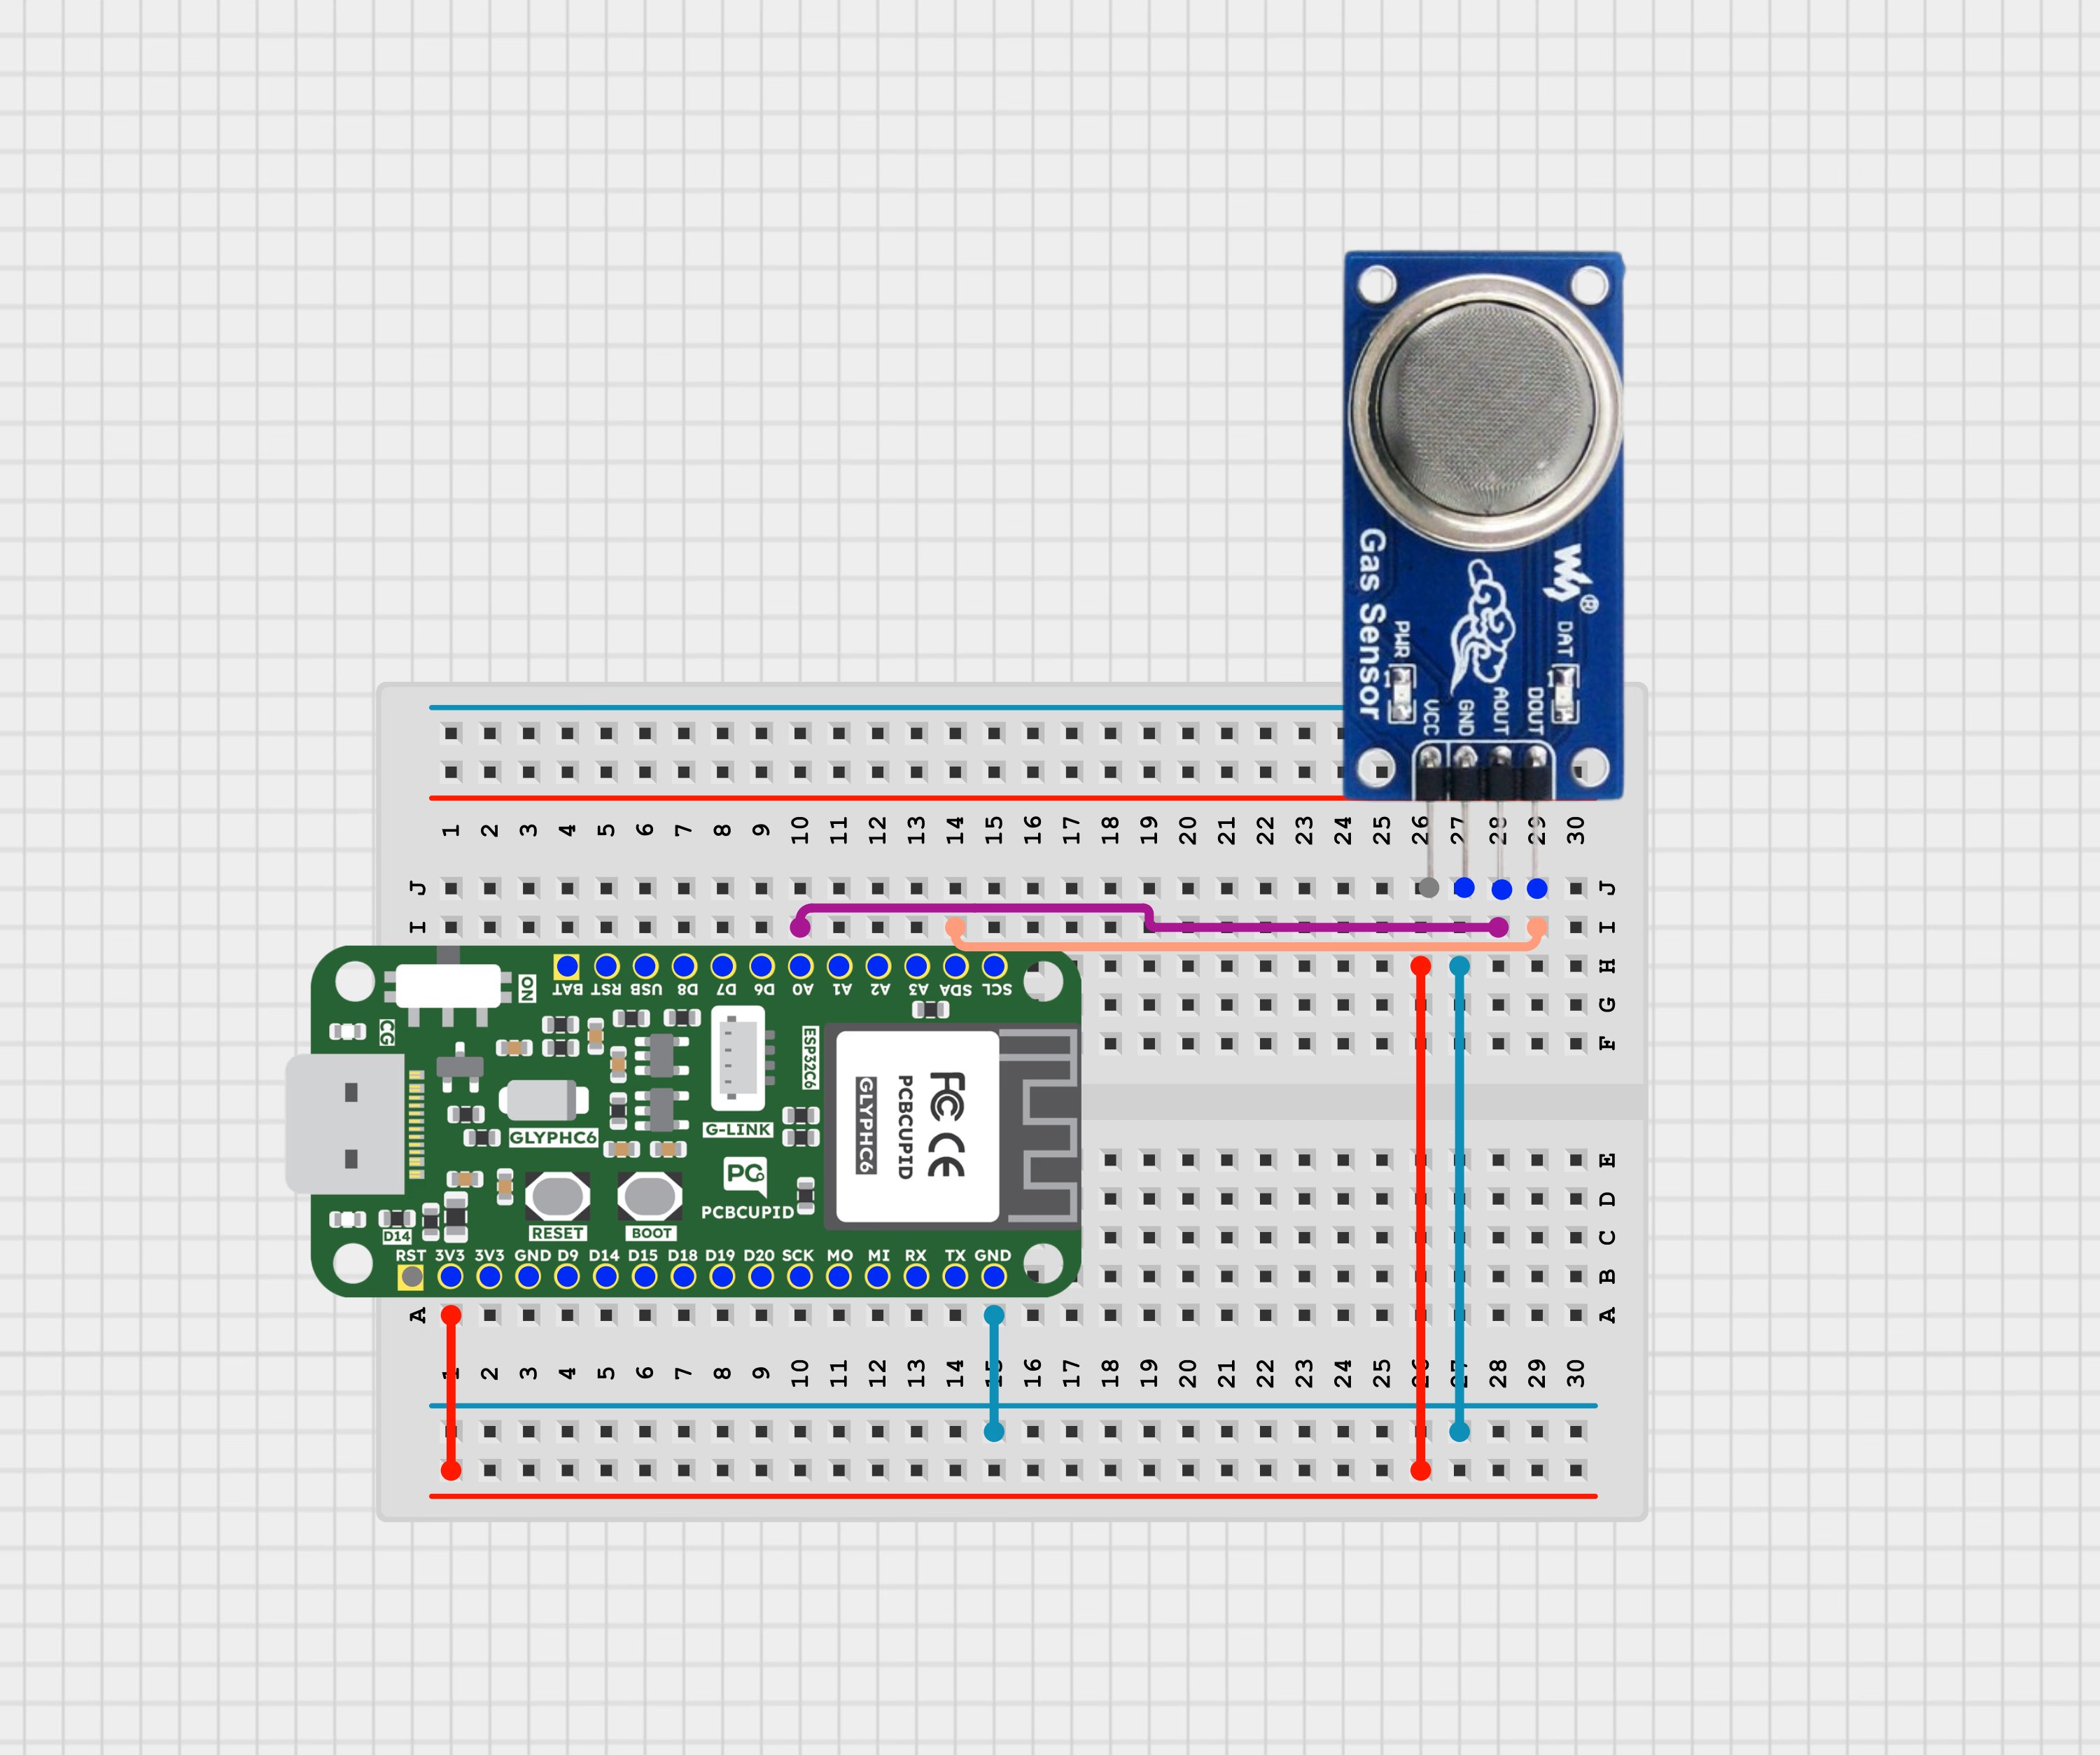
Step 2: Circuit Diagram
Connect the MQ2 sensor to the GLYPH-C6 as follows:
- VCC → 5V (Recommended for the internal heater)
- A0 → GPIO 4 (Analog Output)
- D0 → GPIO 5 (Digital Threshold Output)
- GND → Ground
Step 3: Code Setup
Step 4: Upload the Code
- Connect the Board
- Plug the GLYPH board into your computer using a USB cable.
- Select the Board and Port
Tools > Board > esp32 > Pcbcupid GLYPH C6
Tools > Port and select the connected port.
Tools > USB CDC on Boot > Enabled
For the Pcbcupid GLYPH C6 to appear under Tools > Board > esp32, the esp32 board version installed in the Arduino IDE should be greater than or equal to 3.1.0.
Tools > Port and select the port connected to your GLYPH.Tools > USB CDC on Boot > Enabled
If USB CDC on BOOT is not enabled, you won’t see any serial data in the Arduino IDE.
- Upload the Code
Click the upload button (➡️ icon) or press CTRL + U to upload the code.
Step 5: Observe the Output on the Serial Monitor
When you open Serial Monitor, you can see the Carbon Monoxide & Smoke Concentration displayed in parts per million(ppm) along with the ADC readings and corresponding voltage levels.
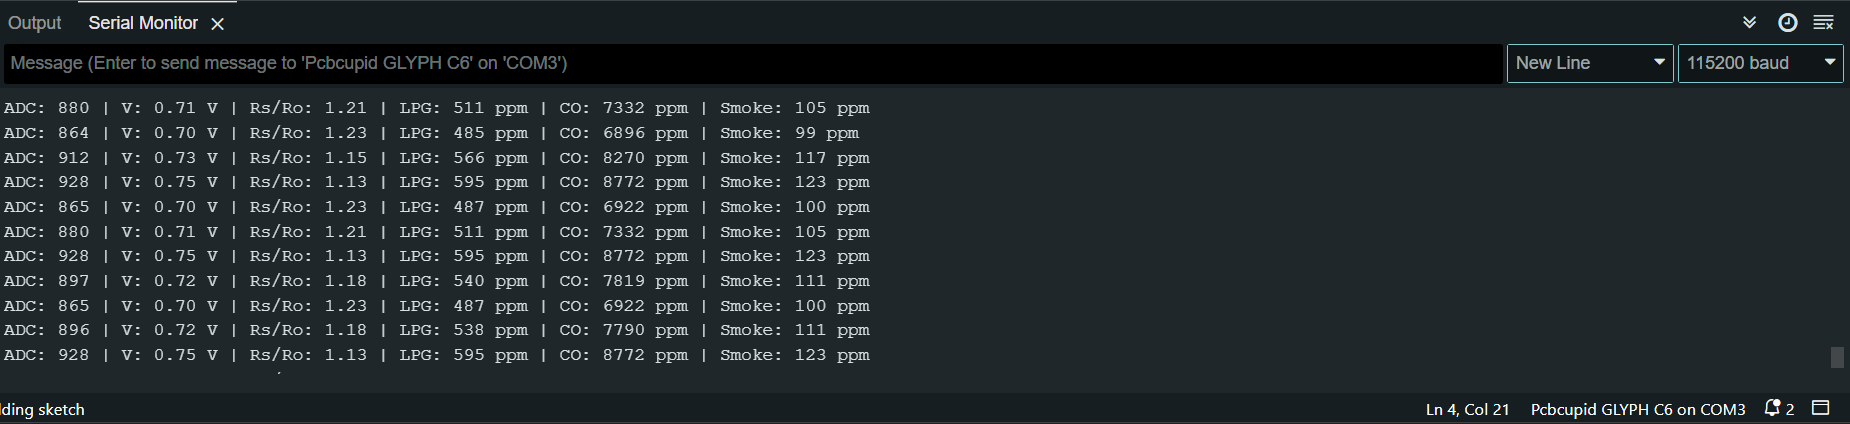 The sensor’s response changes based on the surrounding gas concentration.