Ordering On LionCircuits
In this Guide we learn how to place an order from LionCircuits Website for the manufacture and assembly of your PCB boards, based on your Gerber & BOM Files that we learnt from KiCad & EasyEDA tutorial.
LionCircuit KiCad TemplateYou can download the template Lioncircuit KiCad Template here
Download Now
1. Go to LionCircuits.com

2. Create an Account
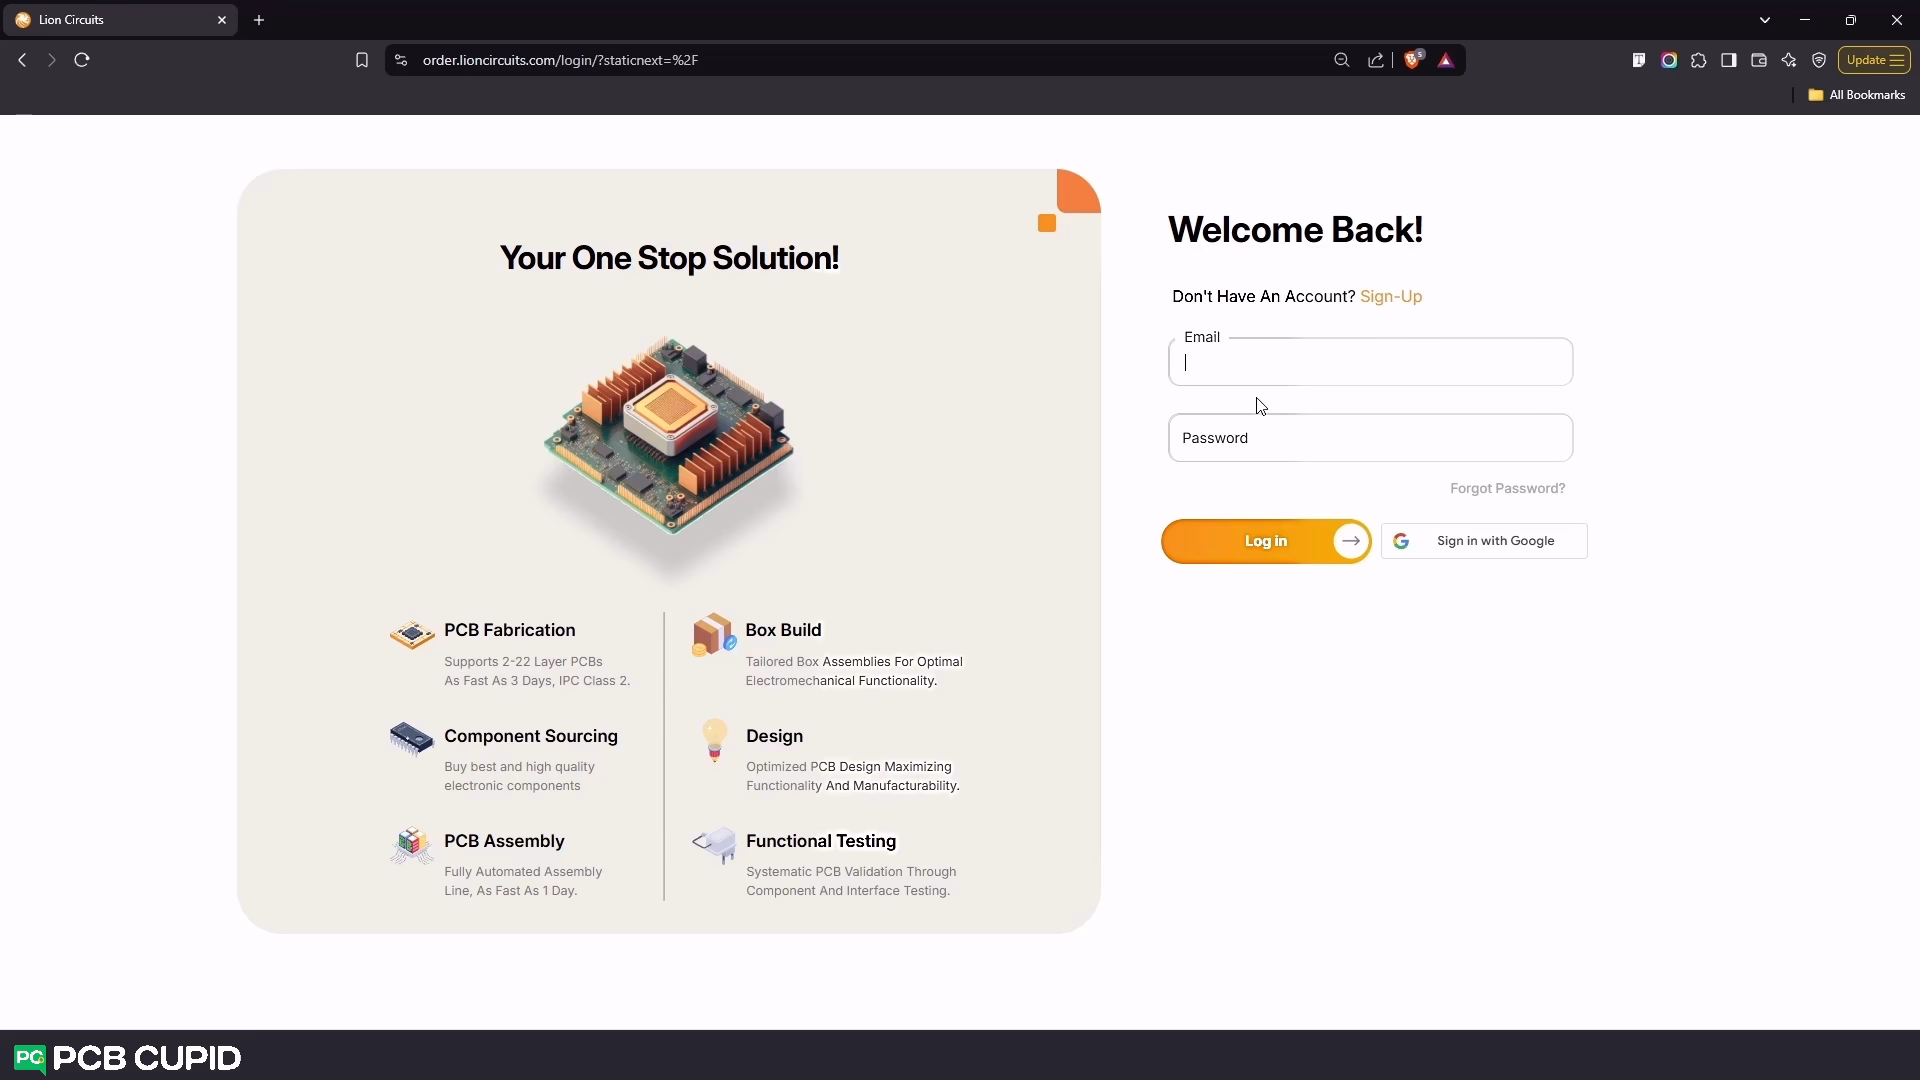 Click on Sign Up if you are a first-time user and enter your First Name, Last Name, Email and Password to sign up.If you have already signed-up, then click on Login and enter your Email id and Password to login. Or Alternatively you can directly sign in via your Google Account with the option Sign in With Google
3. Creating a Project

Once logged in, click on My Projects as shown in the image above
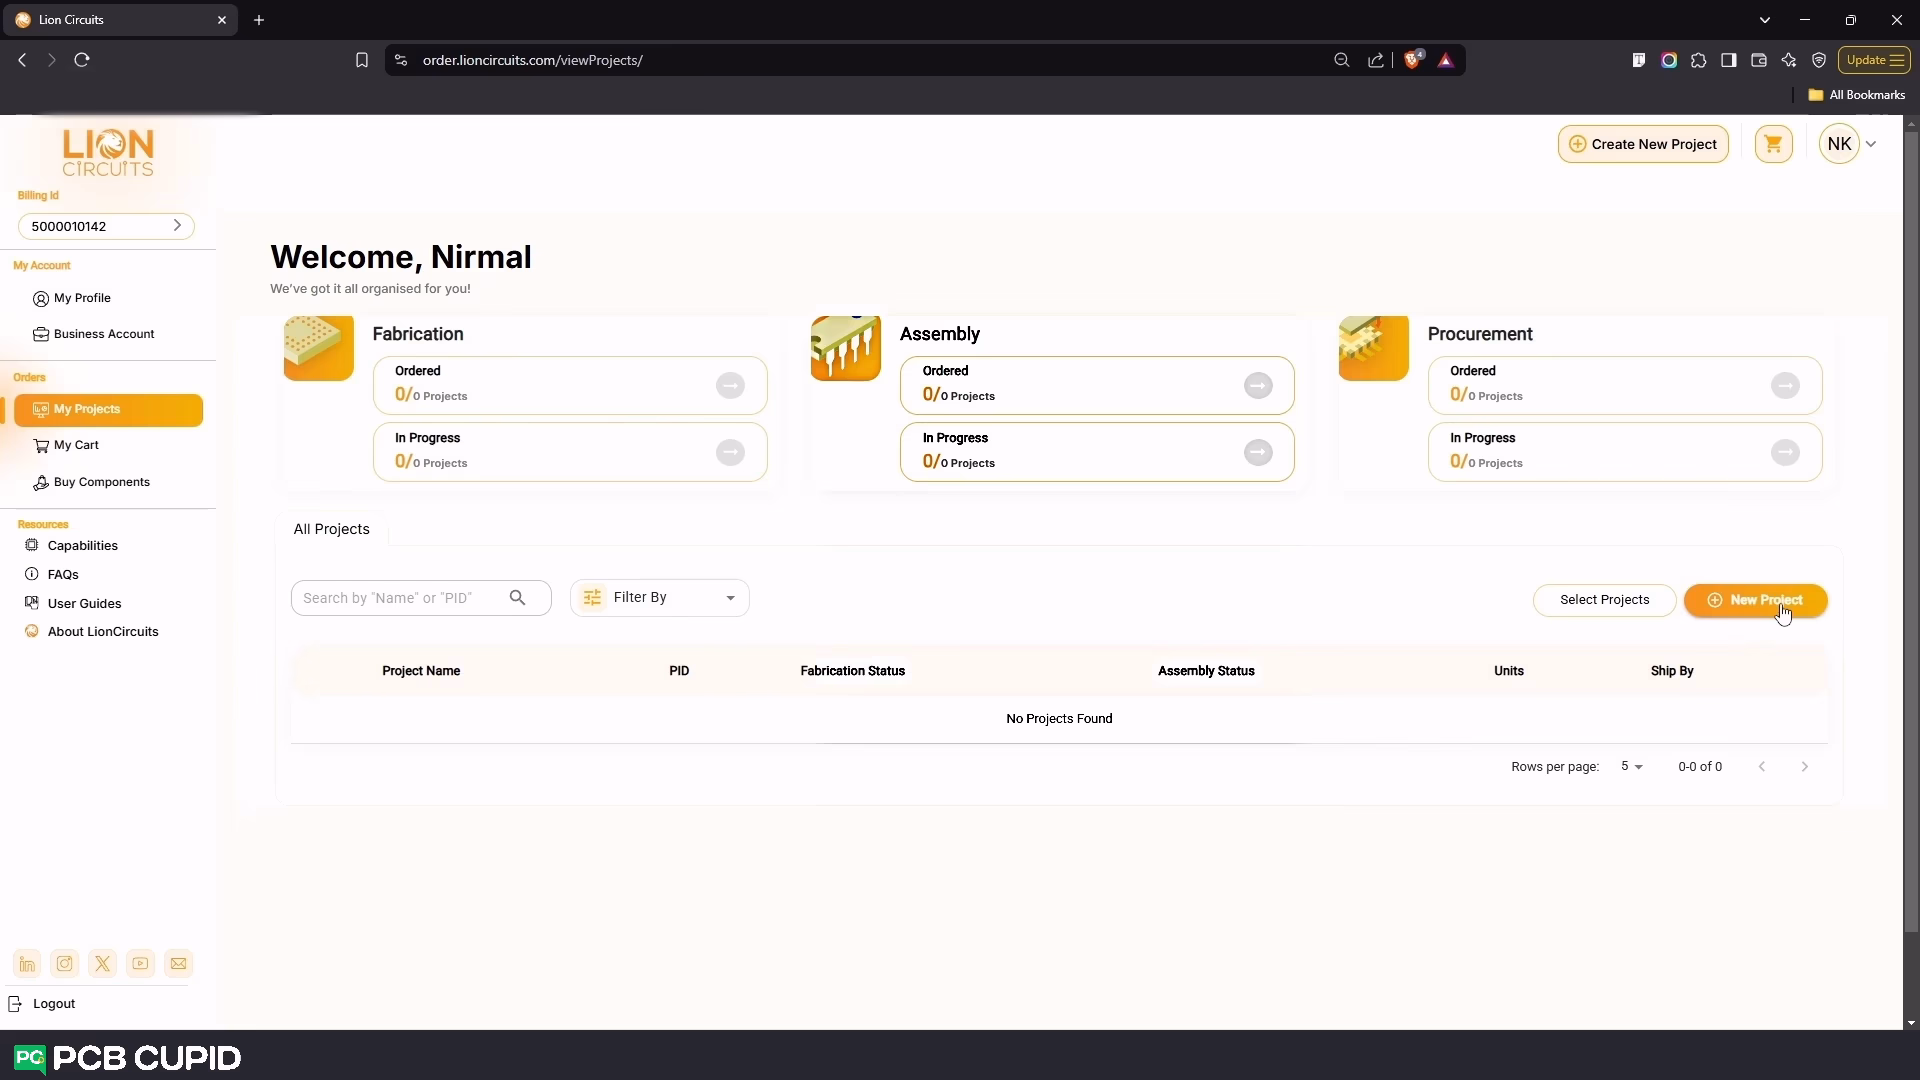 Next, Click on New Project
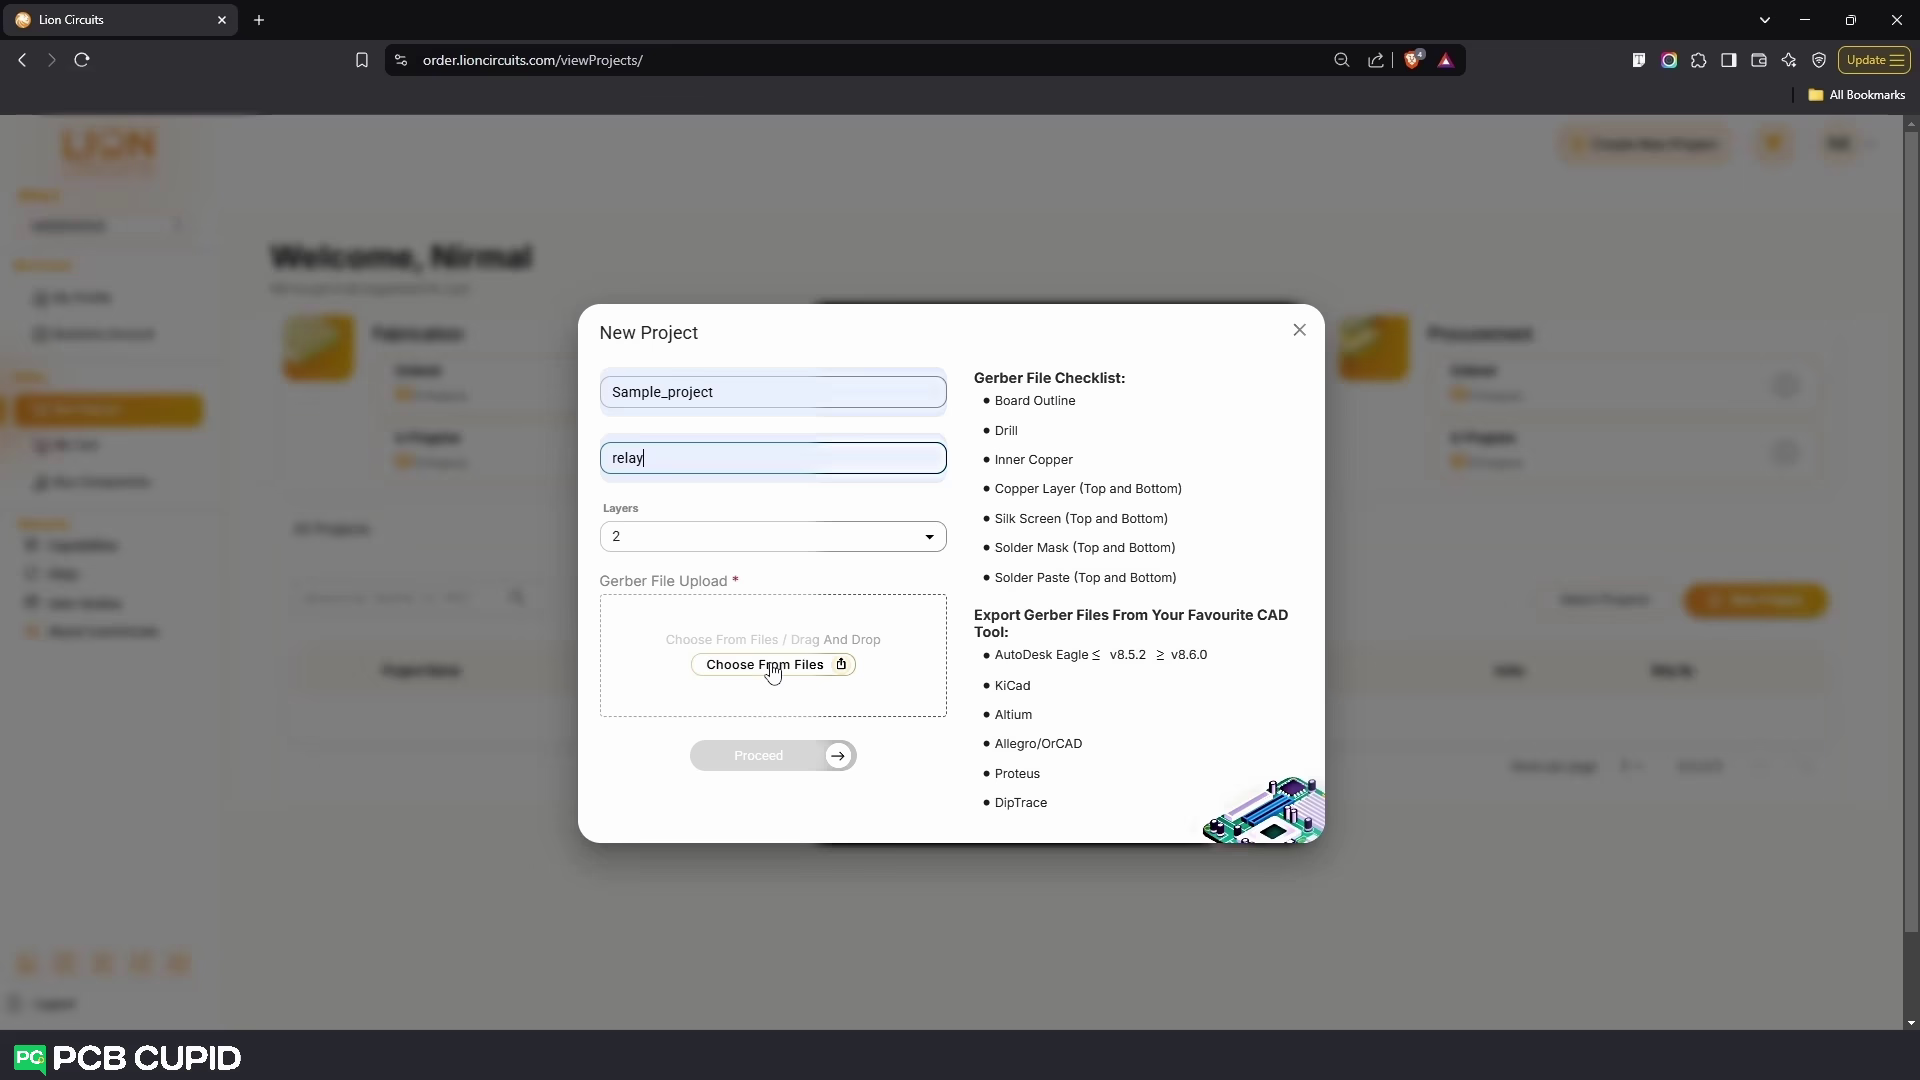
- In the Project Name field, enter the Name of your project
- In the Description field, give a description for your project(if any)
- In the Layers field, specify the number of layers your PCB has
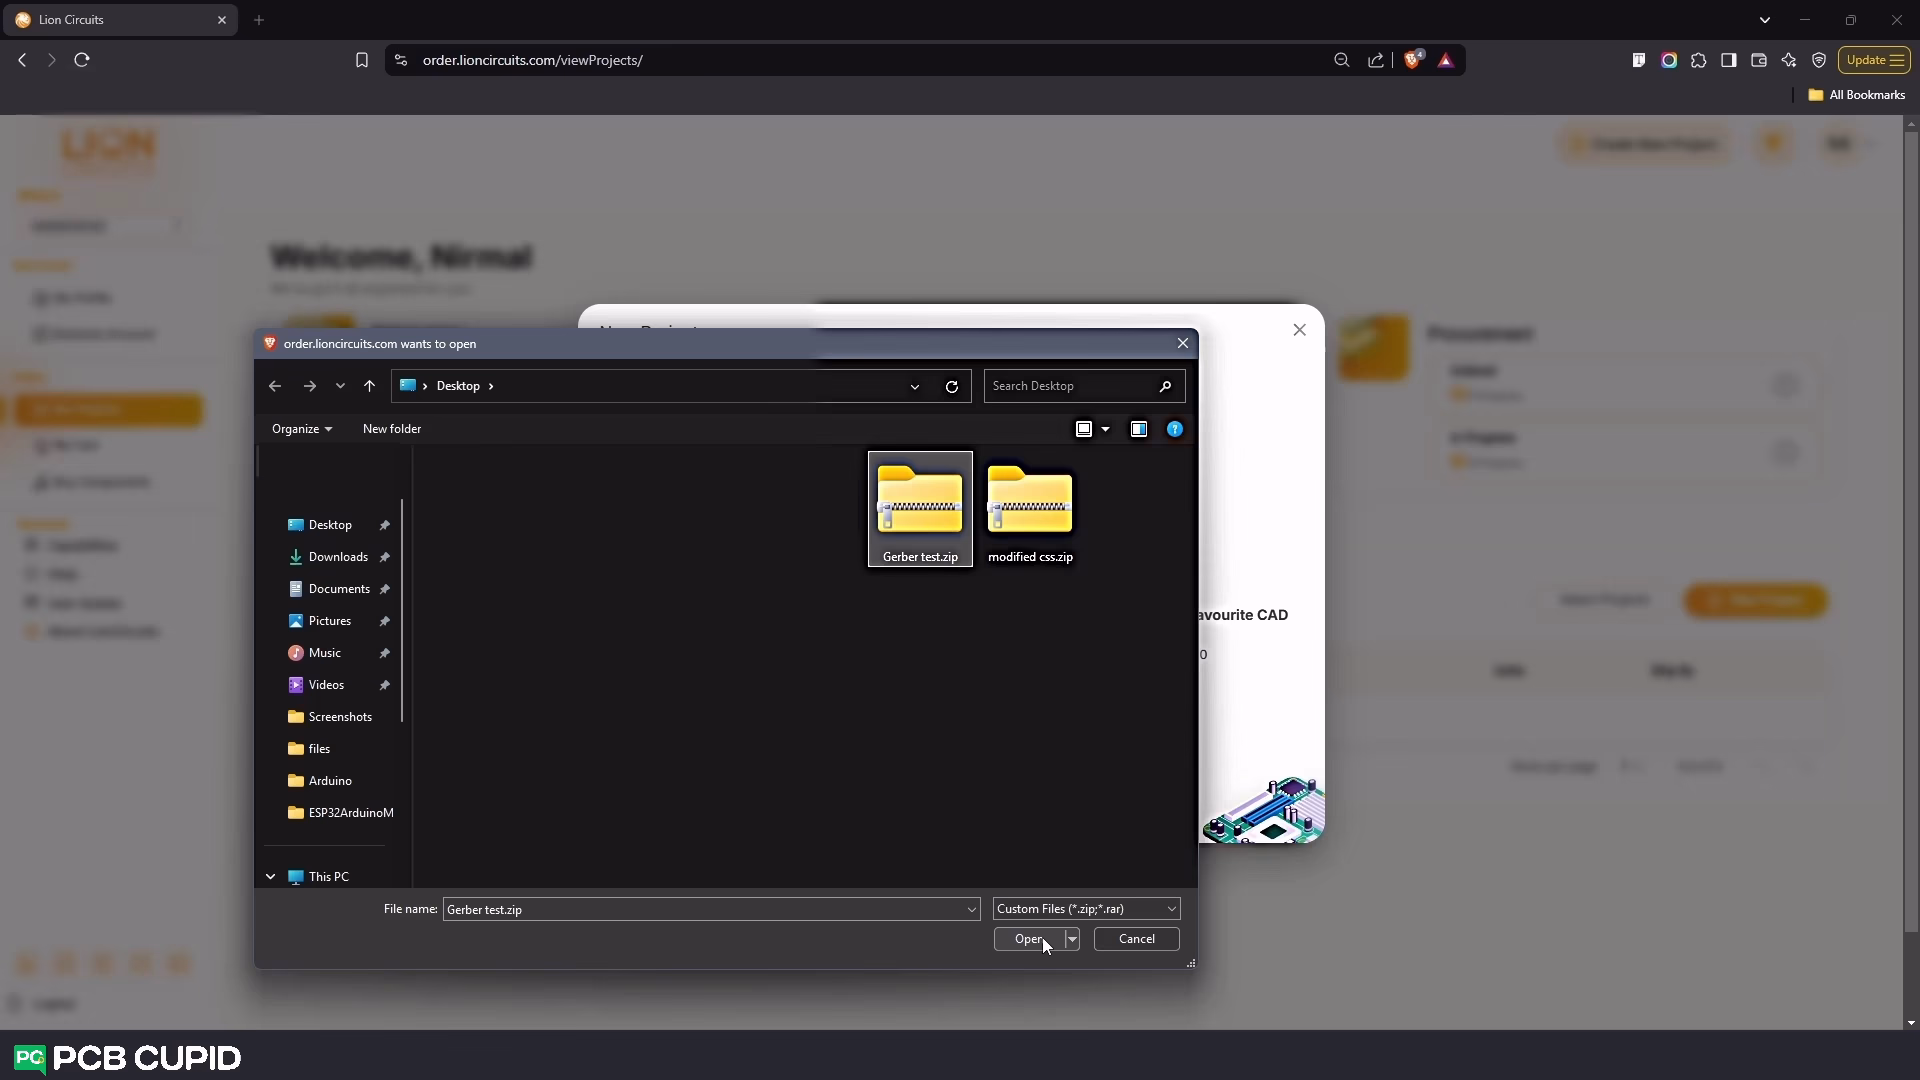
- In the Gerber File Upload field, click on Choose From Files/Drag And Drop
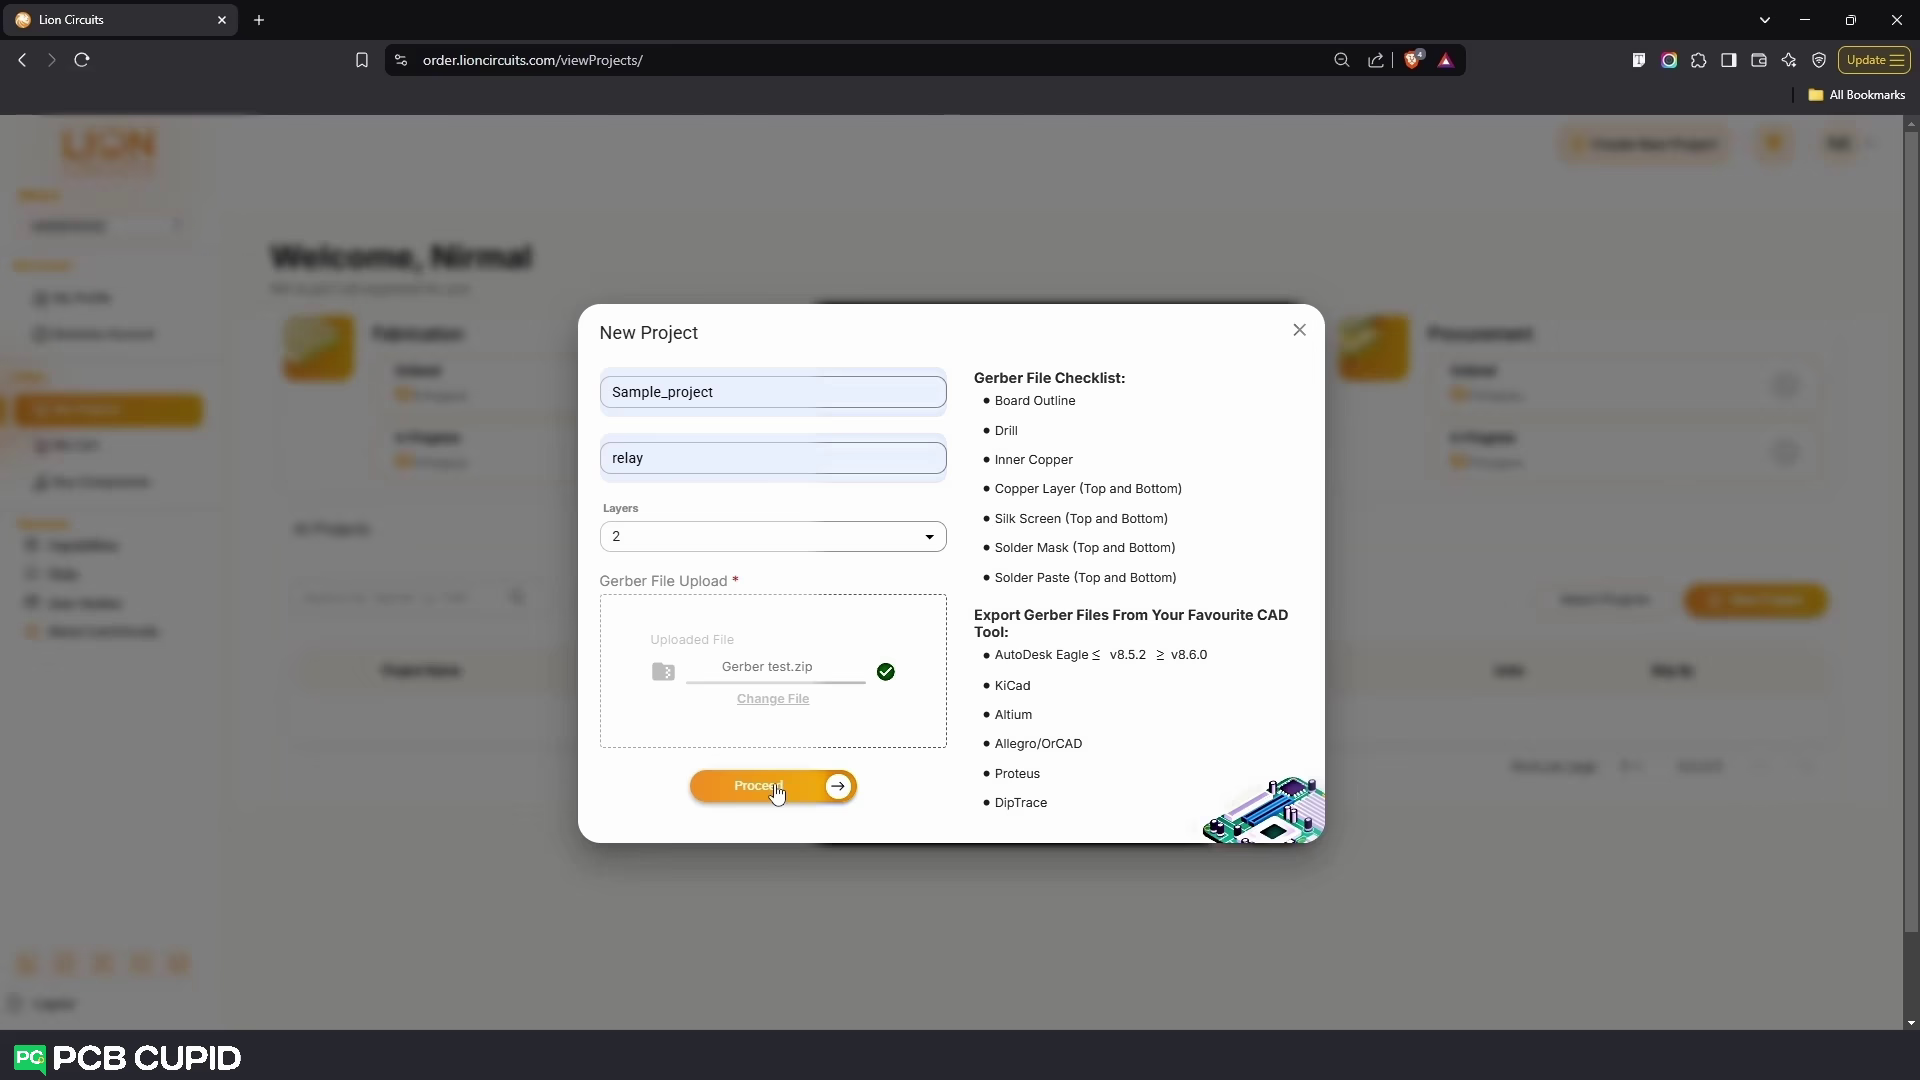
- Upload your Gerber zip file and Click on Proceed
4. Specifying What You Want
-
Next, you will see 4 Steps that you must go through before Placing your Order :
- Fabrication
- Assembly
- Procurement
- Summary
Step 1: Fabrication
In the Fabrication step , The Default settings should look like this: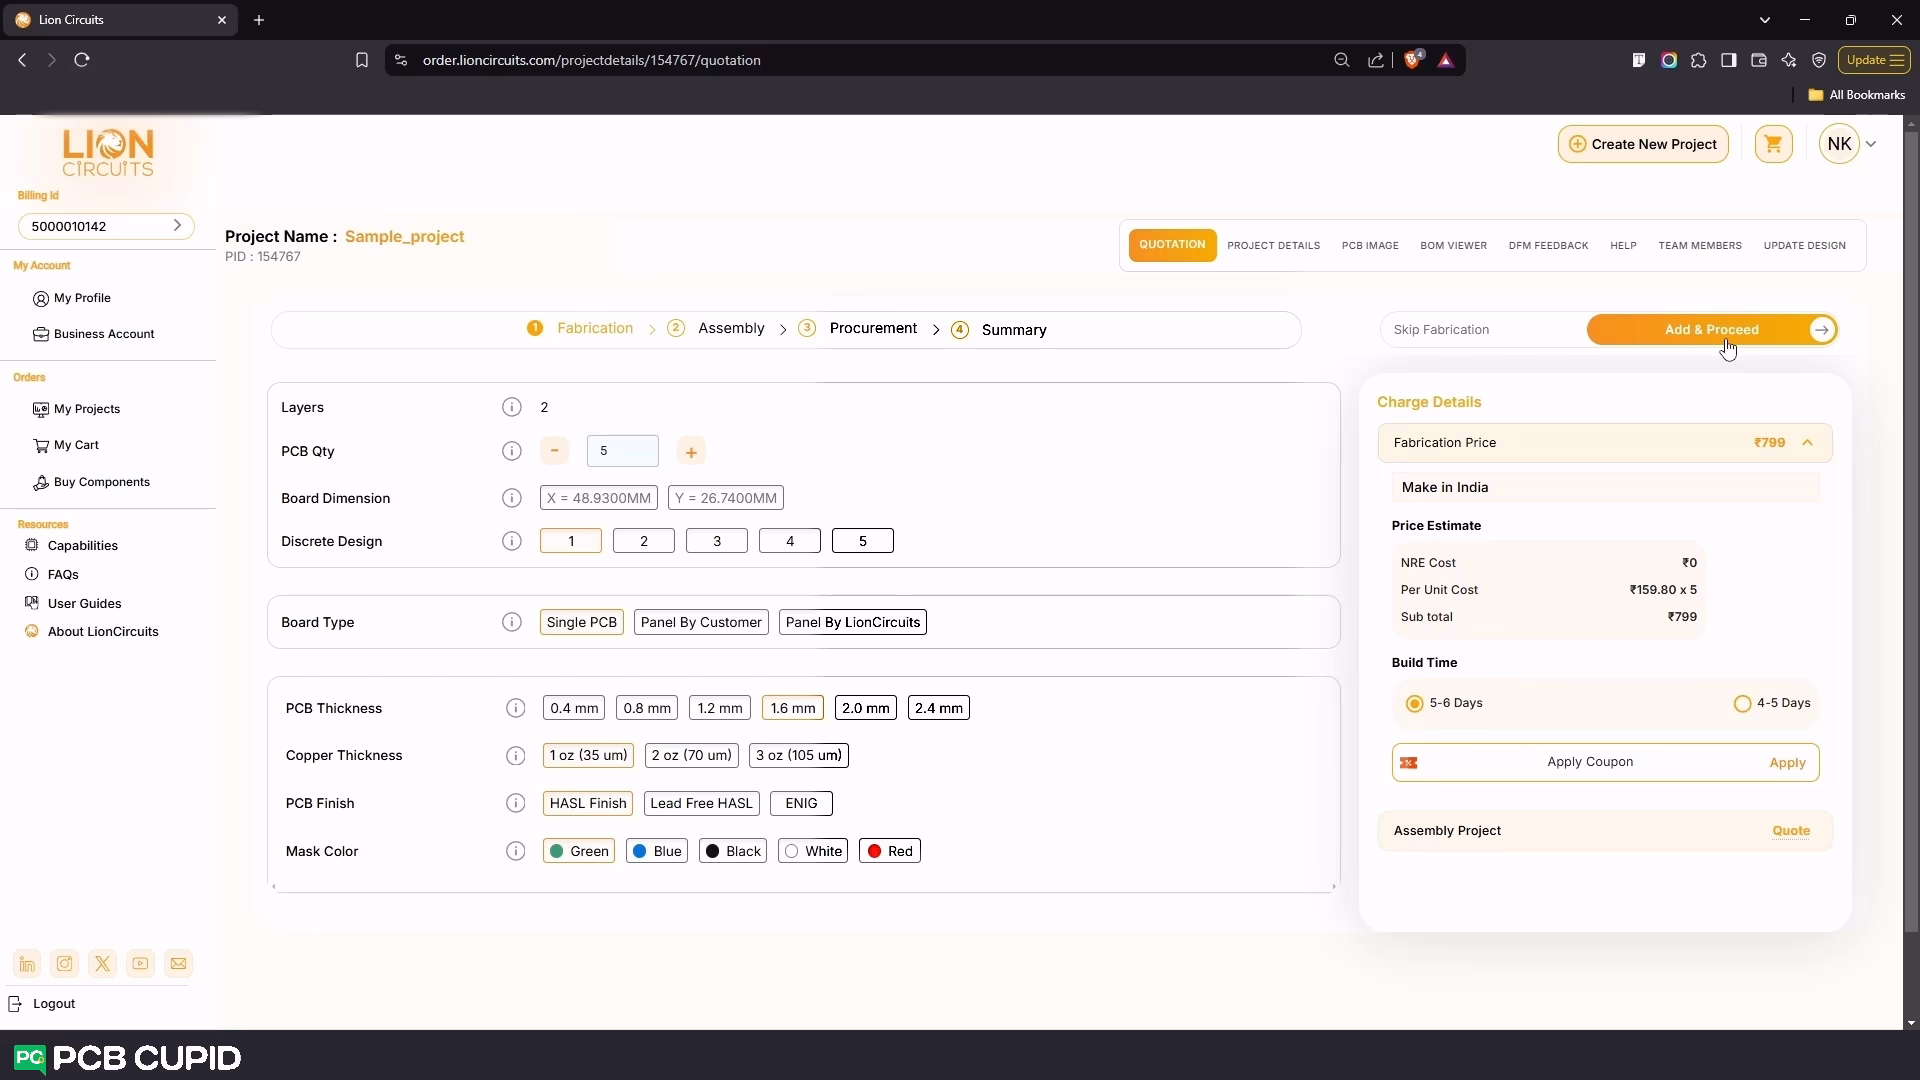
- Layers - set to 2
- PCB Qty - set to 5
- Board Dimension - Calculated from your Gerber
- Discrete Design - 1
- Board Type - Single PCB
- PCB Thickness - 1.6mm
- Copper Thickness - 1 oz(35 um)
- PCB Finish - HASL Finish
- Mask Color - Green
Step 2: Assembly
Next for the assembly make sure you prepare your BOM file as per the EXAMPLE BOM given by Lion Circuits.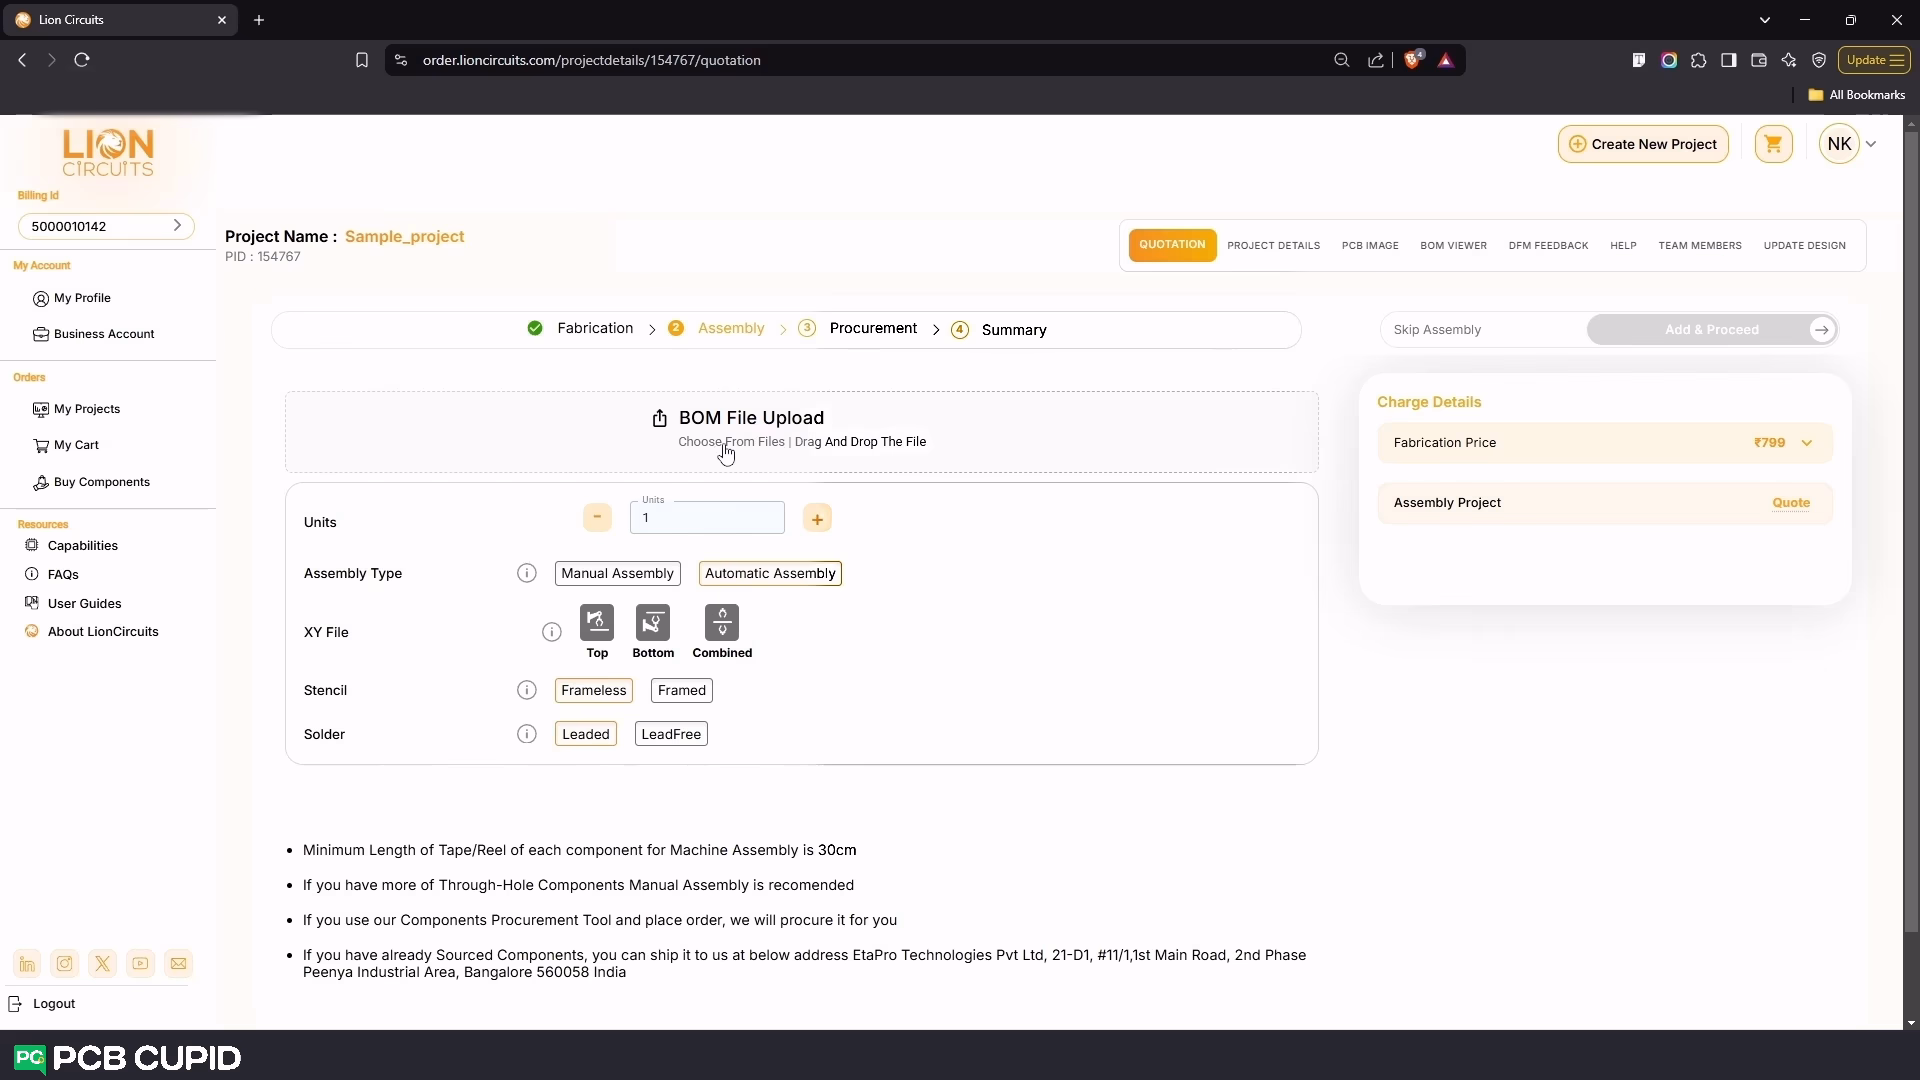
- To upload the bom file click on BOM File Upload and upload your BOM File
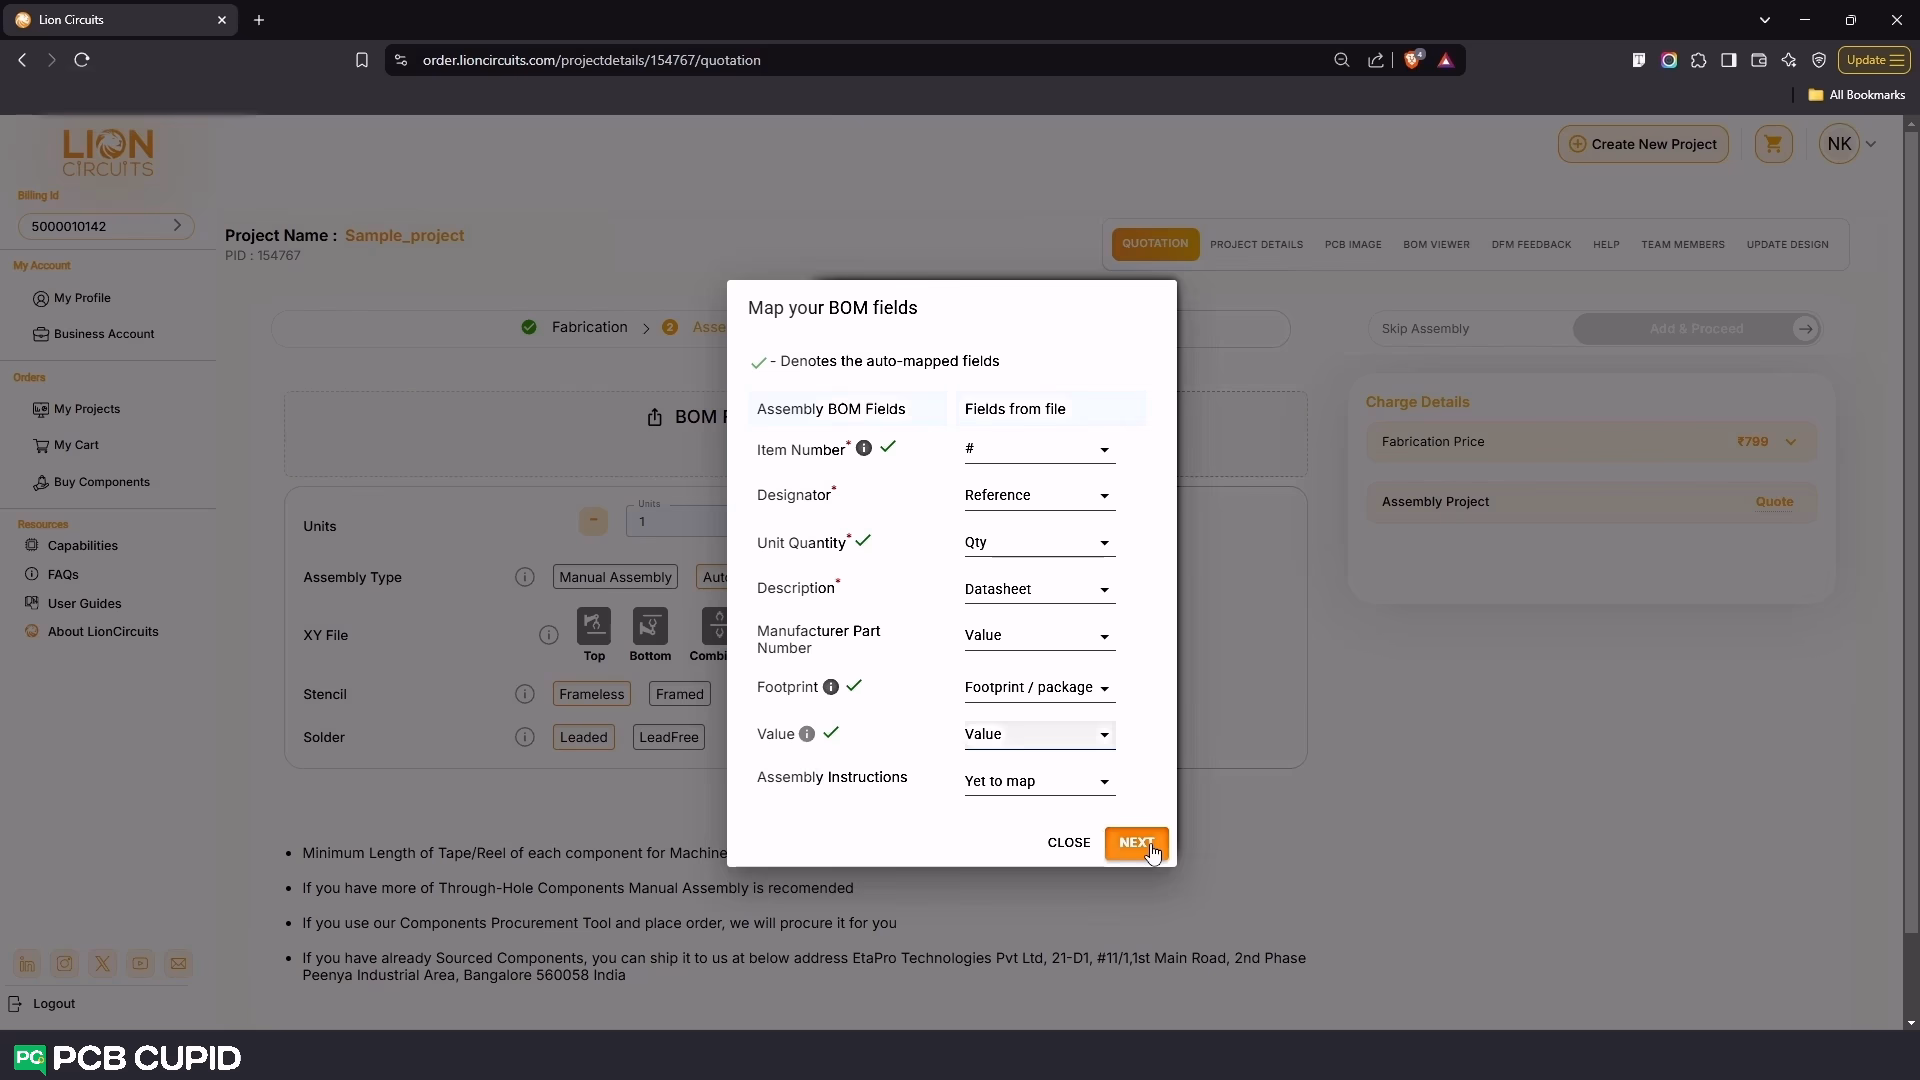
- Once the BOM file is uploaded, a drop-down menu called Map your BOM Fields will appear. Map your file’s BOM Fields to the correct Assembly BOM Fields and click on Next
- In the Units Field, specify how much Units you need
- In the Assembly Type Field, specify what type of Assembly you want - Manual or Automatic Assembly
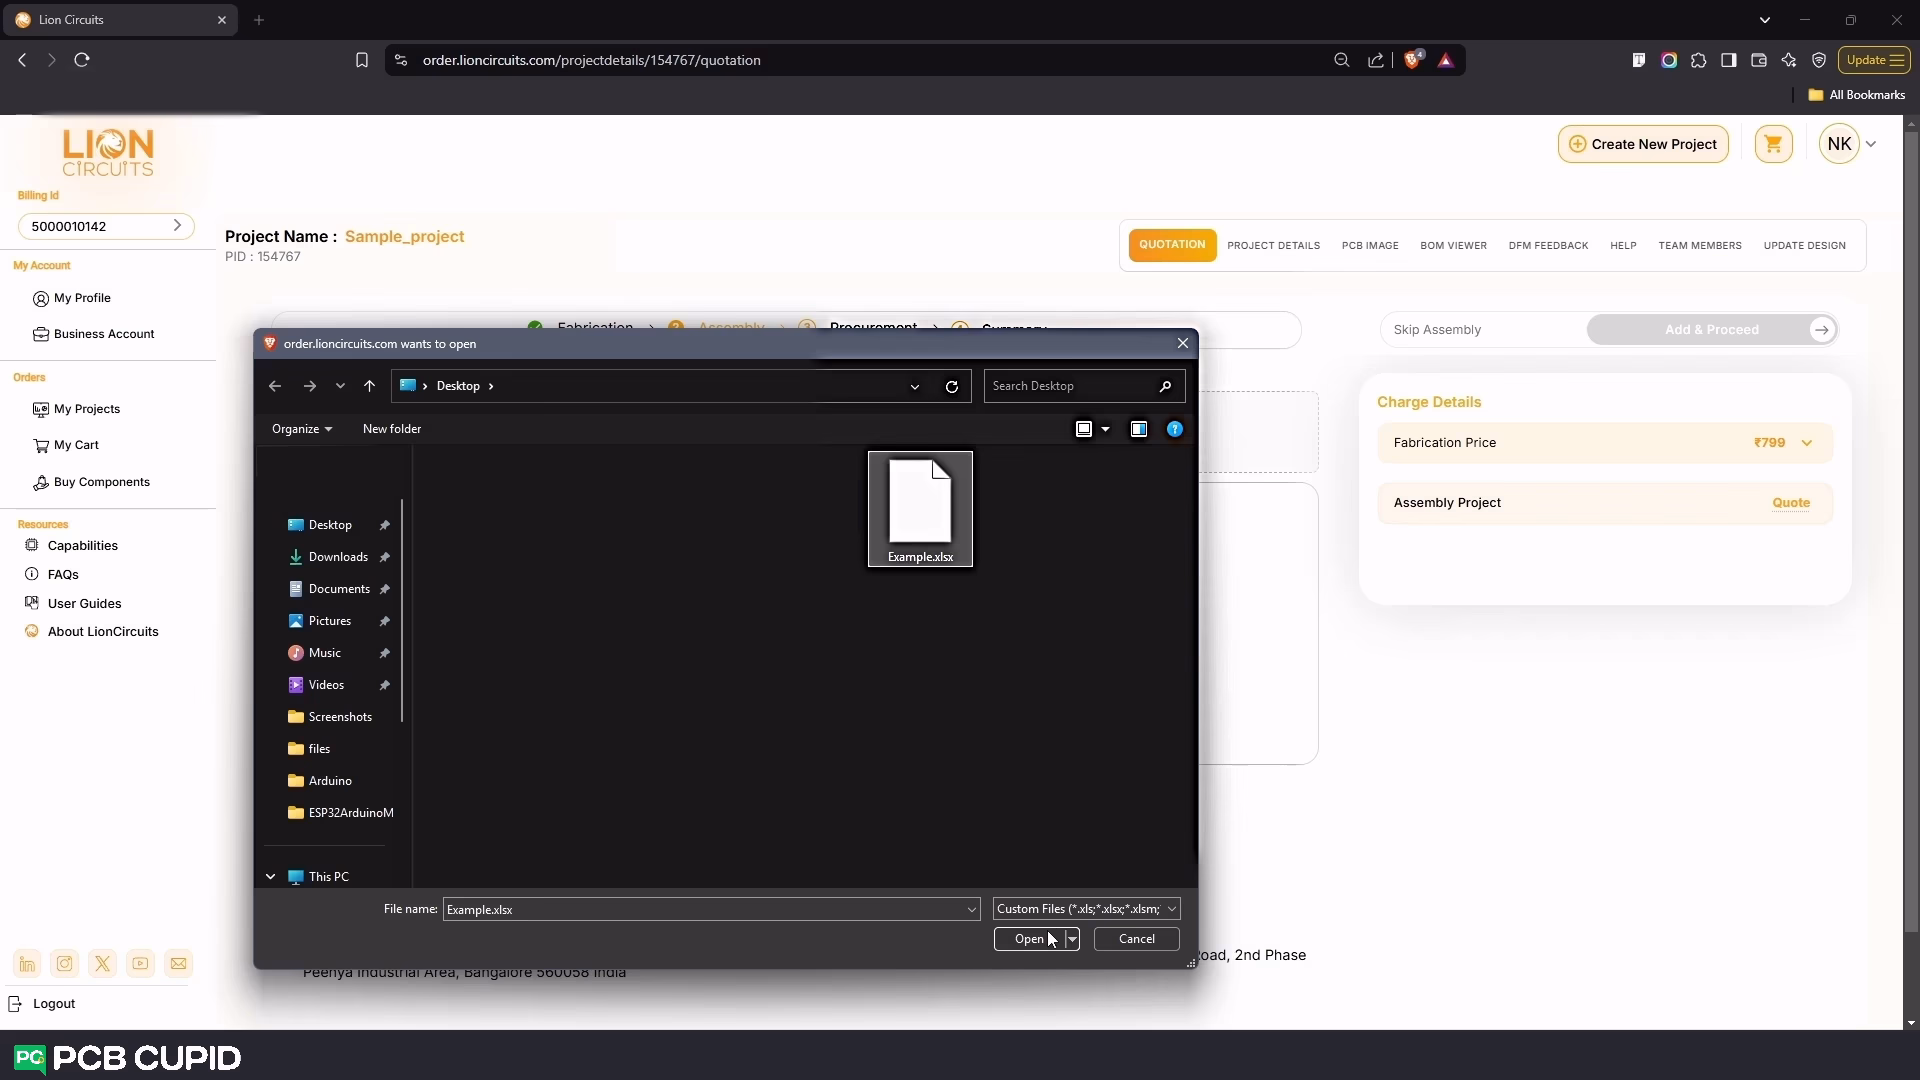
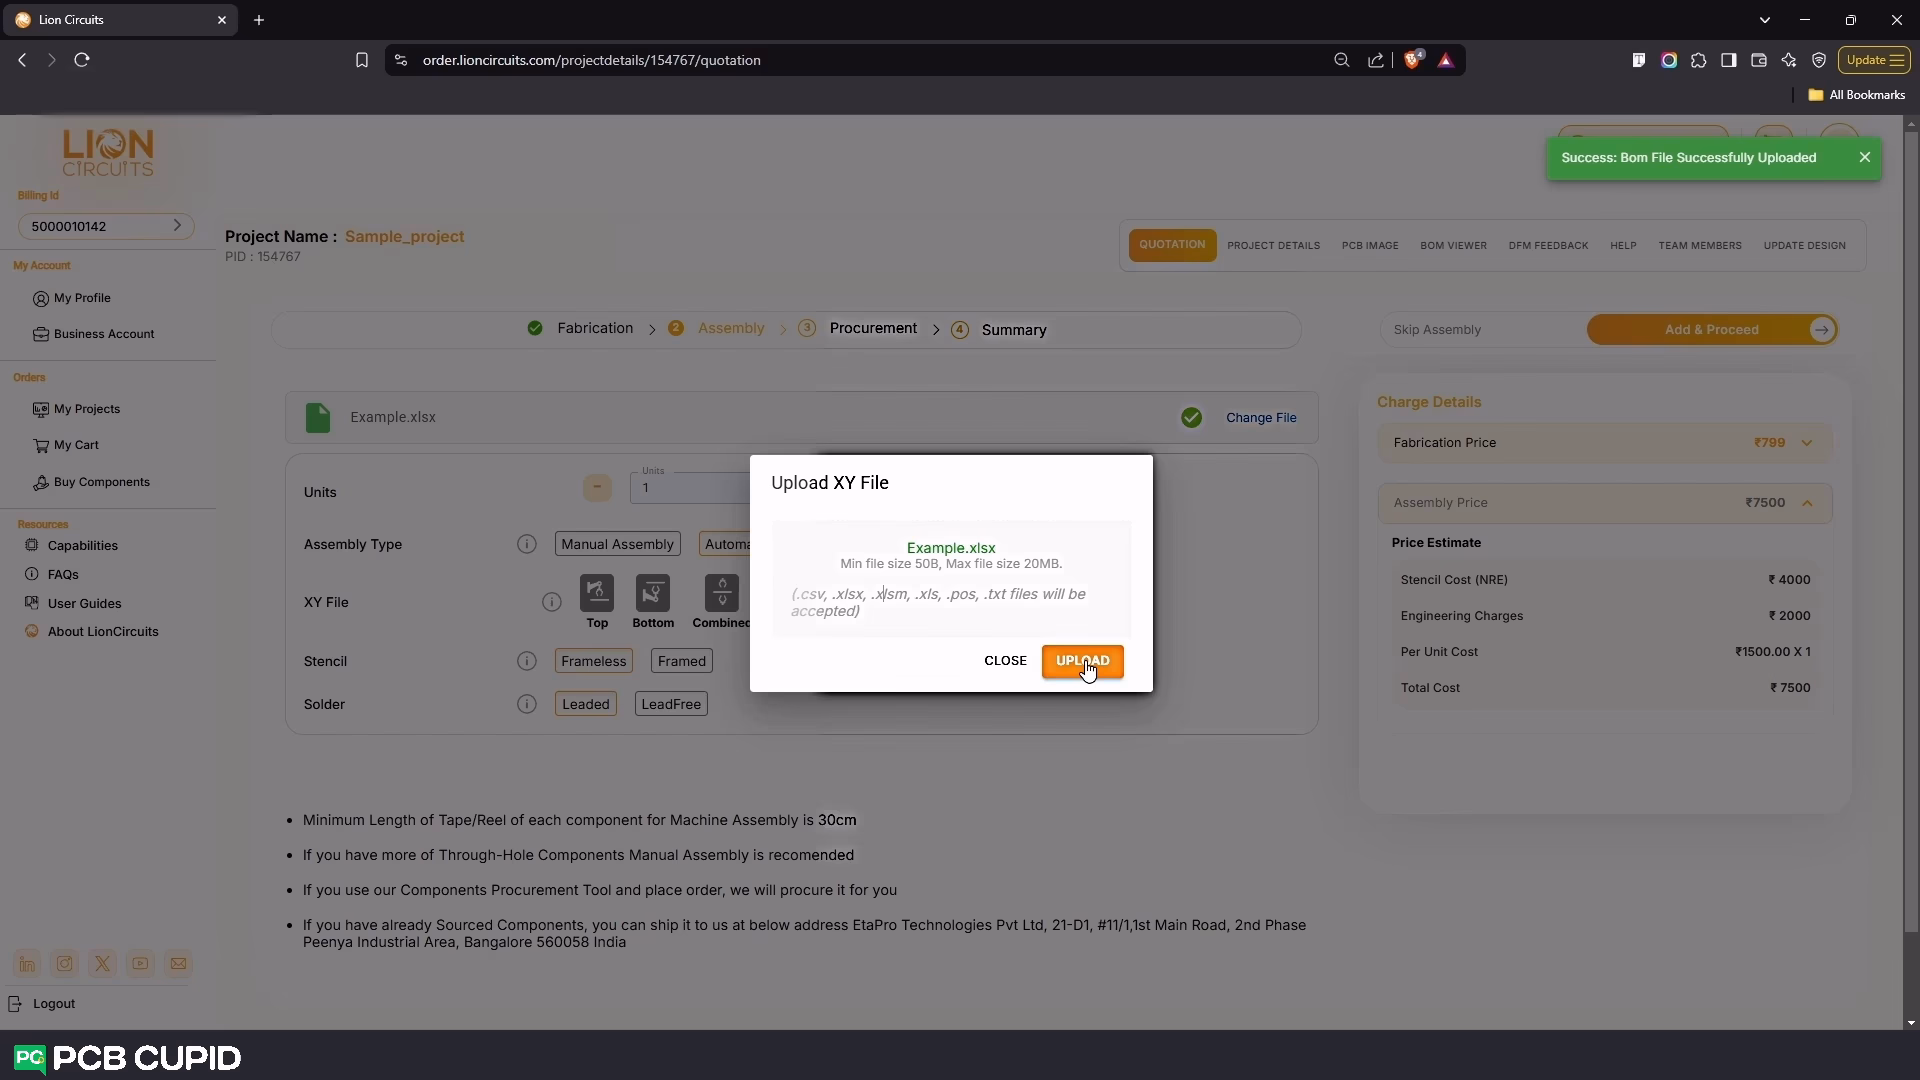
- If you want to do Automatic Assembly, Another field called XY File will appear
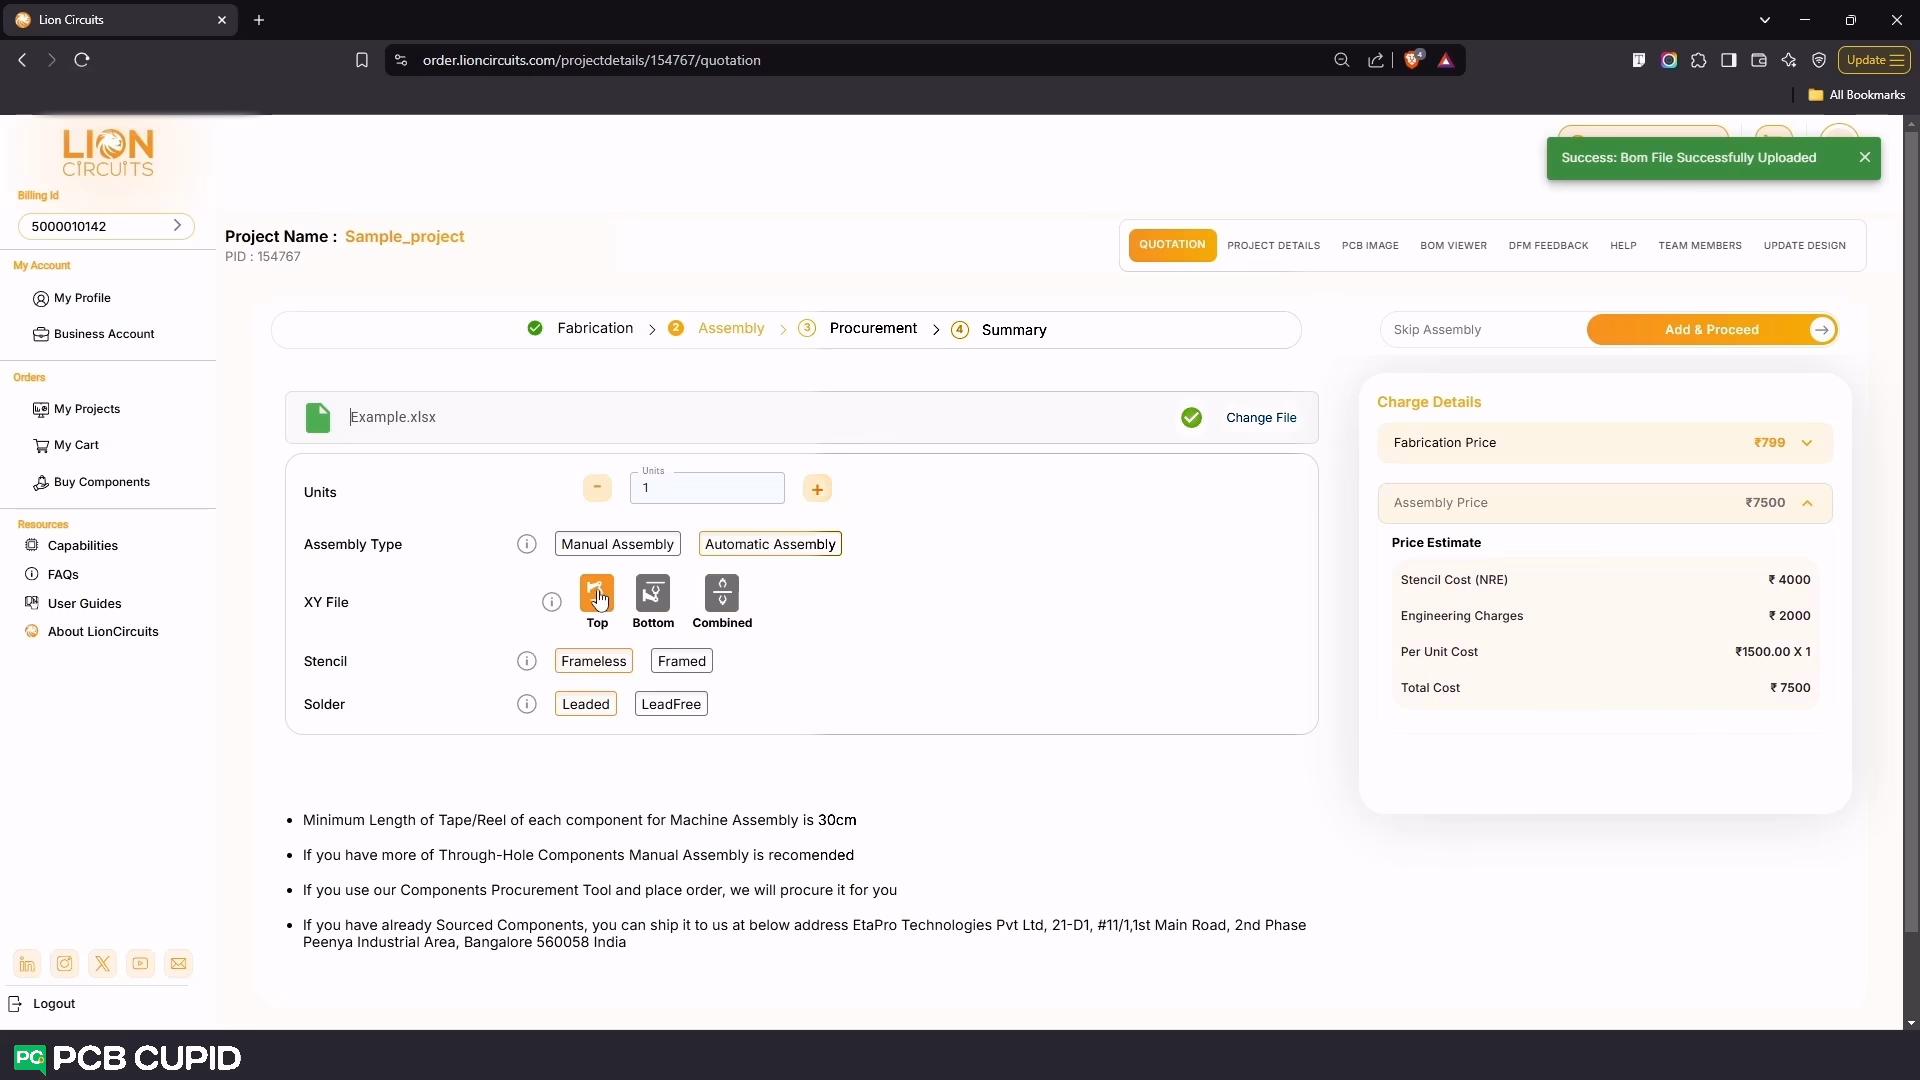
- In the XY File Field, Upload the respective XY File generated from your CAD program which can be Top, Bottom or Combined
- In the Stencil Field, select either Frameless or Framed as per your requirements
- In the Solder Field, select either Leaded or LeadFree as per your requirements
Step 3: Procurement
Here in this step you can procure the parts that you need for your PCB project.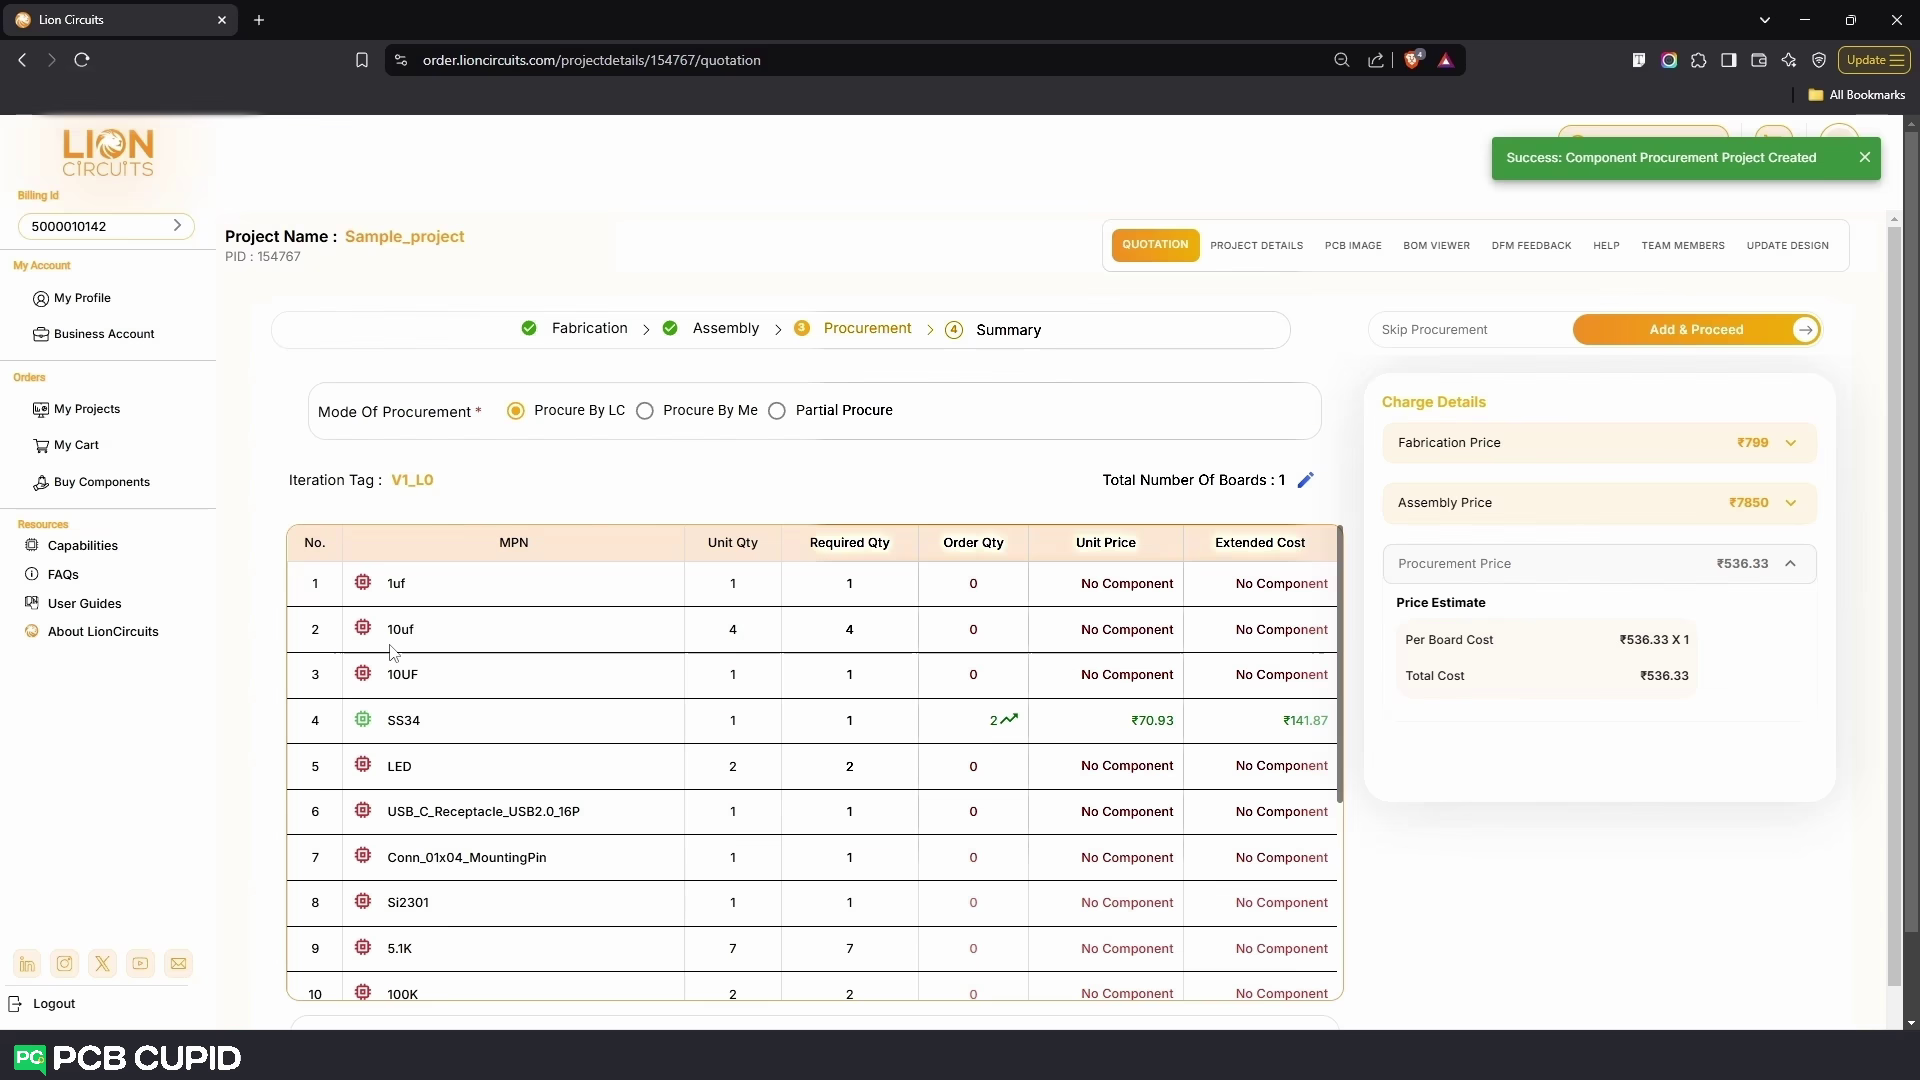 Here based on the requirement you can select the Mode Of Procurement
- Procure by LC : All the components are procured by LionCircuit with the price shown on the BOM Table.
- Procure by Me : Where you can purchase all the parts by yourself and ship it to LionCircuit warehouse.
- Partial Procure : With this method you can procure and send few parts by yourself and the rest can be purchased by LC.
- In the table, you can see the list of your BOM components that are available or in stock, along with their Quantity, Price per unit change as you change the total number of boards.
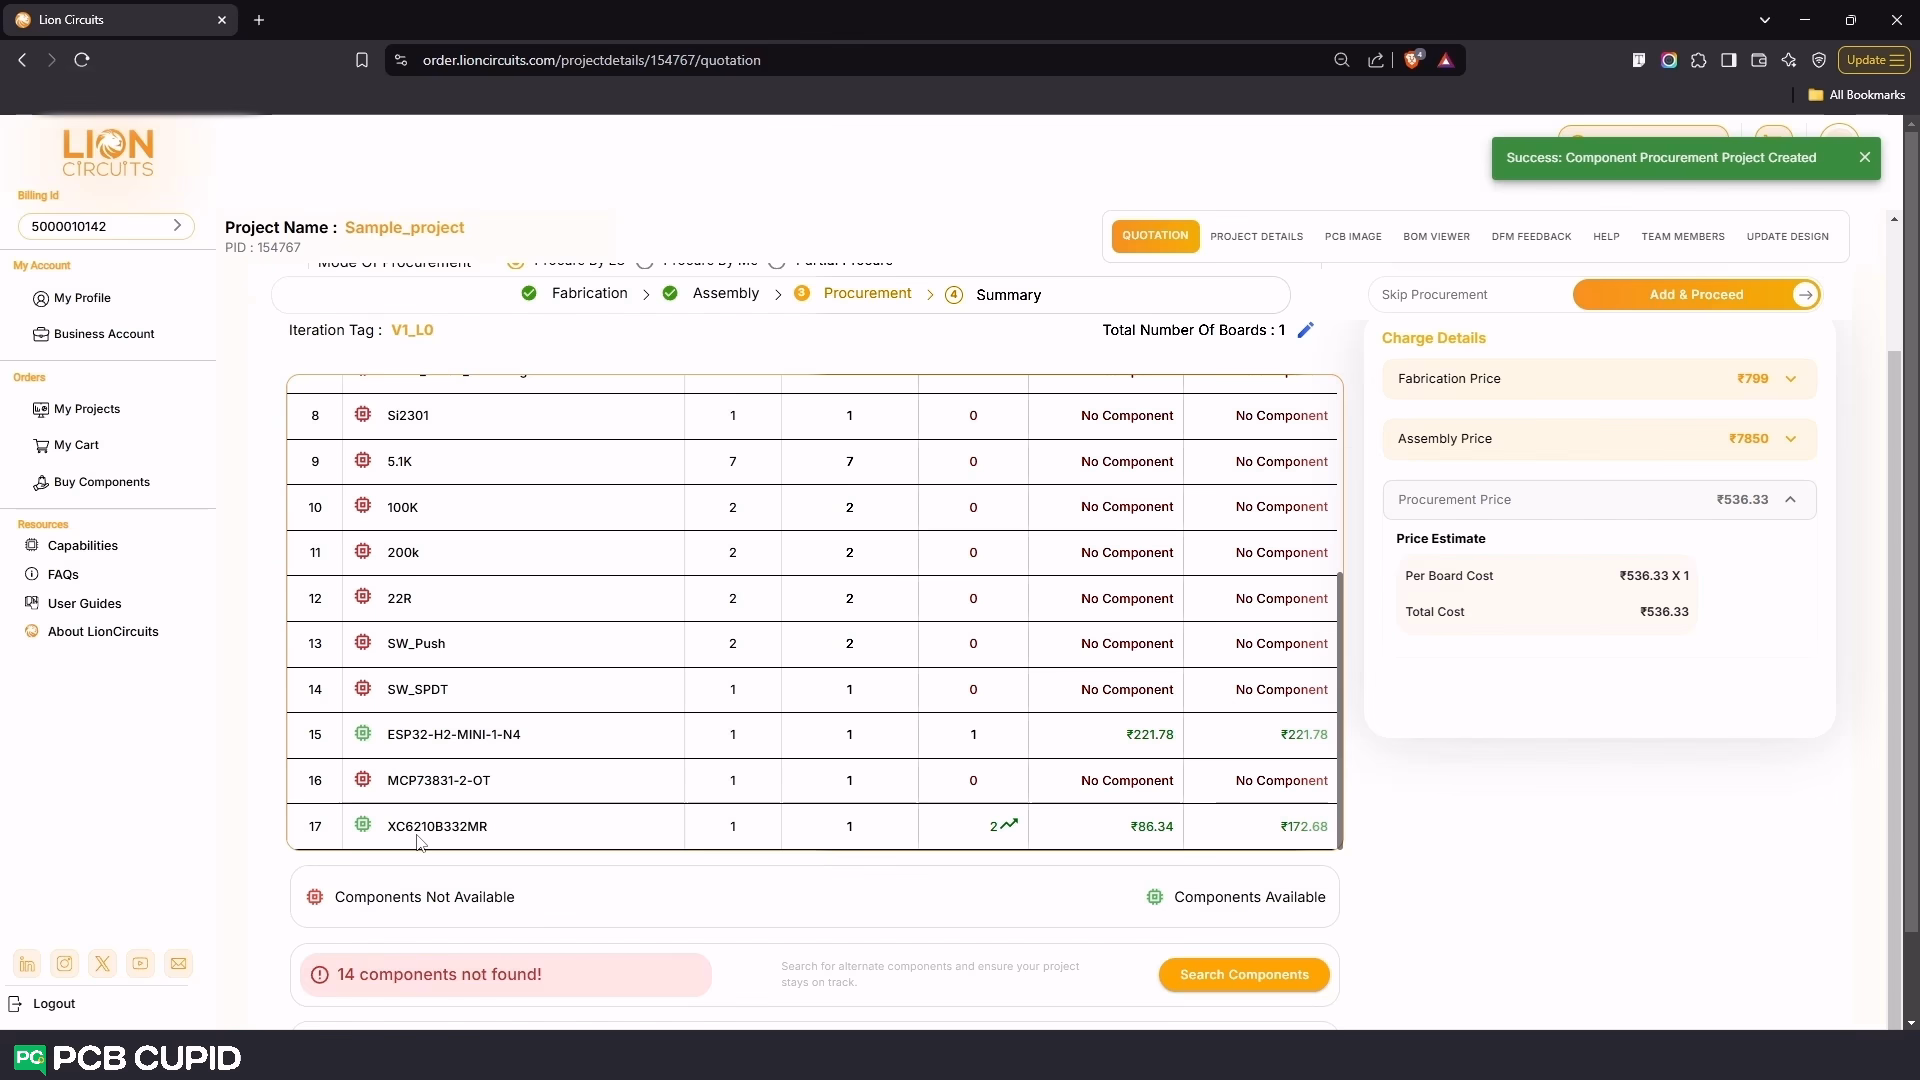 With these setup you can see the cost and procurement time on the right pane. Just as the previous step you can skip this process by clicking on the Skip Procurement or by clicking on Add & Proceed to include this process.
Step 4: Checkout
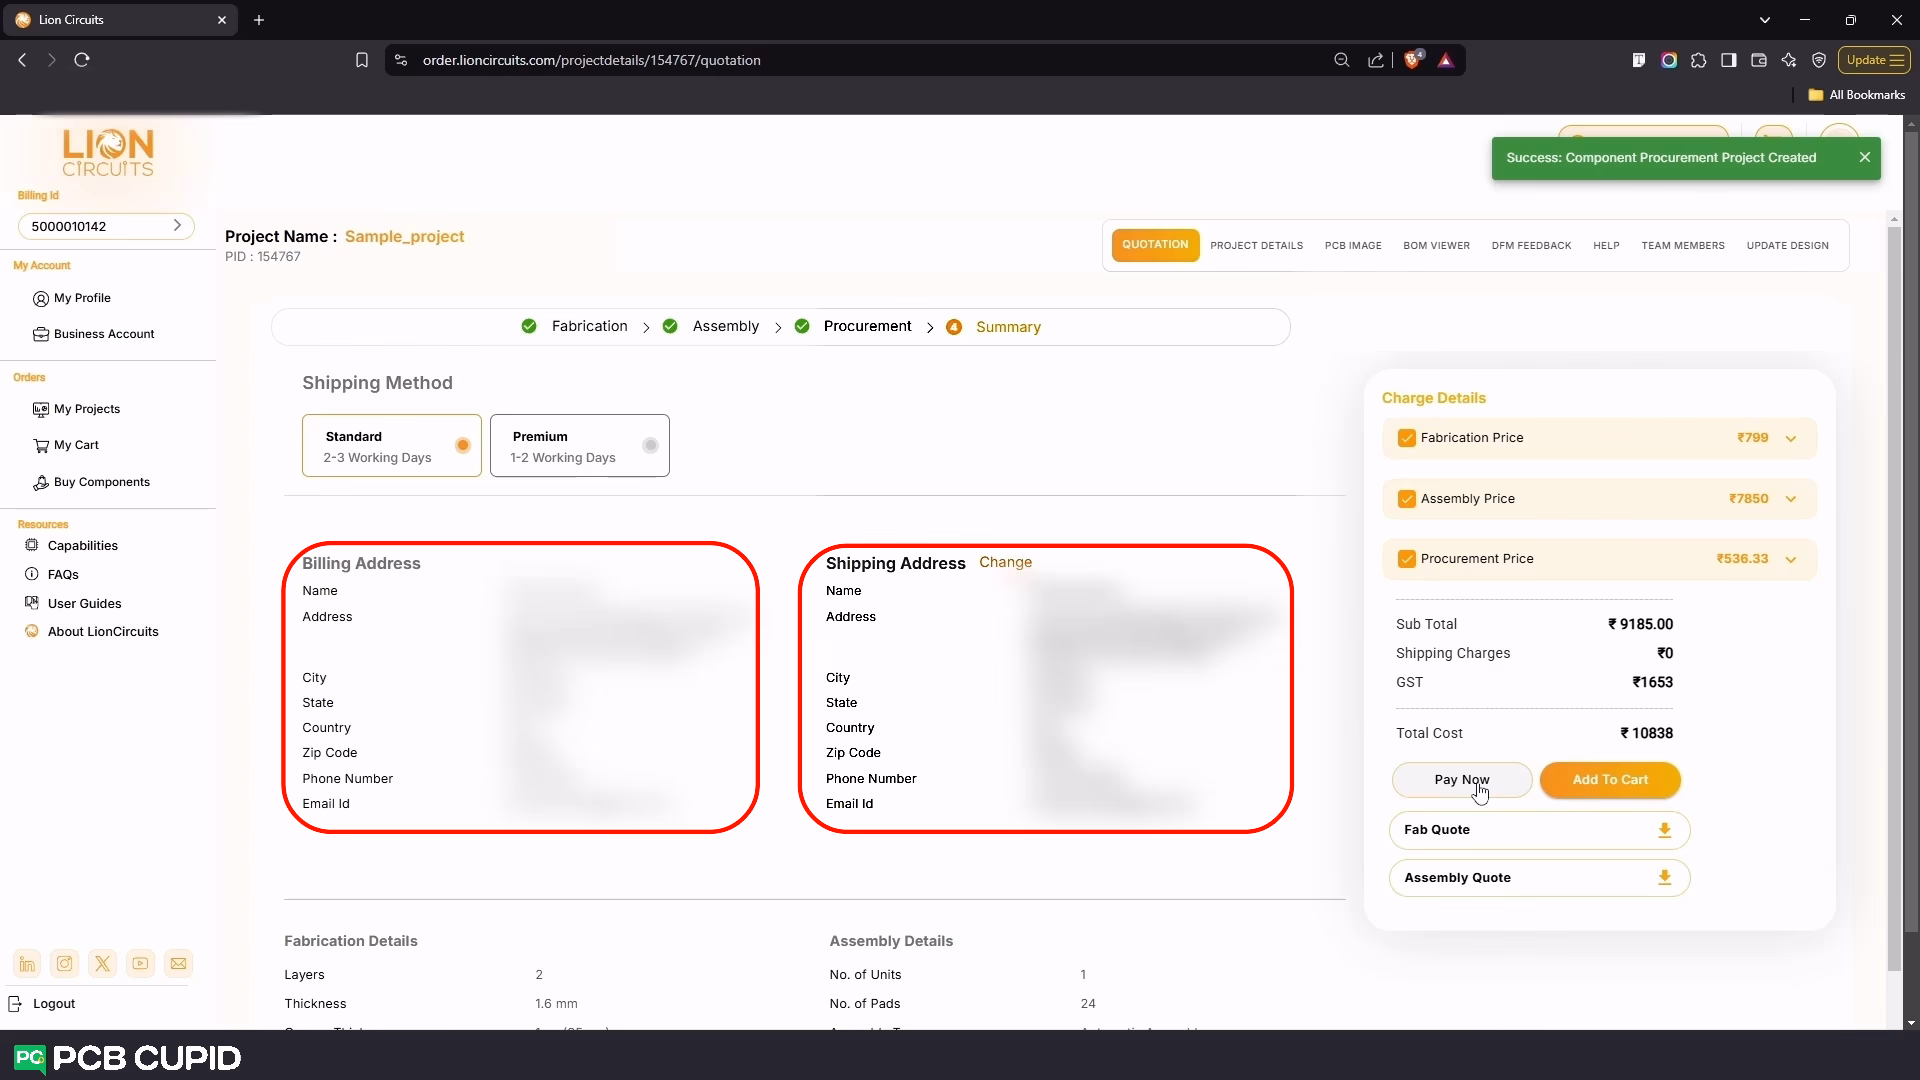 Under the Shipping Method, select your desired shipping mode- Standard 2-3 Working Days or Premium 1-2 Working Days
and finally, add your Billing and Shipping Addresses and click on Pay Now under Charge Details.
Under the Shipping Method, select your desired shipping mode- Standard 2-3 Working Days or Premium 1-2 Working Days
and finally, add your Billing and Shipping Addresses and click on Pay Now under Charge Details.
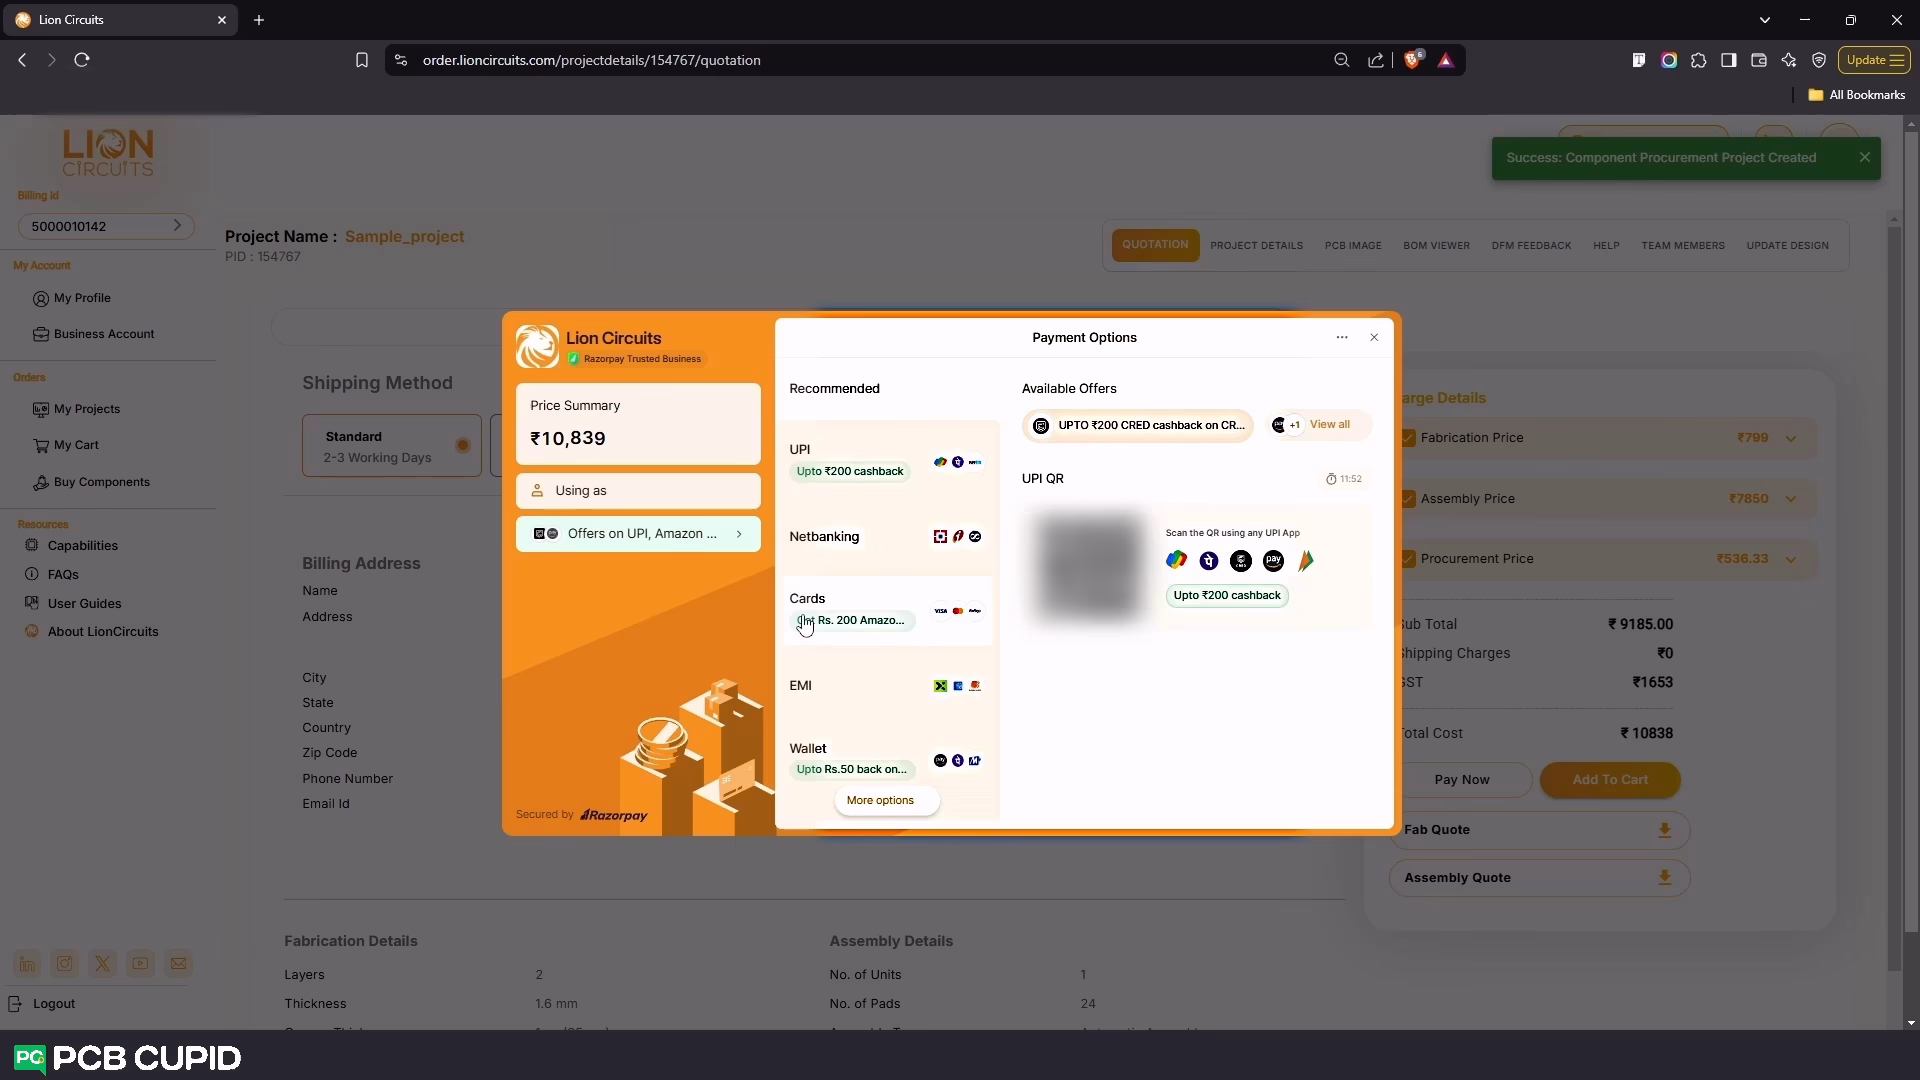 You will be redirected to the LionCircuits Razorpay Payment portal where you can select the mode of your payment. As simple as that you can finish complete electronic manufacturing from Fabrication to Final Product in a single project!
If you like to place order for your PCB check out this link and to learn more about product building you can check this youtube playlist.
You will be redirected to the LionCircuits Razorpay Payment portal where you can select the mode of your payment. As simple as that you can finish complete electronic manufacturing from Fabrication to Final Product in a single project!
If you like to place order for your PCB check out this link and to learn more about product building you can check this youtube playlist.