
Temperature monitoring using OpenWeatherMap & GLYPH

This guide will help you to set up a Temperature Monitoring system with a GLYPH-C3 that fetches Weather data and retrieve the Current Temperature data for a specified location using the OpenWeatherMap API and display it on the Arduino IDE Serial Monitor. We are doing this using the WiFiManager Library, which provides an easy way to connect the device to a WiFi network without hardcoding credentials or constantly re-uploading new firmware when WiFi settings change.

info

Note that the WiFiManager Library, as stated in its GitHub Page, only supports certain ESP32 Devices. Currently it only supports GLYPH-C3. Hence, you cannot use other GLYPH boards for this project.

OpenWeatherMap is a popular weather data service that provides a variety of weather information, including current weather, forecasts, historical data, and climate information. It offers APIs that developers can integrate into their applications to retrieve weather data for specific locations. There are some key points to be remembered, they are:

  • API (Application Programming Interface): An API allows different software applications to communicate with each other. In the context of OpenWeatherMap, it lets developers access weather data programmatically.

  • API Key: It is a unique identifier assigned to each user when they sign up for OpenWeatherMap's services. It acts as a password to authenticate requests to the API, ensuring that the user has permission to access the data.

  • Endpoint: An endpoint is a specific URL within the API that corresponds to a particular function or resource.

Let us consider the example of detecting the Temperature of Bangalore city. The API key inserted in the code below will be different for each user. This API key is also present in OpenWeatherMap. The specific location for which we want to detect the temperature is also selected in OpenWeatherMap.

Step 1: Code Setup

  1. Open Arduino IDE
  2. Install the Necessary Libraries:

Open Arduino IDE and go to Sketch > Include Library > Manage Libraries. Search for and Install the following libraries:

  1. GetOpenWeatherMap API Key:
  • Signup at OpenWeatherMap.
  • After registering, go to the API section and get your API Key.
  • You will use this key to make Authenticated requests to fetch weather data.
  1. Enter the following code into the Arduino IDE
#include <WiFiManager.h> // WiFiManager library
#include <HTTPClient.h>   // HTTP client to make requests. HTTPClient is a class provided by libraries such as HTTPClient.h on the GLYPH board, allowing you to make HTTP requests (such as GET and POST) to web servers over the internet. It is commonly used to interact with APIs, send data to servers, or retrieve information from the web (e.g., weather data, sensor logs, etc.).
#include <ArduinoJson.h>  // ArduinoJson to parse JSON. It provides a simple and efficient way to parse (read) and serialize (write) JSON data in memory-constrained environments.

// OpenWeatherMap API endpoint and API key
const char* apiKey = "871cd481558344e66f35315c8d1b2f65"; // enter the API key which we can get from the openweathermap
const char* cityName = "Bangalore";//enter the city name which want to be detected.
const char* apiUrl = “http://api.openweathermap.org/data/2.5/weather?q=Bangalore&appid=871cd481558344e66f35315c8d1b2f65&units=metric”; // This URL is taken from OpenWeatherMap to replace the API key

// Create an instance of the WiFiManager class. his instance (wm) will be used to manage Wi-Fi connections for the GLYPH board. WiFiManager simplifies connecting to Wi-Fi networks, allowing for easy handling of saved credentials and configuration options when no saved credentials are found.
WiFiManager wm; // Declare a WiFiManager object named 'wm'.

void setup()
{
  Serial.begin(115200); // Initialize the serial communication at a baud rate of 115200

  // Automatically connect using saved credentials
if(!wm.autoConnect("WeatherAP_AccessPoint")) // wm.autoConnect("WeatherAP_AccessPoint"): This function attempts to connect to to the last known WiFi network using previously saved credentials (SSID and Password) from EEPROM/flash. If the device has connected to a WiFi network before, the credentials are stored, and autoConnect will attempt to reconnect to that network automatically. If GLYPH-C3 cannot connect to a saved WiFi network (either because the credentials are not stored or the network is unavailable), it will create an Access Point (AP) with the SSID "WeatherAP_AccessPoint". This allows the user to connect to GLYPH-C3 from another device (e.g., a phone or laptop), access the captive portal, and provide WiFi credentials through a web interface.The GLYPH C3 now reattempts to connect with the new saved credentials. If the connection is successful, the function returns true as the result and the if block will not be executed due to ! operator used with the result. If the connection attempt fails, the function returns false and the if block is executed.
{

    Serial.println("Failed to connect"); // Print a message that the Connection has Failed

// Restart the GLYPH to attempt connecting again - This is useful if you want to reinitialize the WiFi stack and try to connect afresh.
    ESP.restart();
  }

  // After Successfully Connecting to the saved WiFi Network
  Serial.println("Connected to WiFi!");

void fetchWeatherData()
{
// HTTP is the foundational protocol used by the web to transfer data between a Client (e.g., a web browser or the GLYPH board) and a Server. HTTPClient is a library often used in IoT devices (like ESP32 and GLYPH boards) for making HTTP Requests. It simplifies sending HTTP requests, handling responses, and even deals with security for HTTPS.
  HTTPClient http; // Create an HTTPClient object to handle the HTTP requests
 
  // Initiate HTTP GET request
  http.begin(apiUrl); // Begin the HTTP request by providing the API URL
  int httpCode = http.GET(); // Send the GET request and store the HTTP response code

// Check if the HTTP request was successful (i.e., response code > 0)
  if (httpCode > 0)
{
    // Check if the response is HTTP OK
    if (httpCode == HTTP_CODE_OK)
{

// Retrieve the server’s response data (e.g., weather data in JSON format) as a string. This data will typically include the actual weather information you're fetching from the API. 'Payload' typically refers to the actual data being transmitted or processed within a system, particularly in the context of networking, APIs, or messaging.
      String payload = http.getString();

// Print a message indicating that the weather data has been successfully received
      Serial.println("Weather data received:");

// Print the raw weather data (in JSON or text format) to the Serial Monitor for debugging
      Serial.println(payload);
     
// Create a JSON document object to hold the parsed data. The number 1024 specifies the size of the memory buffer in bytes that will be used to store the JSON data. JSON (JavaScript Object Notation) is a lightweight data-interchange format. It is often used to send and receive data from web services in a structured format. JSON represents data in key-value pairs and arrays. A DynamicJsonDocument is used to store the parsed JSON. Parsing is typically done when you need to extract meaningful information from raw data such as text, numbers, or special tokens in a string. When you parse JSON, you take the raw JSON string and transform it into a format you can work with programmatically, like reading specific values or modifying them.
      DynamicJsonDocument doc(1024); // DynamicJsonDocument adjusts this size according to the size of the expected JSON response.

// Parse the JSON payload (the raw data from the server response) and store the result in the `doc` object. `deserializeJson` function parses the payload string and fills the `doc` with the corresponding JSON structure. It returns a `DeserializationError` which will indicate if the parsing was successful or if there was an error
      DeserializationError error = deserializeJson(doc, payload);// Check if the deserialization (JSON parsing) process was successful
if (!error)
{
// Parsing was successful, and the `doc` object now contains the parsed JSON structure. Now you can access individual elements of the JSON data as needed, e.g., temperature, weather description, etc. Example: Access and print the value of the "temp" field inside the "main" object
  float temperature = doc["main"]["temp"];

// Example: Access and print the "description" field from the first object in the "weather" array. Index [0] specifies that we want to access the first object in the "weather" array. Since arrays are zero-indexed, the first element is accessed with index 0. This accesses the "description" property of the first object in the "weather" array. The expected value is typically a string that describes the current weather conditions, such as "clear sky" or "light rain". The retrieved description is stored in a const char* variable called description.
  const char* description = doc["weather"][0]["description"];
       
  // Display data on Serial Monitor. Print the label "Temperature in " followed by the city name
      Serial.print("Temperature in ");// Prints a string message "Temperature in " without moving to the next line

// Print the name of the city (stored in `cityName` variable). This assumes `cityName` contains the city name as a string (e.g., "New York")
        Serial.print(cityName); // Prints the value of `cityName` (the name of the city)

// Print the colon ":" and a space after the city name to format the output nicely
        Serial.print(": ");// Prints ": " to separate the city name and temperature

// Print the temperature value (assumed to be stored in the `temperature` variable). The value of `temperature` is expected to be a float that contains the temperature in degrees Celsius
        Serial.print(temperature); // Prints the temperature value (e.g., 25.3)
// Print the degree symbol and "C" to indicate Celsius
        Serial.println(" °C");// Prints " °C" to indicate the temperature unit and moves to the next line

// Print the label "Weather description: " to introduce the weather description
        Serial.print("Weather description: ");// Prints "Weather description: " without moving to the next line

// Print the actual weather description (assumed to be stored in the `description` variable). The `description` variable holds a string that describes the current weather (e.g., "clear sky")
        Serial.println(description); // Prints the weather description and moves to the next line
      }

else
{

// If JSON parsing failed (i.e., there was an error), print an error message to the Serial Monitor
        Serial.println("Failed to parse JSON");// Prints an error message indicating that the JSON parsing failed
      }
    }
}

// else block: This block is executed if the if (httpCode > 0) check fails, meaning the HTTP request did not return a successful response or there was an error in deserializing the JSON data.
  else
{

// If there was an error during JSON deserialization or the HTTP request failed, print an error message to the Serial Monitor for debugging purposes.
    Serial.print("Error on HTTP request: ");

// `Serial.println(httpCode);` prints the actual HTTP status code that was returned by the server,
    Serial.println(httpCode);
  }

// This function call ensures that the HTTP connection is properly closed and all resources allocated for the request are released. Not calling http.end() could lead to memory leaks or other resource-related issues, which could eventually cause the program to behave incorrectly.
  http.end();
}

void loop()
{
// Fetch weather data every 30seconds(30000 milliseconds =30seconds)
fetchWeatherData(); // Call the function to get the latest weather data . This function is called to retrieve the latest weather information from the OpenWeatherMap API.

delay(30000); // Wait for 30 seconds(30000 milliseconds) before fetching. This delay between each request is to avoid exceeding the API rate limits and making unnecessary requests. You can adjust the delay time based on how frequently you want to update the weather data.
}

Step 2: Upload the Code

  1. Connect the Board
  • Connect your GLYPH board to your computer
  1. Select the Board and Port

    Do the following settings in your Arduino IDE, Do the following settings in your Arduino IDE,

    • Tools > Board > esp32 > Pcbcupid GLYPH C3
warning

For the Pcbcupid GLYPH C3 to appear under Tools > Board > esp32, the esp32 board version installed in the Arduino IDE should be greater than or equal to 3.1.0.

  • Tools > Port and select the port connected to your GLYPH.
  • Tools > USB CDC on Boot > Enabled
warning

If USB CDC on BOOT not enabled, you won't be seeing any serial data on Arduino IDE.

  1. Upload the Code
  • Click the upload button (➡️ icon) or use the shortcut CTRL + U in Arduino IDE to upload the code to the board.

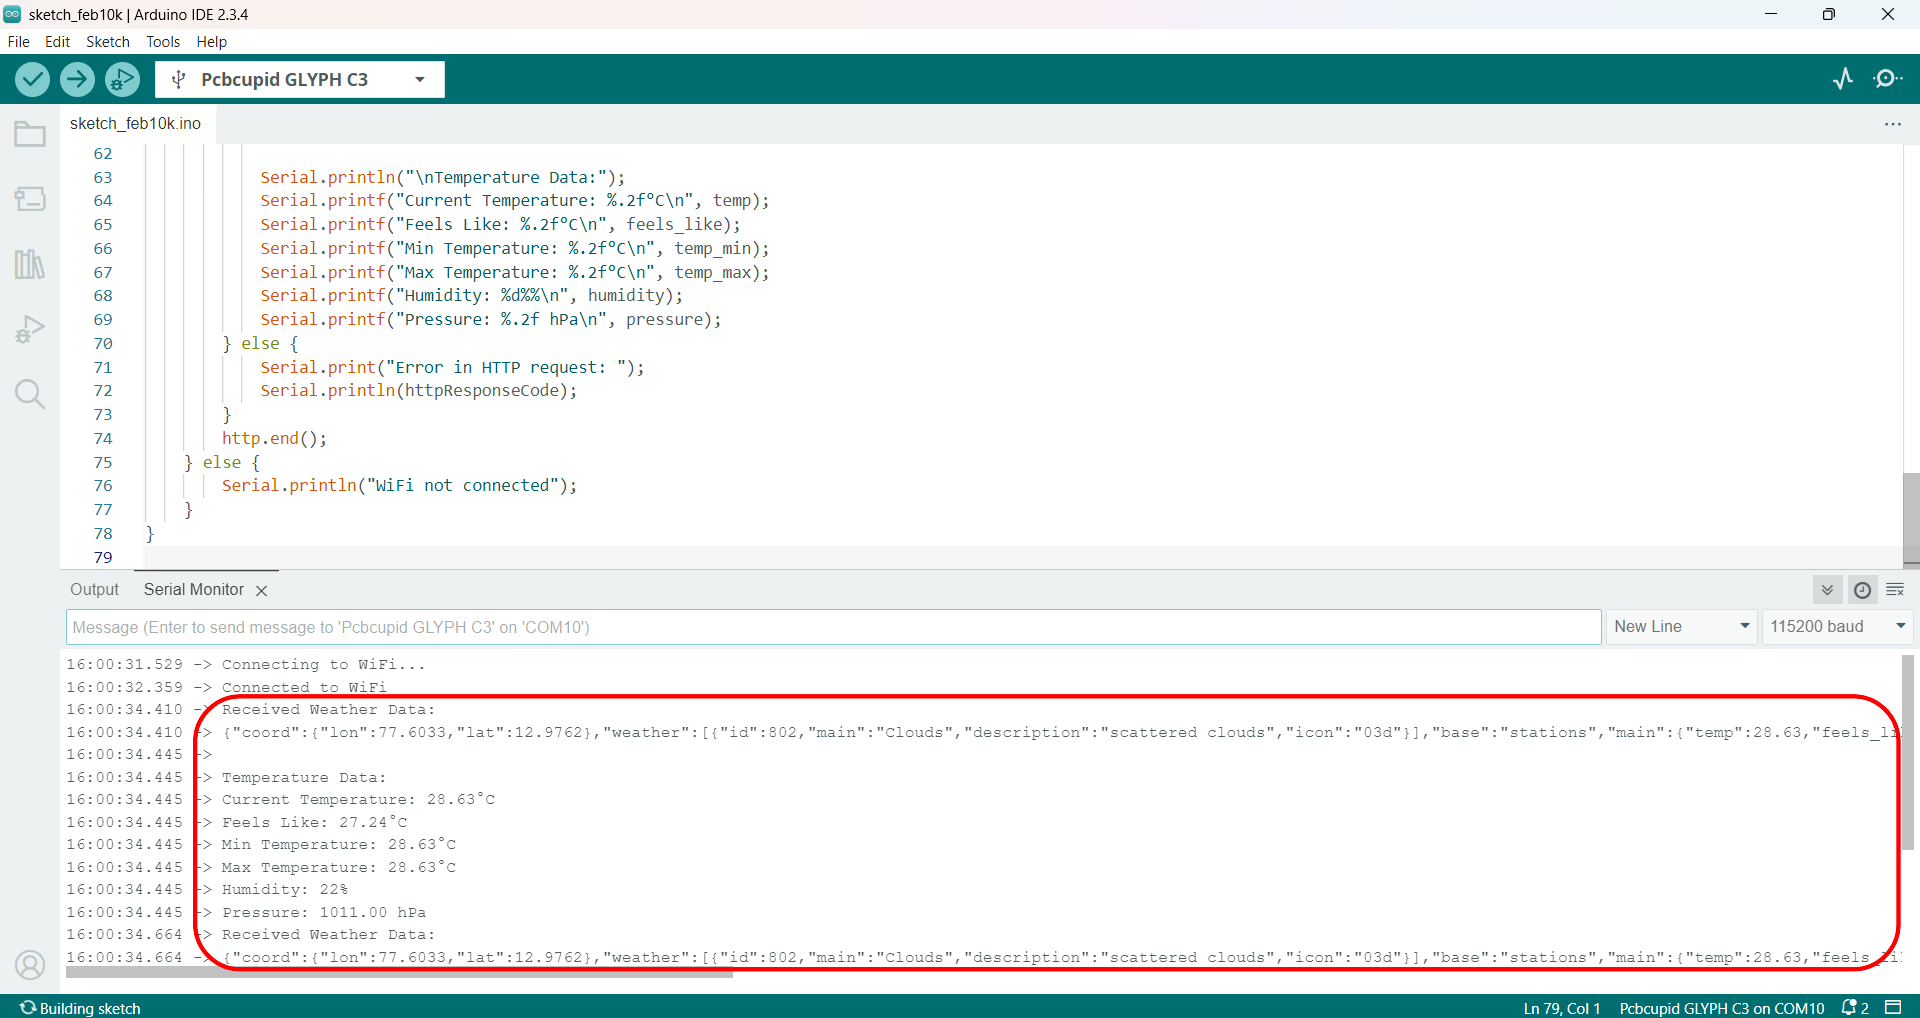
Step 3: Observe the Output on the Serial Monitor

The Serial Monitor should start displaying the Weather Description and Temperature of the Location which has been set in OpenWeatherMap.

Battery_charge