Pin Configuration
- S - SIGNAL
- G - GND
- V - VCC
Key Features
- Mechanical or electromechanical operation for detecting position or motion
- Durable and reliable for repeated actuation
- Variety of actuator types: lever, roller, plunger, whisker, etc.
- Normally Open (NO) and Normally Closed (NC) contacts for flexible circuit design
- Wide voltage and current handling depending on model
- Compact and robust design suitable for industrial environments
Applications
- Industrial Machinery – detects the end of travel of moving parts
- Conveyor Systems – position sensing and item detection
- Robotics & Automation – motion control and position feedback
- Safety Interlocks – prevents machine over-travel or unsafe operation
- Elevators & Lifts – detects door positions and travel limits
- CNC Machines – homing switches for axes
We have 2 variant’s of the limit switch, one is GLYPH compatible (in terms of dimension) and the other one is generic. Please choose the variant based on the size and the direction fo the switch! otherwise both of them are electrically same.
Step 1: Hardware Required
- Glyph Boards
- Limit Switch
Step 2: Circuit Diagram

Step 3: Code Setup
- Open Arduino IDE.
- Make sure to install the library
- Copy and paste the following code into the Arduino IDE:
Step 4: Upload the Code
- Connect the Board
- Connect your GLYPH board to your computer
- Select the Board and Port
Tools > Board > esp32 > Pcbcupid GLYPH C3
Tools > Portand select the port connected to your GLYPH.Tools > USB CDC on Boot >Enabled
-
Upload the Code
- Click the upload button (➡️ icon) or use the shortcut
CRTL + Uin Arduino IDE to upload the code to the board.
- Click the upload button (➡️ icon) or use the shortcut
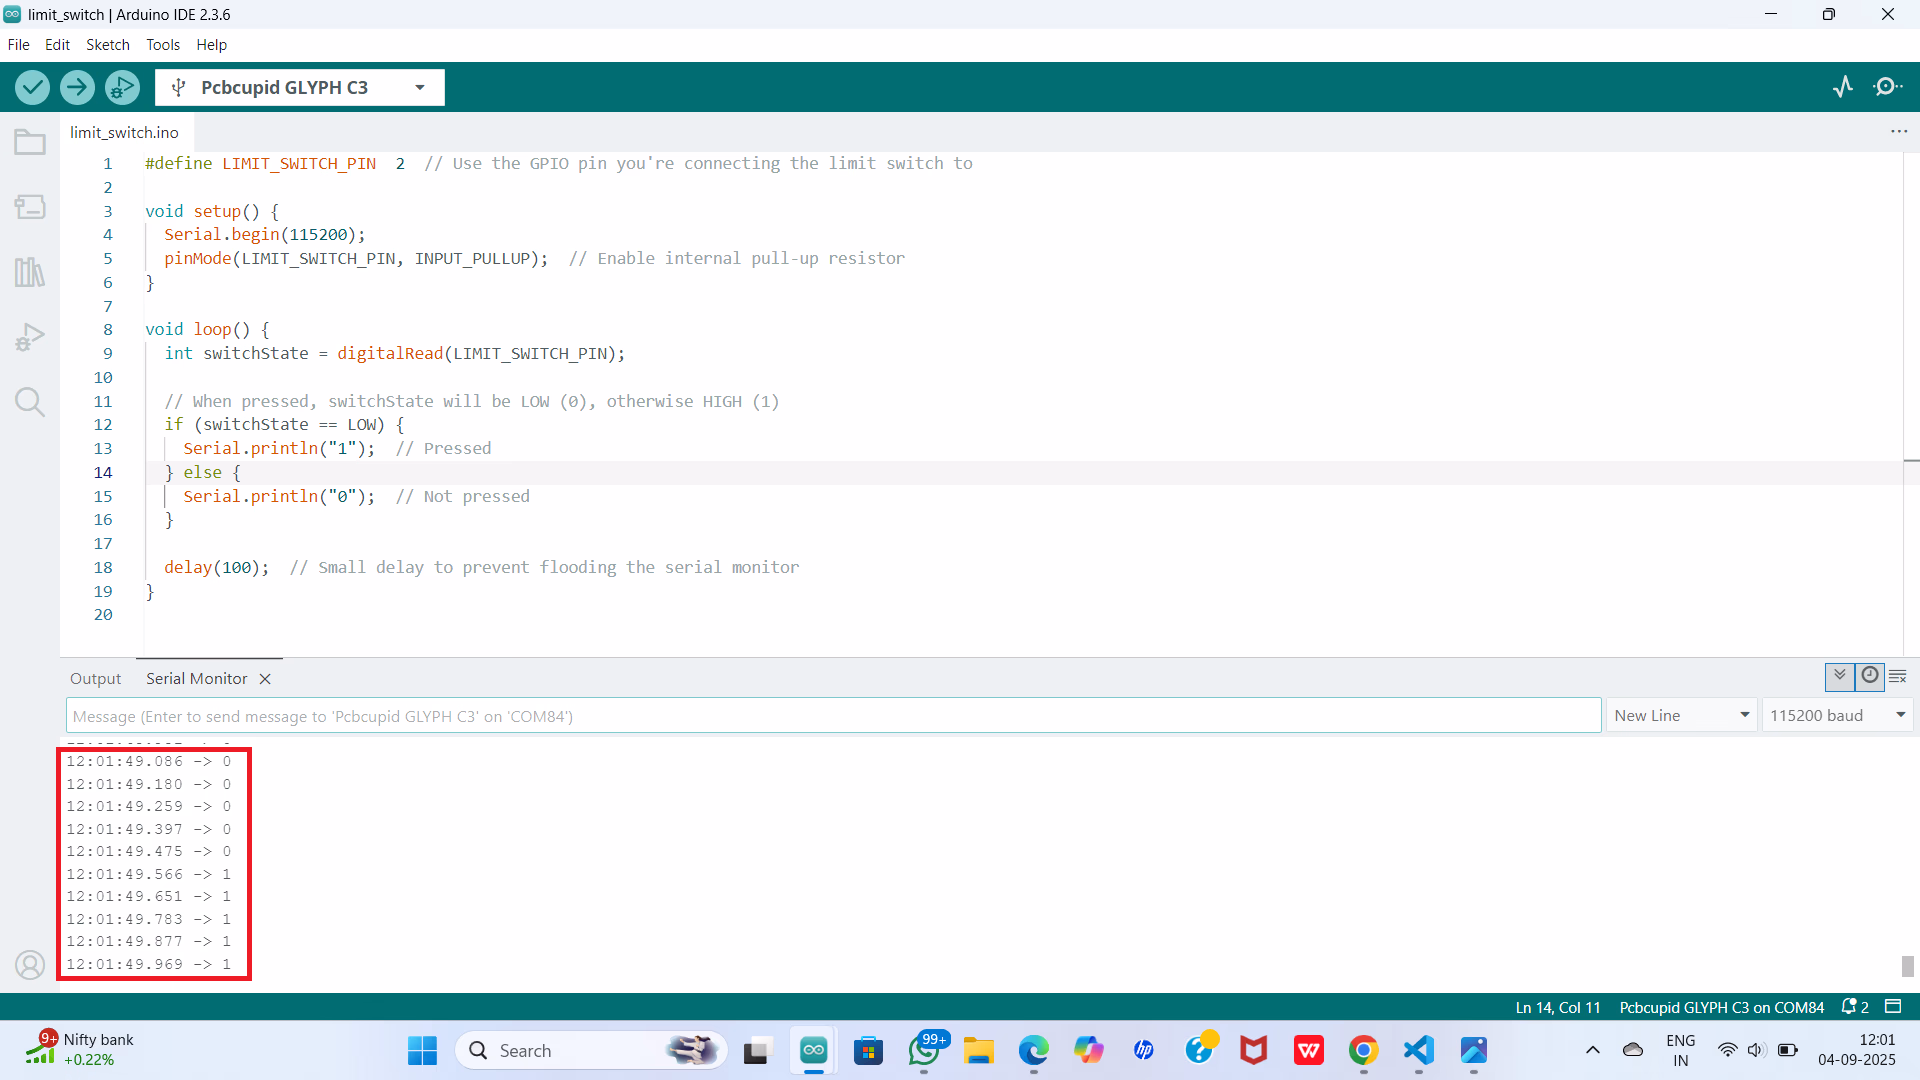
Step 5: Observe the Output
The Serial Monitor output will be a stream of 1s and 0s depending on the state of the limit switch:- 1 → Limit switch is pressed/activated (circuit closed, GPIO reads LOW)
- 0 → Limit switch is not pressed (circuit open, GPIO reads HIGH)