CAP1203 Capacitive-Touch
Overview
This guide provides a step-by-step explanation to help you integrate the Gsense-Touch Sensor for touch detection using the G-Sense module on the GLYPH-H2 board. The system detects left ,middle and right gestures and provides real-time feedback via the Serial Monitor.
Features
- 3-Channel Capacitive Touch – detects left, middle, and right touch/slide gestures
- Swipe Detection – recognizes directional swipes across the slider
- Digital Output – provides clear HIGH/LOW signals for each touch channel over I2C
- Low Power Consumption – suitable for battery-operated applications
- Integrated Signal Processing – built-in debounce and touch sensing algorithms
- Compact Module – easy integration with boards like GLYPH
Applications
- Gesture-Control Interfaces – control devices or menus with simple swipes
- Consumer Electronics – touch sliders for volume, brightness, or selection
- Robotics & Automation – simple human-machine interface (HMI) for commands
- IoT Devices – intuitive touch-based input for compact devices
- Gaming & VR Controllers – gesture input for interactive experiences
- Wearable Devices – lightweight, low-power input sensor for compact systems
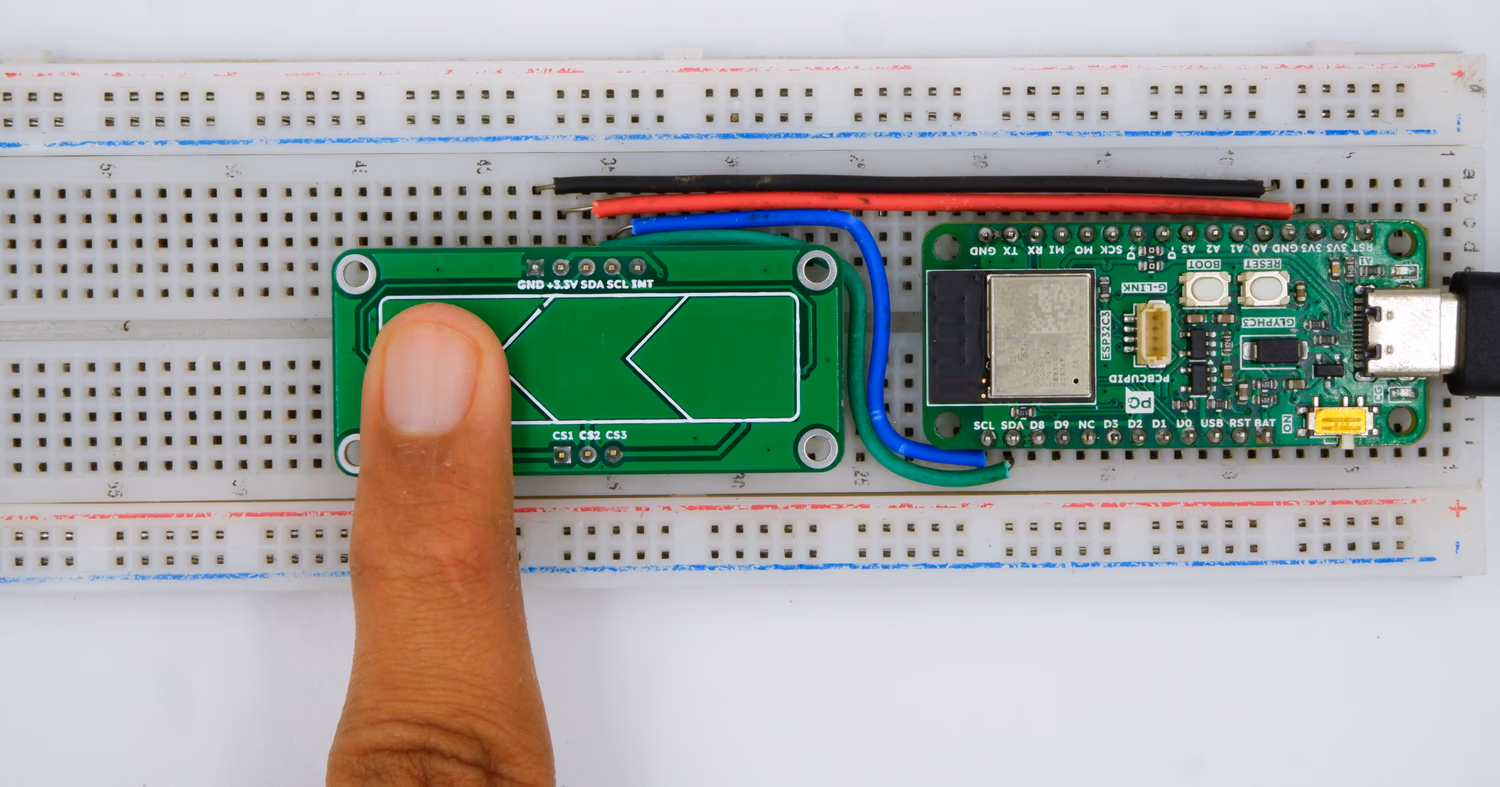
Step 1: Hardware Required
- Glyph Board
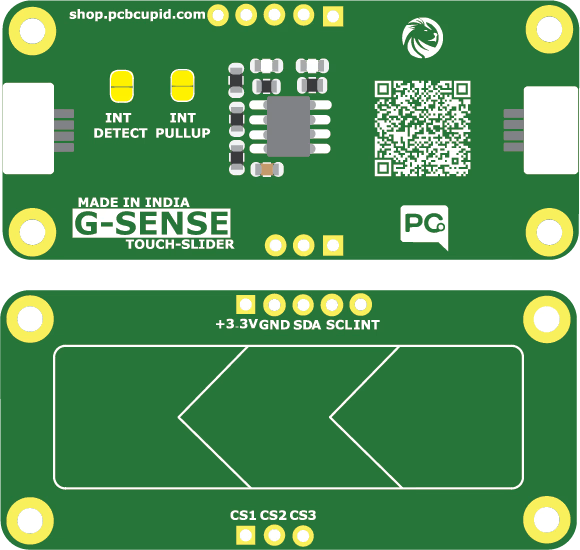
- Gsense Capacitive Touch Slider
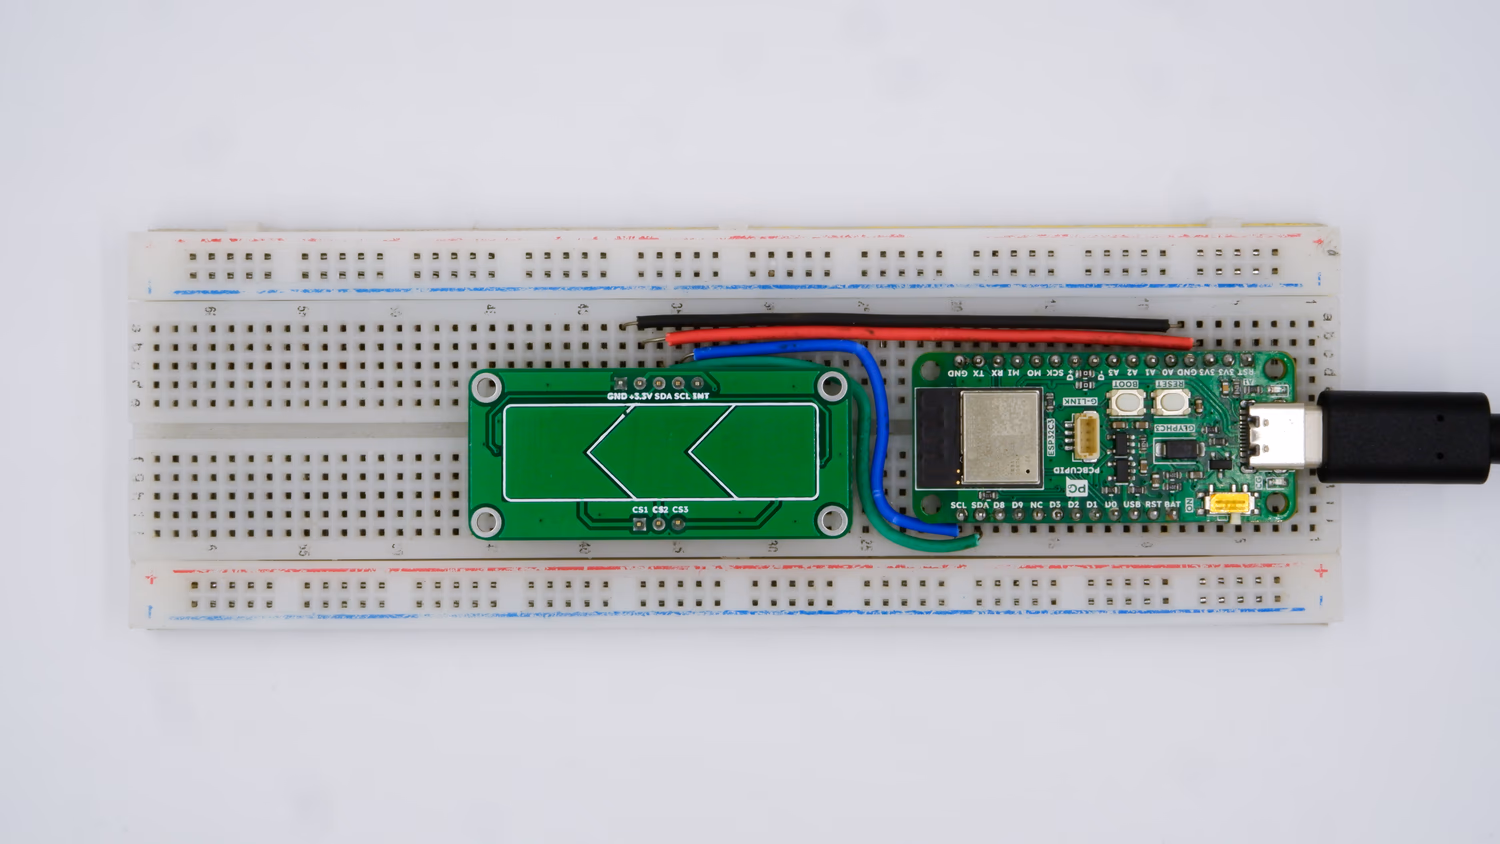
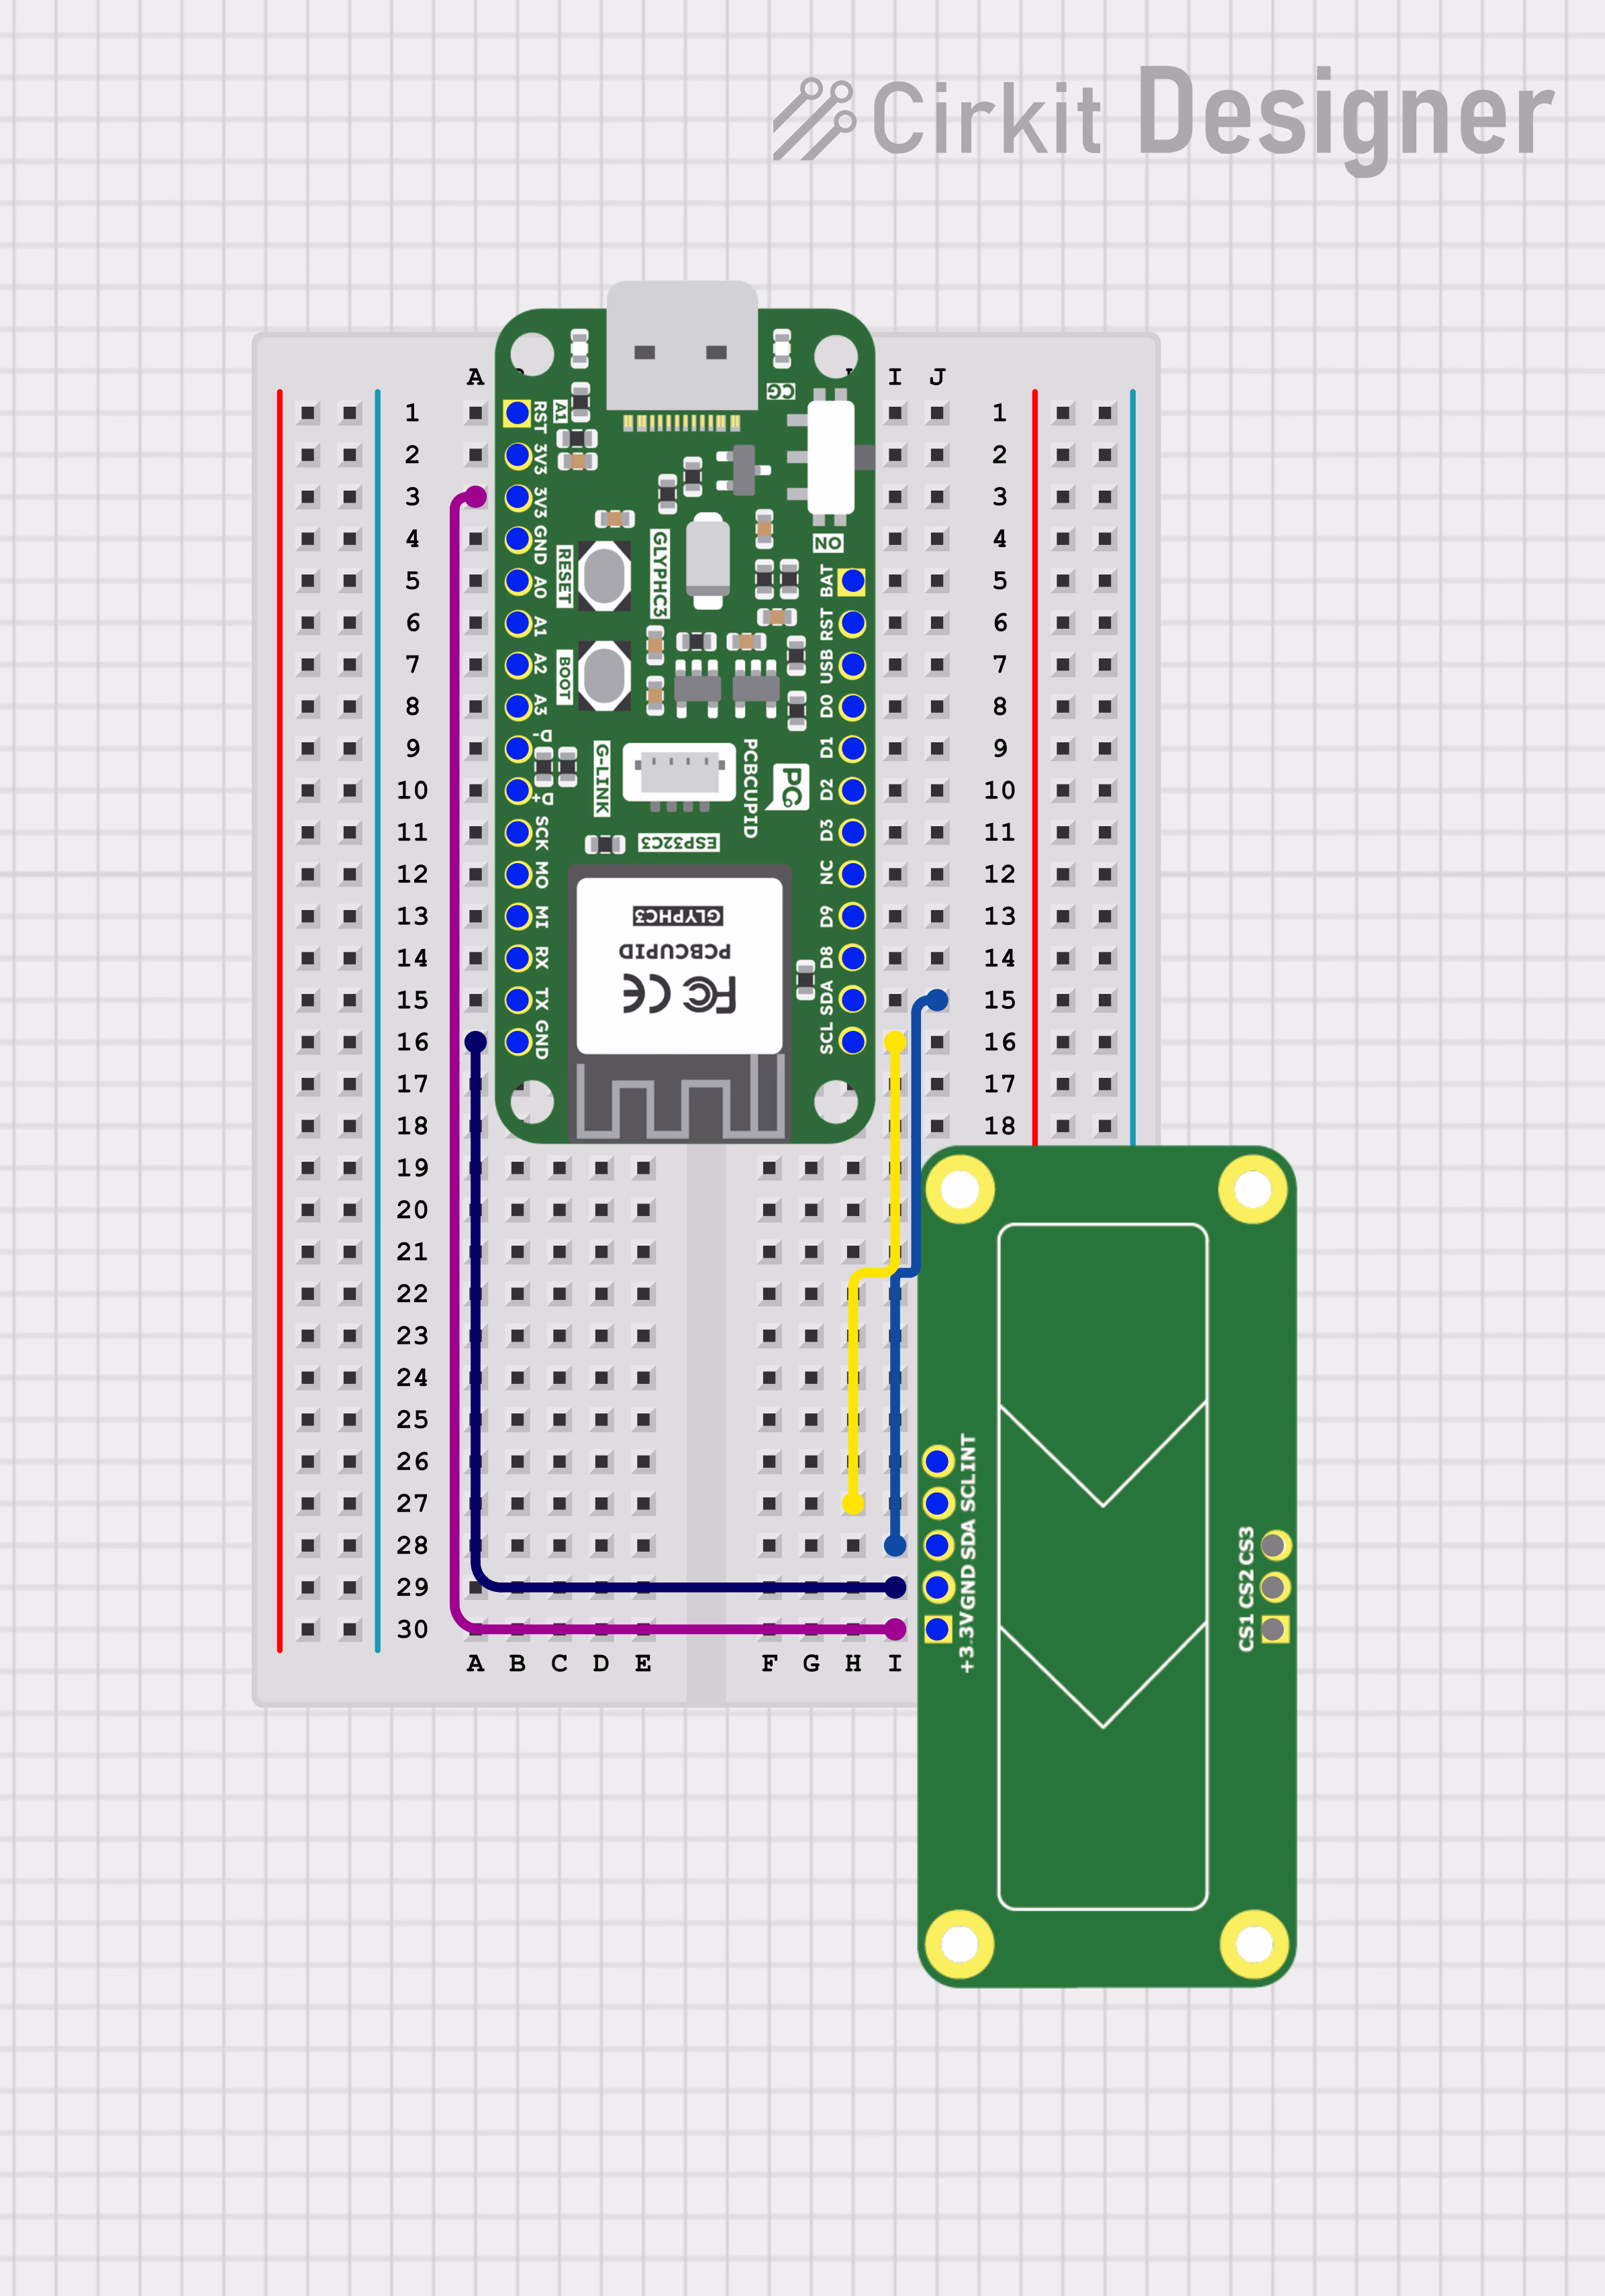
Step 2: Circuit Diagram
Step 3: Code Setup
#include <Wire.h>
#include "SparkFun_CAP1203.h" // Click here to get the library: http://librarymanager/All#SparkFun_CAP1203
CAP1203 sensor; // Initialize sensor
void setup()
{
Wire.begin(); // Join I2C bus
Serial.begin(9600); // Start serial for output
// Setup sensor
if (sensor.begin() == false)
{
Serial.println("Not connected. Please check connections and read the hookup guide.");
while (1)
;
}
else
{
Serial.println("Connected!");
}
}
void loop()
{
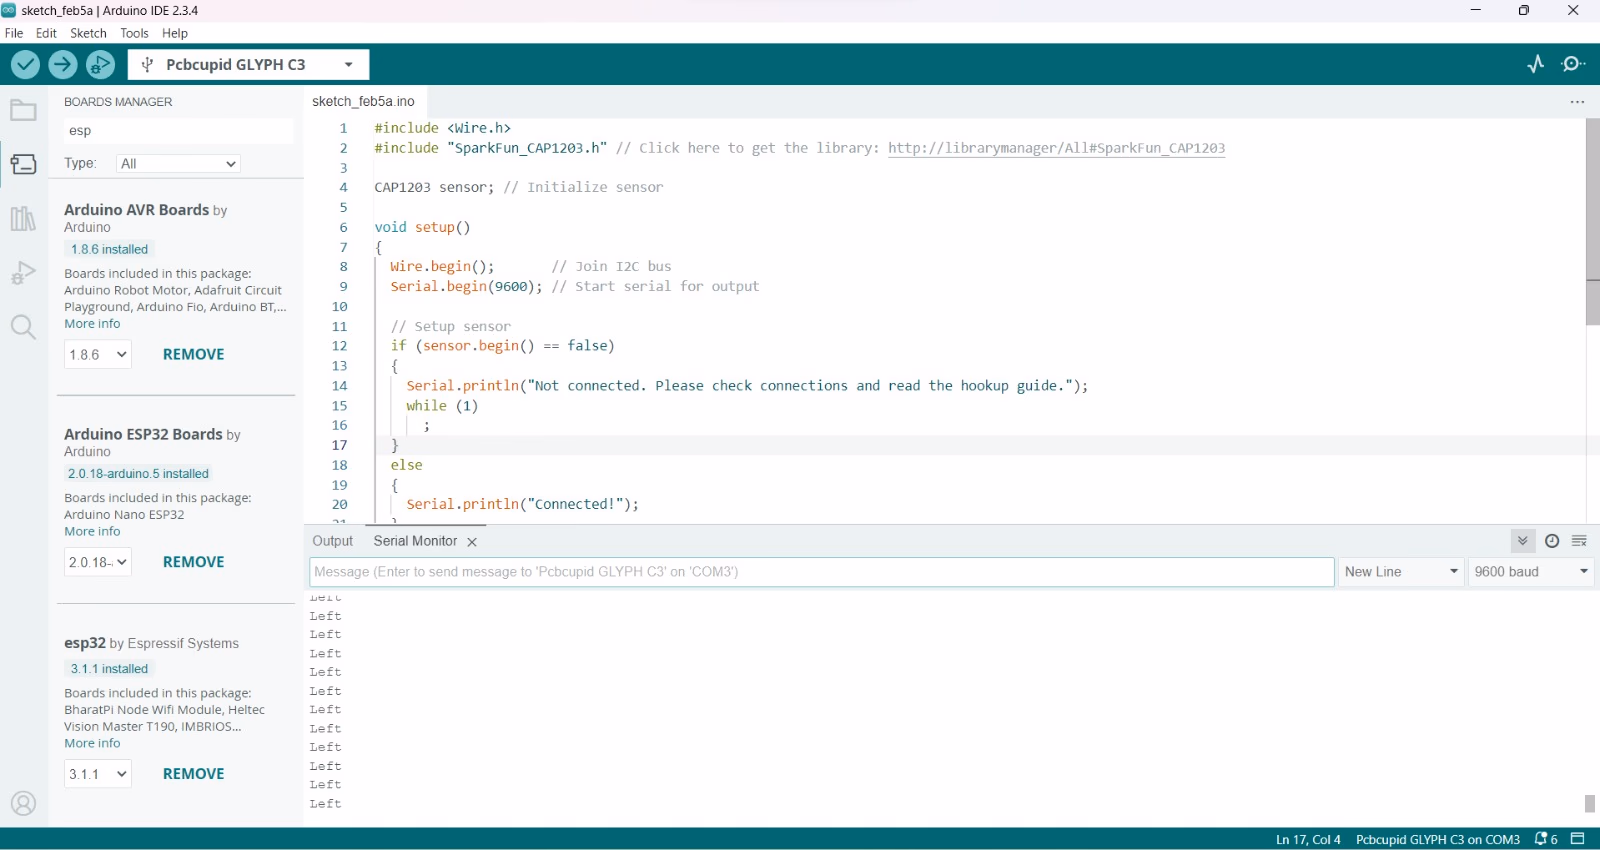
if (sensor.isLeftTouched() == true)
{
Serial.println("Left");
}
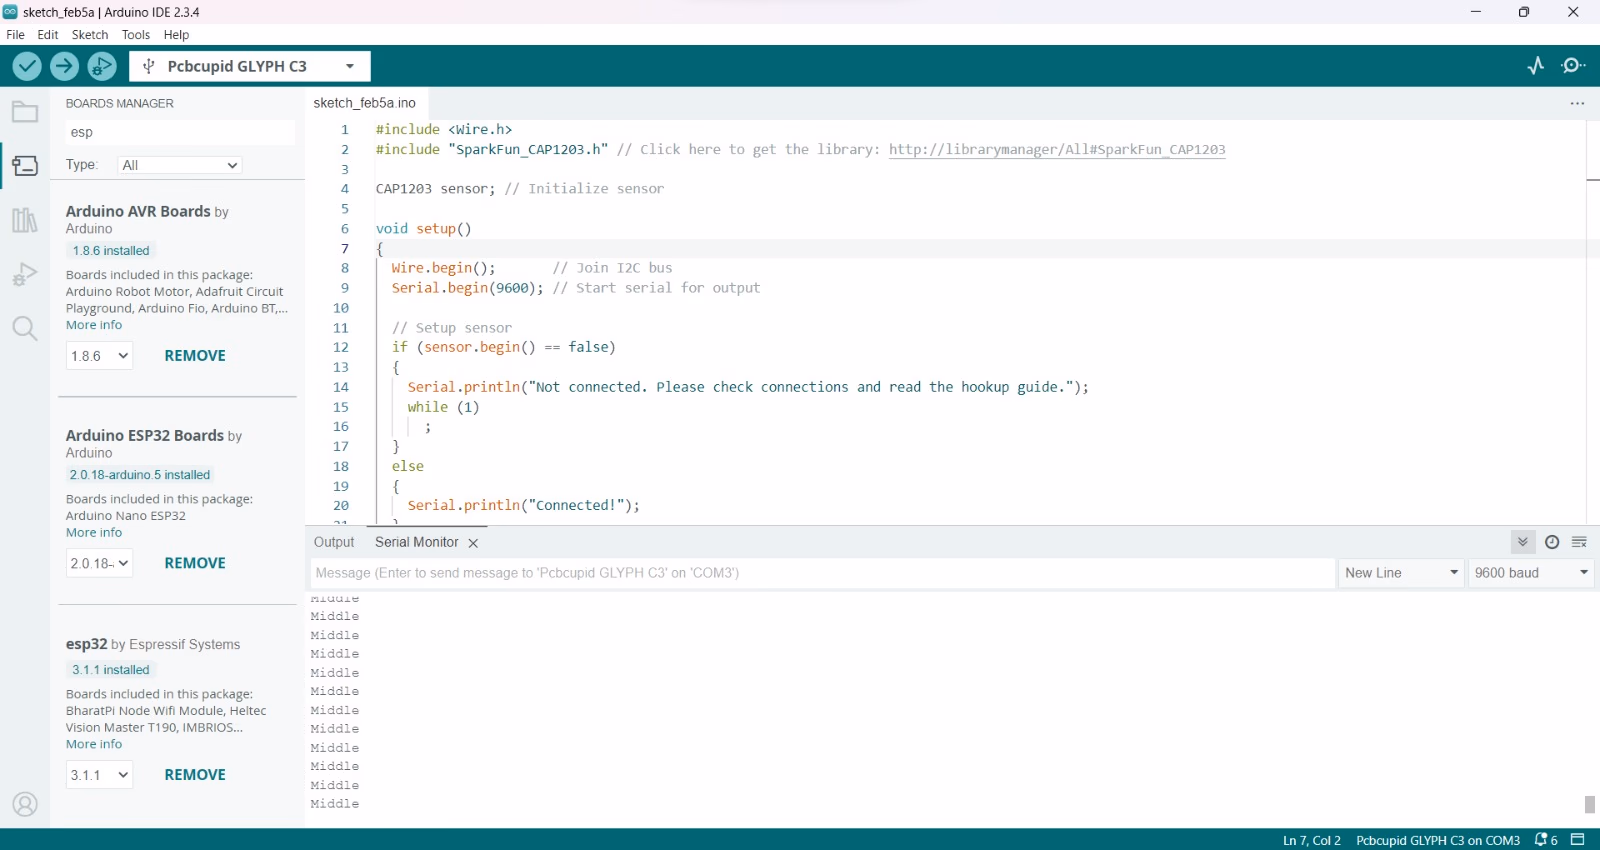
if (sensor.isMiddleTouched() == true)
{
Serial.println("Middle");
}
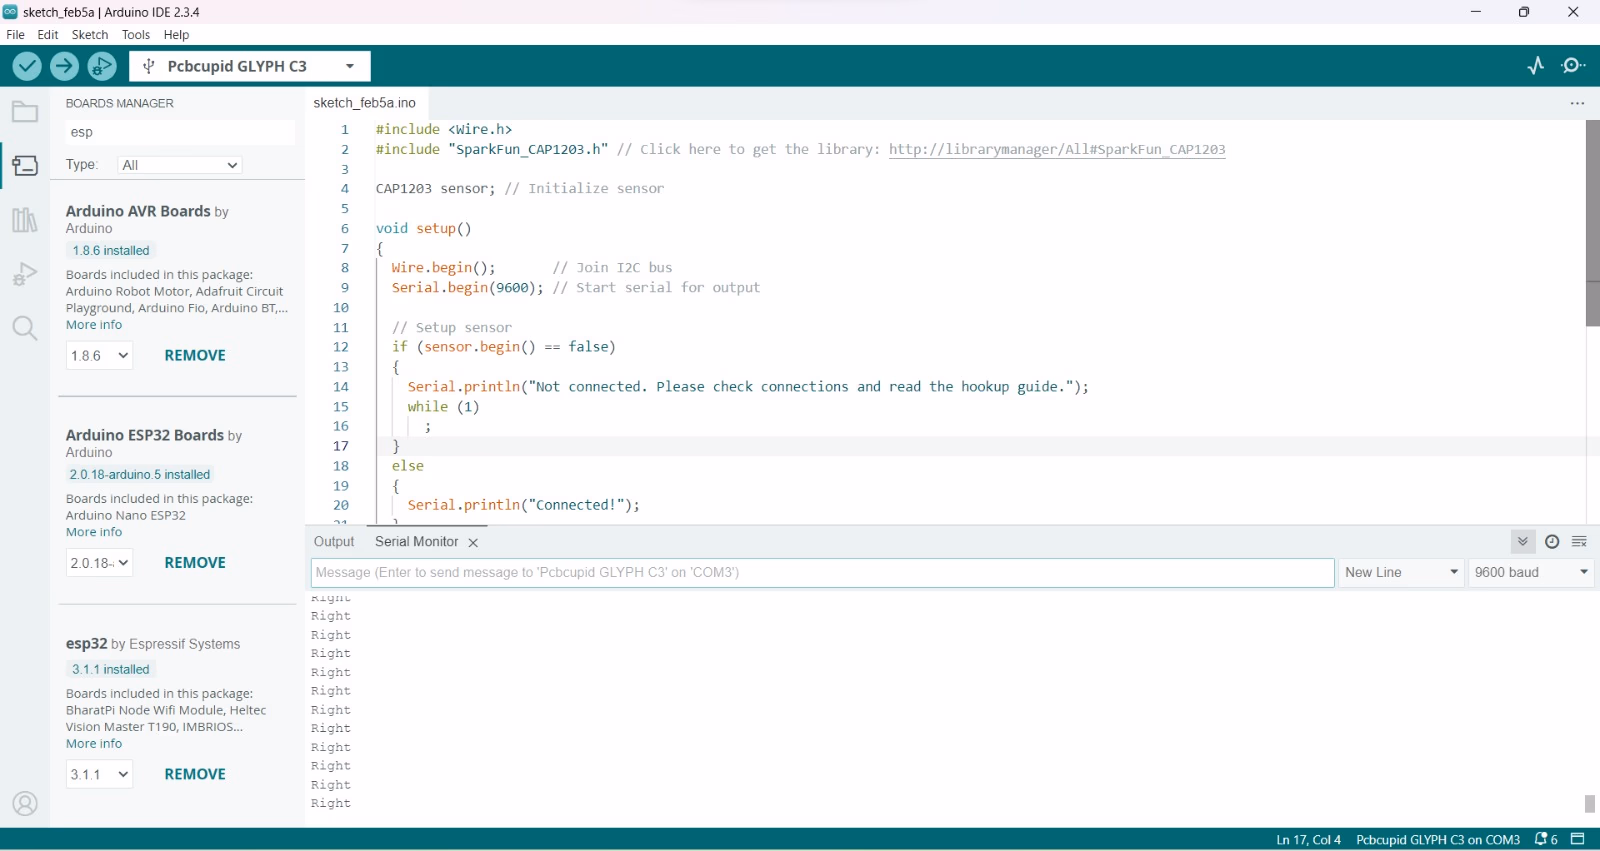
if (sensor.isRightTouched() == true)
{
Serial.println("Right");
}
}
Step 4: Upload the Code
- Connect the Board
- Connect your GLYPH board to your computer
-
Select the Board and Port
Do the following settings in your Arduino IDE, Do the following settings in your Arduino IDE,
Tools > Board > esp32 > Pcbcupid GLYPH C3
warning
For the Pcbcupid GLYPH C3 to appear under Tools > Board > esp32, the esp32 board version installed in the Arduino IDE should be greater than or equal to 3.1.0.
Tools > Portand select the port connected to your GLYPH.Tools > USB CDC on Boot >Enabled
warning
If USB CDC on BOOT not enabled, you won't be seeing any serial data on Arduino IDE.
- Upload the Code
- Click the upload button (➡️ icon) or use the shortcut
CTRL + Uin Arduino IDE to upload the code to the board.
Step 5: Observe the Output
When you touch different sides of the Sensor, you can see the Serial Monitor Output as follows: