> ## Documentation Index
> Fetch the complete documentation index at: https://learn.pcbcupid.com/llms.txt
> Use this file to discover all available pages before exploring further.
> Connect the BH1750 Adafruit light sensor to a Glyph development board over I2C using the Glink/Qwiic connector and read ambient lux values.
# BH1750 Adafruit Sensor
# Integrating Adafruit with GLYPH Boards
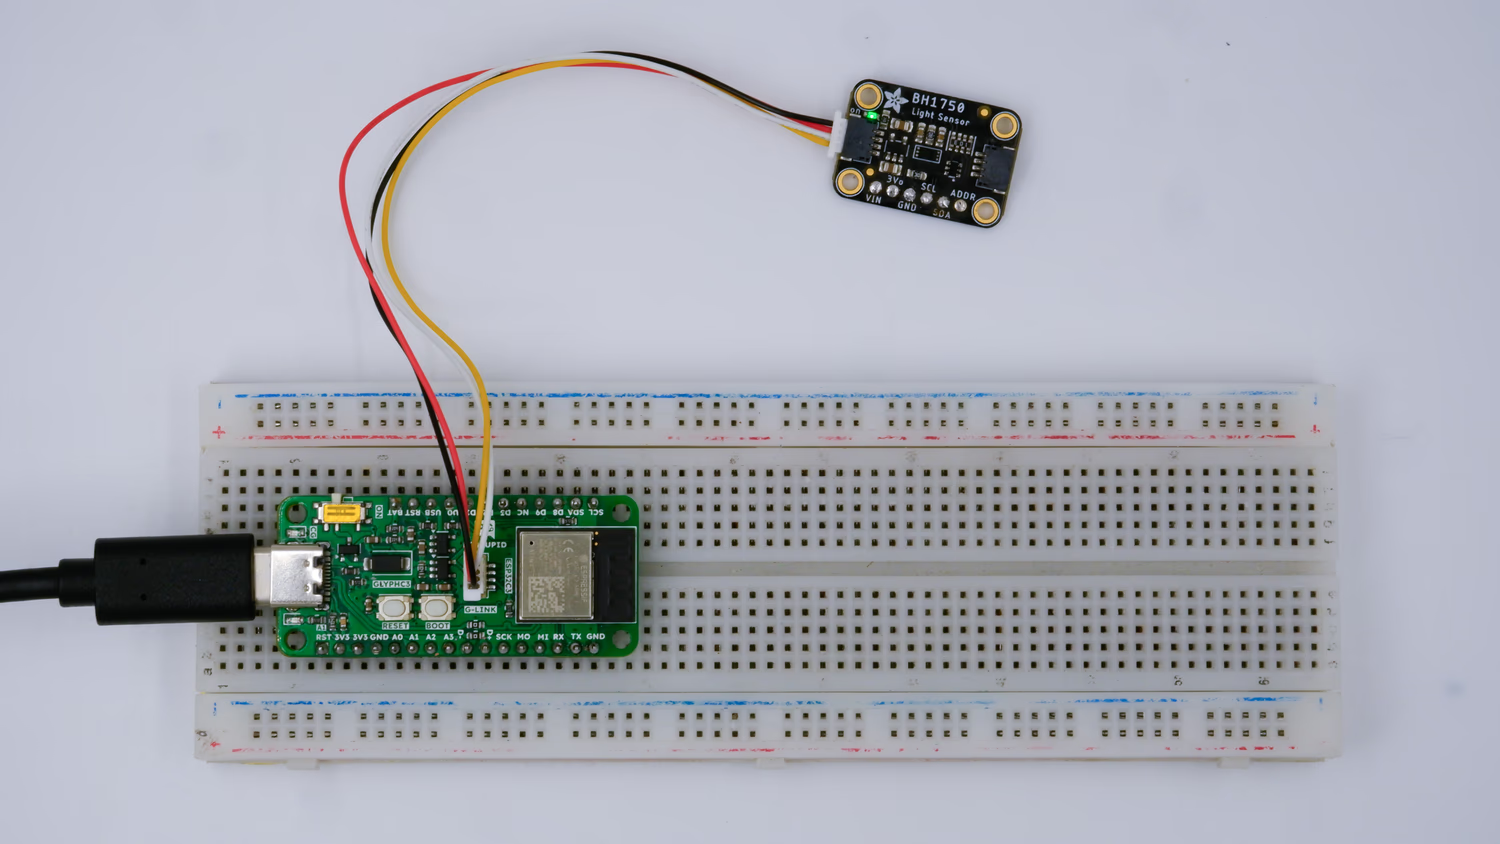
This guide helps you integrate the BH1750 light sensor with GLYPH Boards assuming you are using [GLYPH-C3](https://learn.pcbcupid.com/boards/glyph-c3/overview) (but any [GLYPH development board](https://shop.pcbcupid.com/product-category/development-boards/) from the ESP32 Series should work). Along with that it should prove to be a good example for using [G-LINK](https://learn.pcbcupid.com/boards/needs/glink) that comes as a part of GLYPH board and also shows cross compatibility between [G-LINK](https://learn.pcbcupid.com/boards/needs/glink) and [QWIIC](https://www.sparkfun.com/qwiic) Connector. The provided code in this example should reads light levels and prints them to the Serial Monitor. We'll walk you through setting up the sensor and modifying the code.
## Step 1: Hardware Required
* Glyph Boards
* BH1750 light sensor
* GLINK / QWIIC connector
* Breadboard (optional)
## Step 2: Circuit Diagram
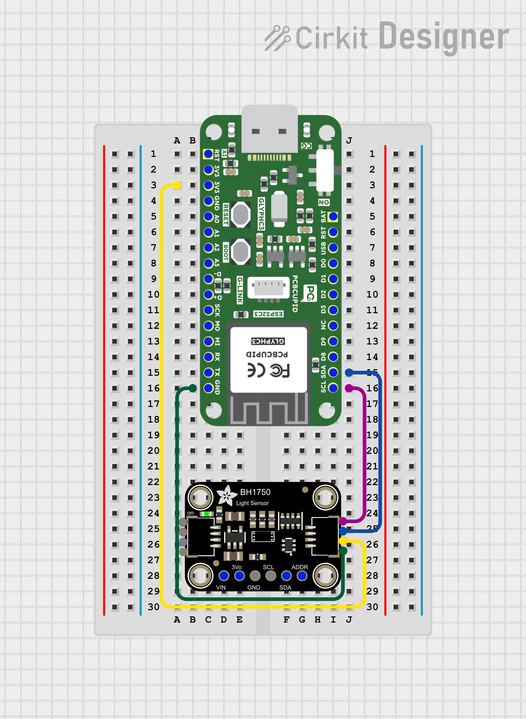
Connect the BH1750 sensor to the Glyph boards using the following pin configurations:
* **VCC to 3.3V** (on the Adafruit board)
* **GND to GND**
* **SCL to SCL**
* **SDA to SDA**
## Step 3: Code setup
1. **Open Arduino IDE.**
2. **Copy and paste the following code into the Arduino IDE:**
```cpp theme={null}
#include
#include
BH1750 lightMeter;
void setup()
{
Serial.begin(9600);
// Initialize the I2C bus (BH1750 library doesn't do this automatically)
Wire.begin();
lightMeter.begin();
Serial.println(F("BH1750 begin"));
}
void loop()
{
float lux = lightMeter.readLightLevel();
Serial.print("Light: ");
Serial.print(lux);
Serial.println(" lx");
delay(1000);
}
```
### Explanation
* **Wire.begin():** On the GLYPH boards, you can use the default `Wire.begin()` to initialize the I2C bus, or specify the SDA and SCL pins manually if needed.
* **Sensor Setup:** The `lightMeter.begin()` function initializes the BH1750 sensor.
## Step 4: Upload the Code
1. **Connect the Board**
* Connect your GLYPH board to your computer
2. **Select the Board and Port**
Do the following settings in your Arduino IDE,
Do the following settings in your Arduino IDE,
* `Tools > Board > esp32 > Pcbcupid GLYPH C3`
For the `Pcbcupid GLYPH C3 ` to appear under `Tools > Board > esp32`, the esp32 board version installed in the Arduino IDE should be greater or equal to 3.1.0.
* `Tools > Port` and select the port connected to your GLYPH.
* `Tools > USB CDC on Boot >` ***Enabled***
If `USB CDC on BOOT` not enabled, you won't be seeing any serial data on Arduino IDE.
3. **Upload the Code**
* Click the upload button (➡️ icon) or use the shortcut `CTRL + U` in Arduino IDE to upload the code to the board.
## Step 5: Check the Output on Serial Monitor
1. **Open the Serial Monitor**
* After uploading the code, open the Serial Monitor by clicking on the magnifying glass icon in the top right corner of Arduino IDE or by going to `Tools > Serial Monitor`.
2. **Set the Baud Rate**
* Ensure the baud rate is set to `9600`.
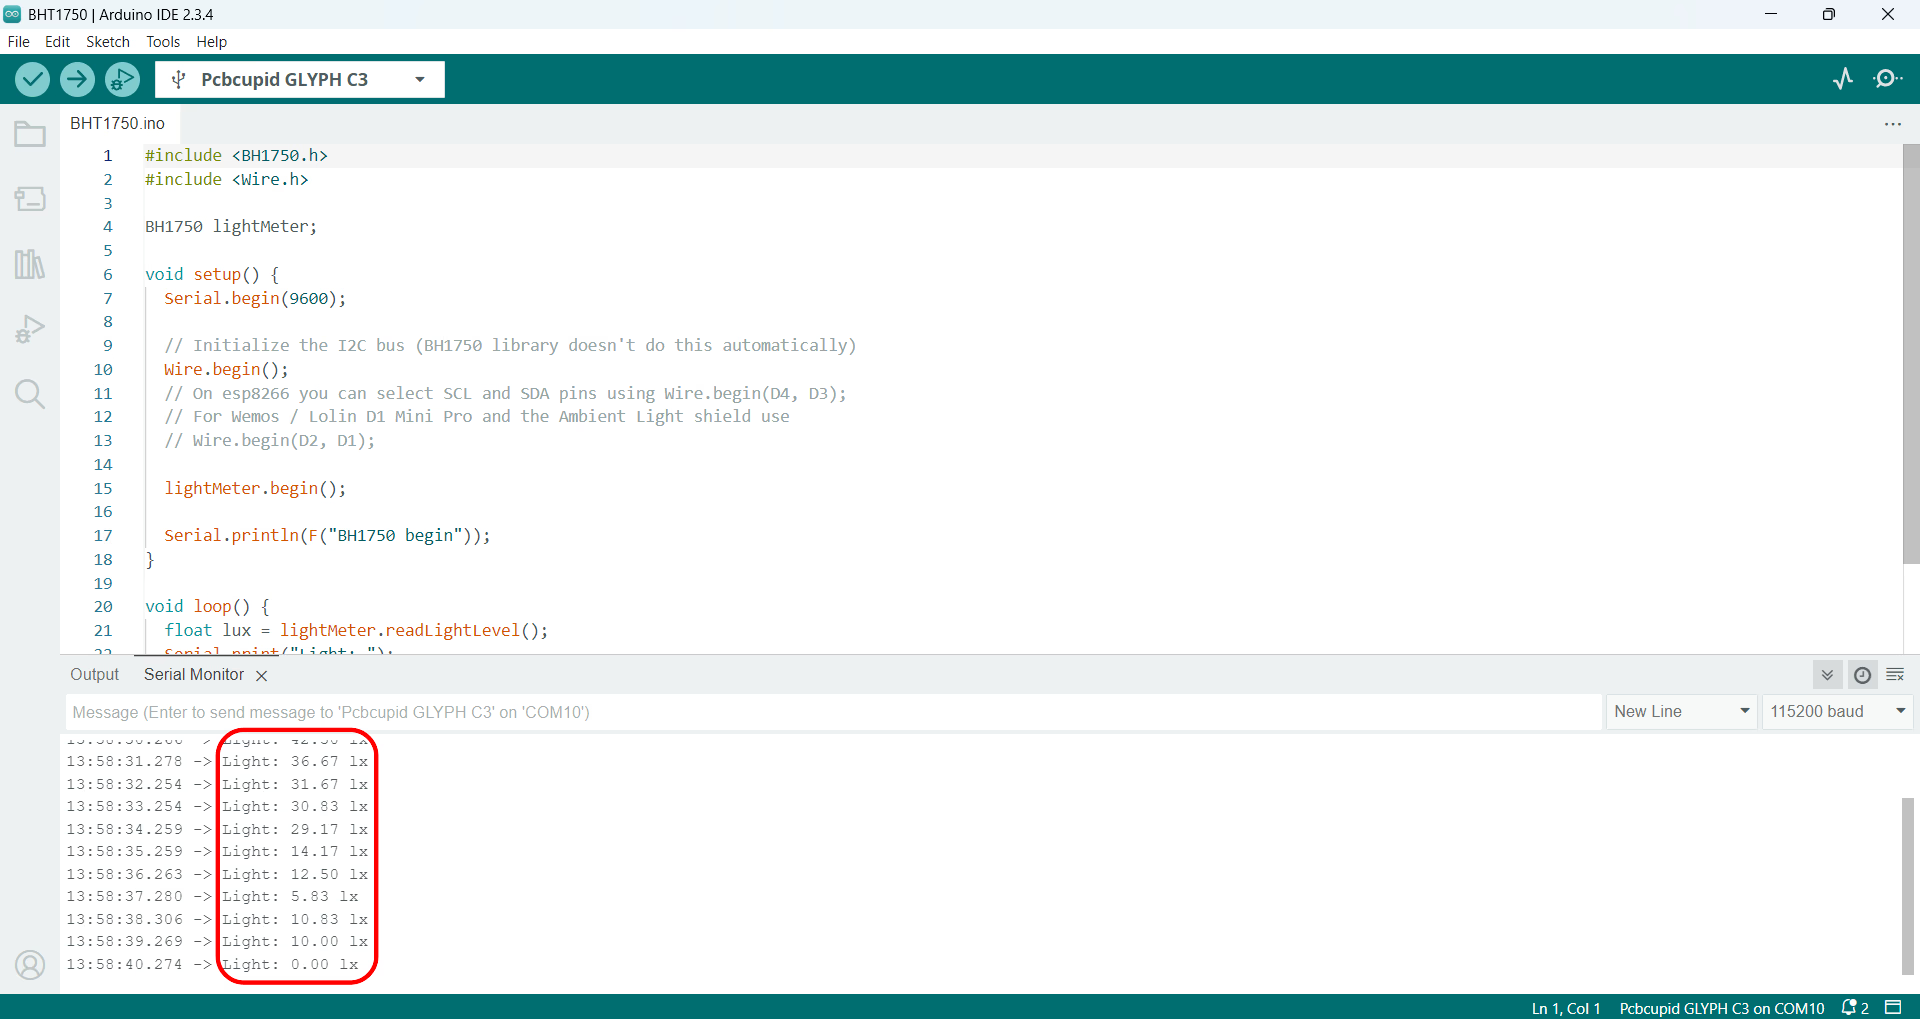
3. **Read the Light Levels**
* The Serial Monitor will display light levels in lux measured by the BH1750 sensor. The output should look something like this: