> ## Documentation Index
> Fetch the complete documentation index at: https://learn.pcbcupid.com/llms.txt
> Use this file to discover all available pages before exploring further.
> Train and deploy a gesture recognition model on ESP32 boards using Edge Impulse, covering data collection, model training, and on-device inference.
# Edge Impulse Gesture Recognition
# Edge Impulse Gesture Recognition
Build a gesture detection system that runs fully offline on your ESP32. This guide uses Edge Impulse to train a model and export it as a ready-to-use Arduino library.
## How it Works? (The Simple Version)
1. **Data**: You record motion data (gestures) using your smartphone or sensor.
2. **Train**: Edge Impulse uses that data to teach an AI model to recognize those patterns.
3. **Deploy**: You export the model as code and upload it to your ESP32. It then runs locally without needing the internet.
***
## What You Need
Before starting, make sure you have your hardware and software environment ready.
### Hardware Required
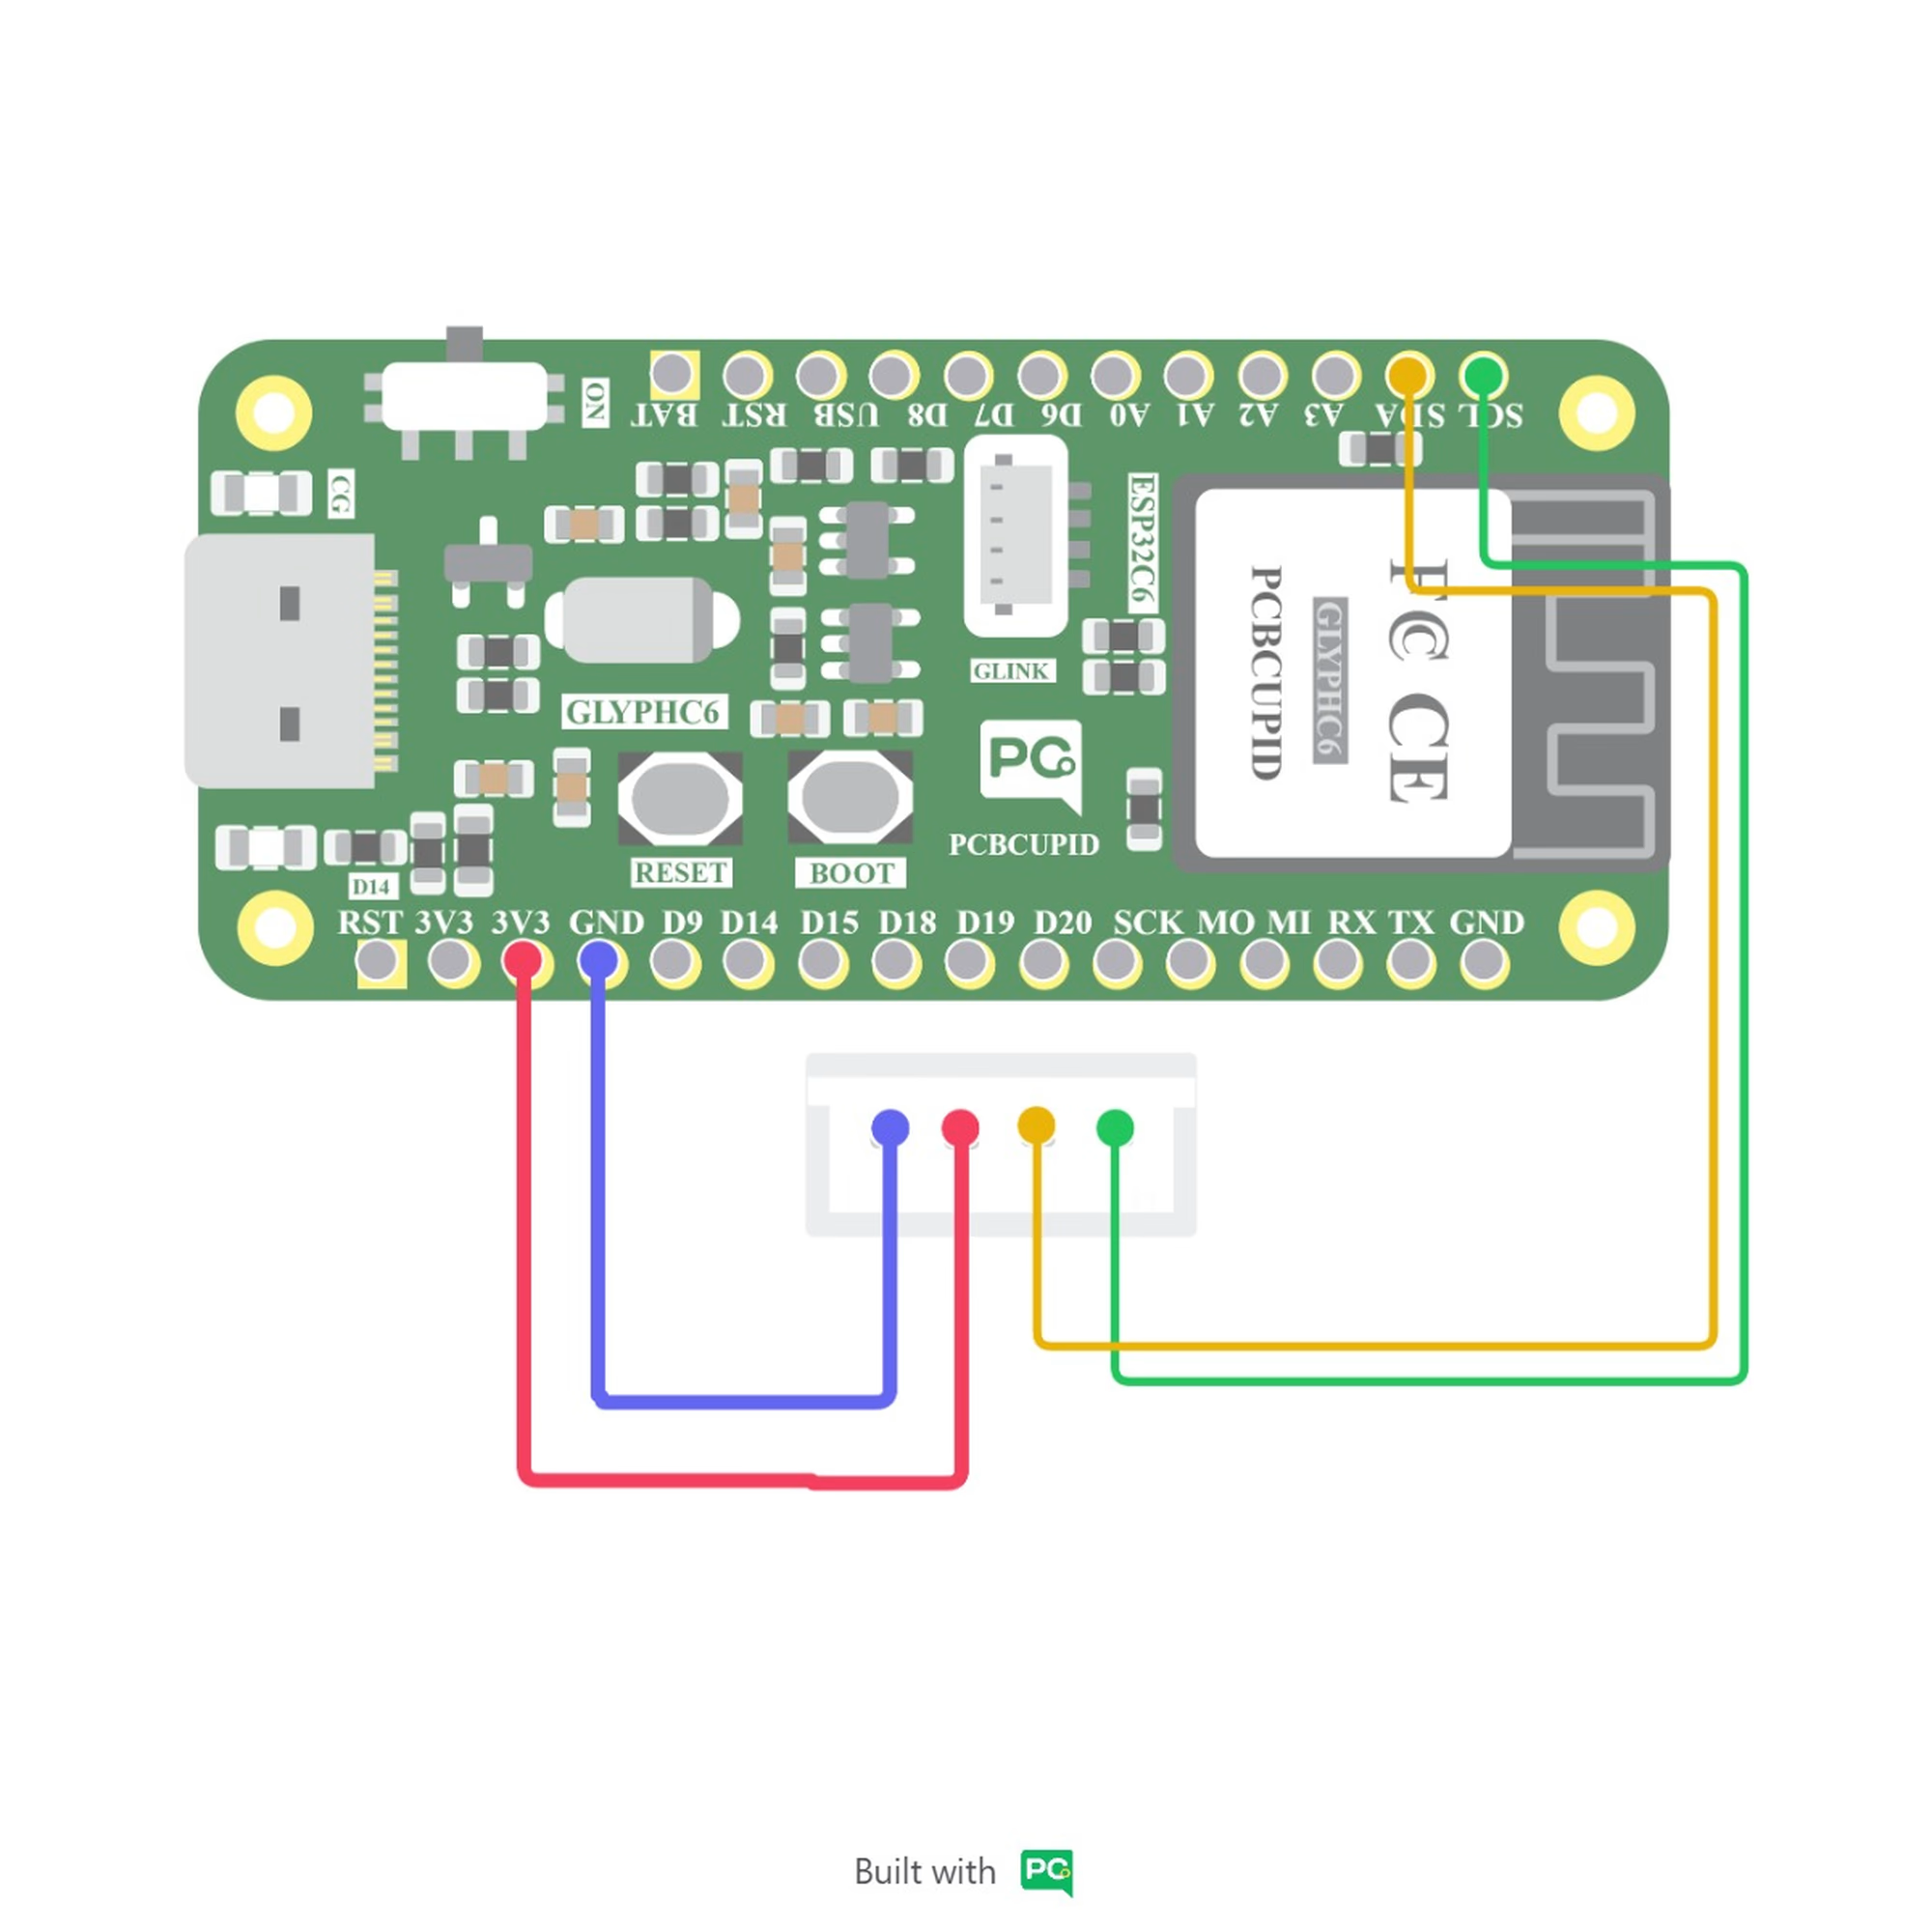
* **ESP32 DevKit** (or any ESP32 board).
* **IMU Sensor** (e.g., MPU6050 or LSM6DS3).
* **Smartphone** (To record initial data).
* **USB Cable** (For power and communication).
### Software
* **Arduino IDE**: To upload the code.
* **ESP32 Board Package**: Installed via Arduino Boards Manager.
* **Edge Impulse Account**: To train and export your model.
***
## Software Setup
### Step 1: Create a Project
Go to [edgeimpulse.com](https://edgeimpulse.com), log in, and create a new project named something like **"Gesture Detection"**.

### Step 2: Connect Your Phone
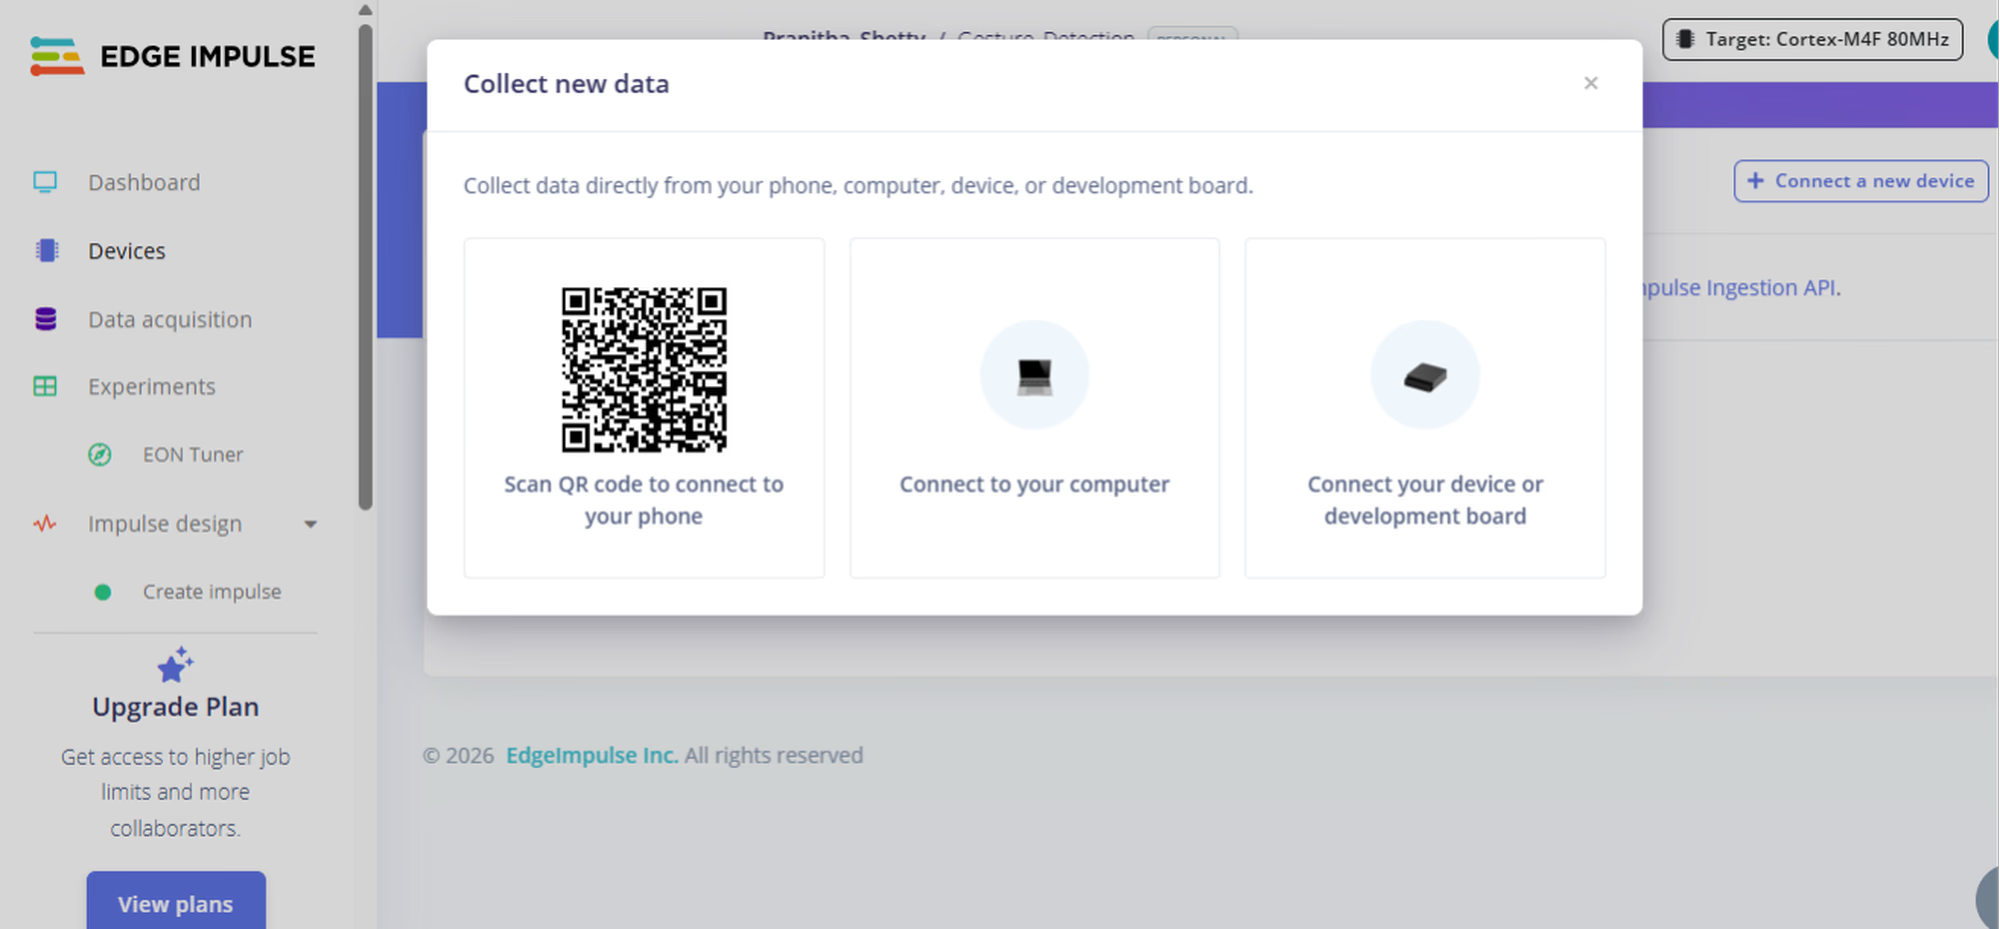
In the **Devices** tab, connect your smartphone by scanning the QR code. Your phone now acts as the motion sensor for data collection.
### Step 3: Collect Data
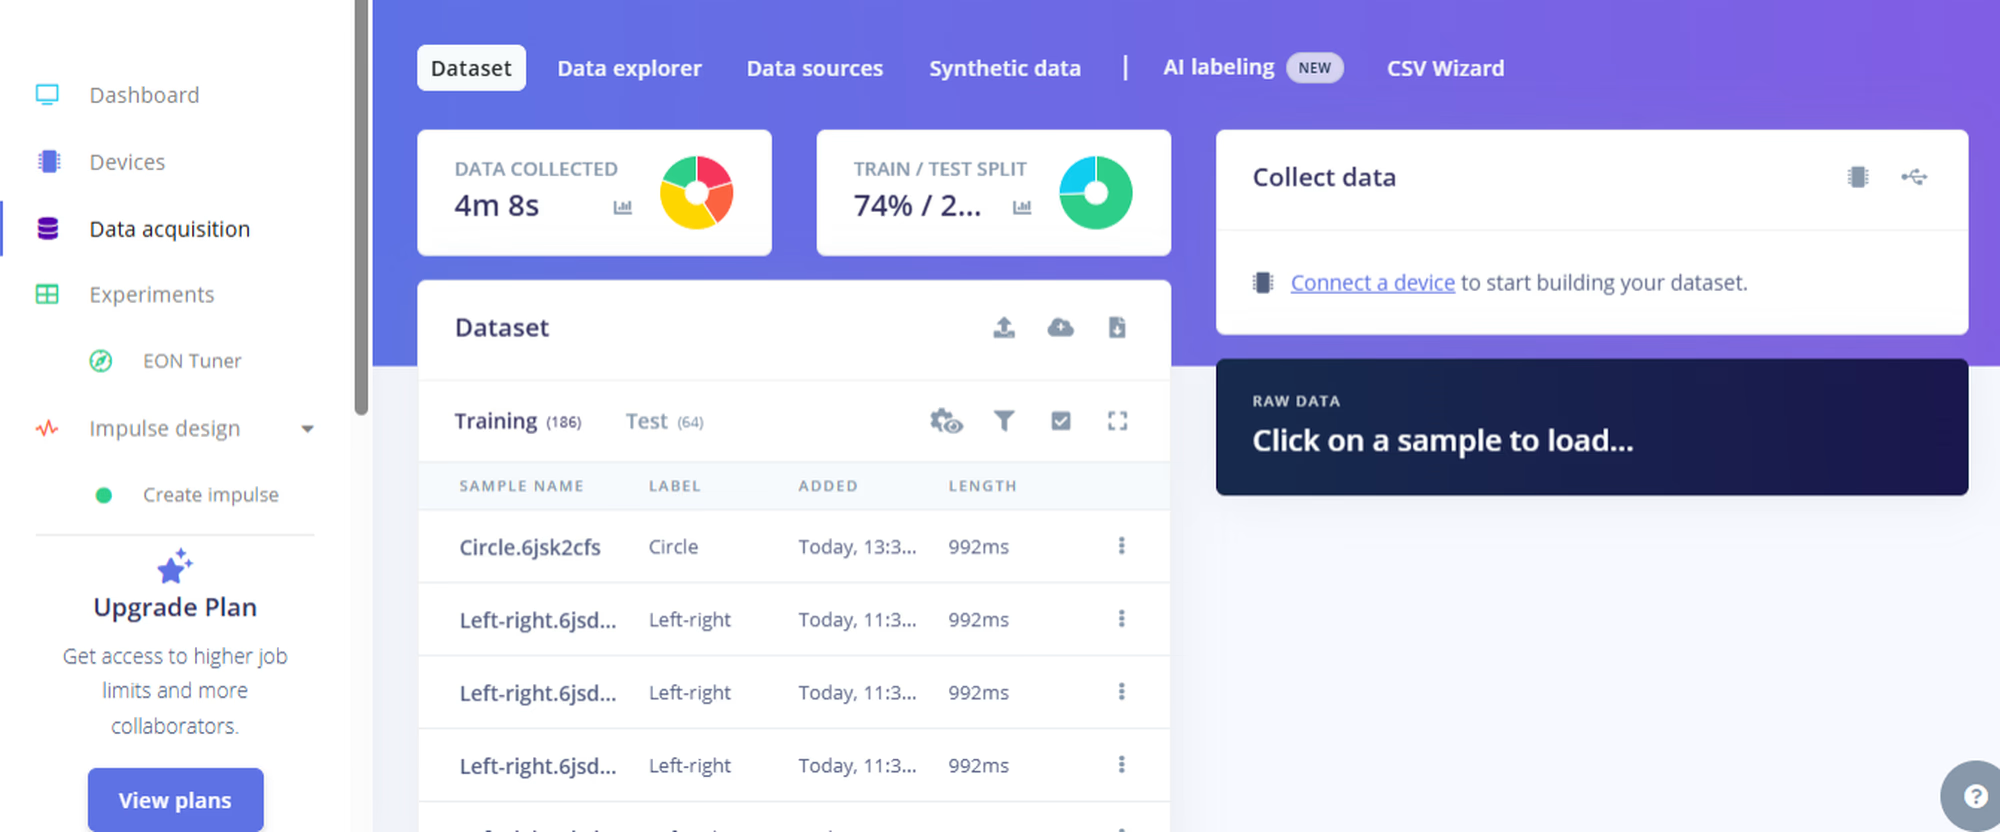
Go to **Data Acquisition**, type a label like `"up-down"`, hit **Start Sampling**, and perform the gesture. Repeat for each gesture you want to teach. Keep the data balanced and save some as **Test Data**.
### Step 4: Design the Impulse
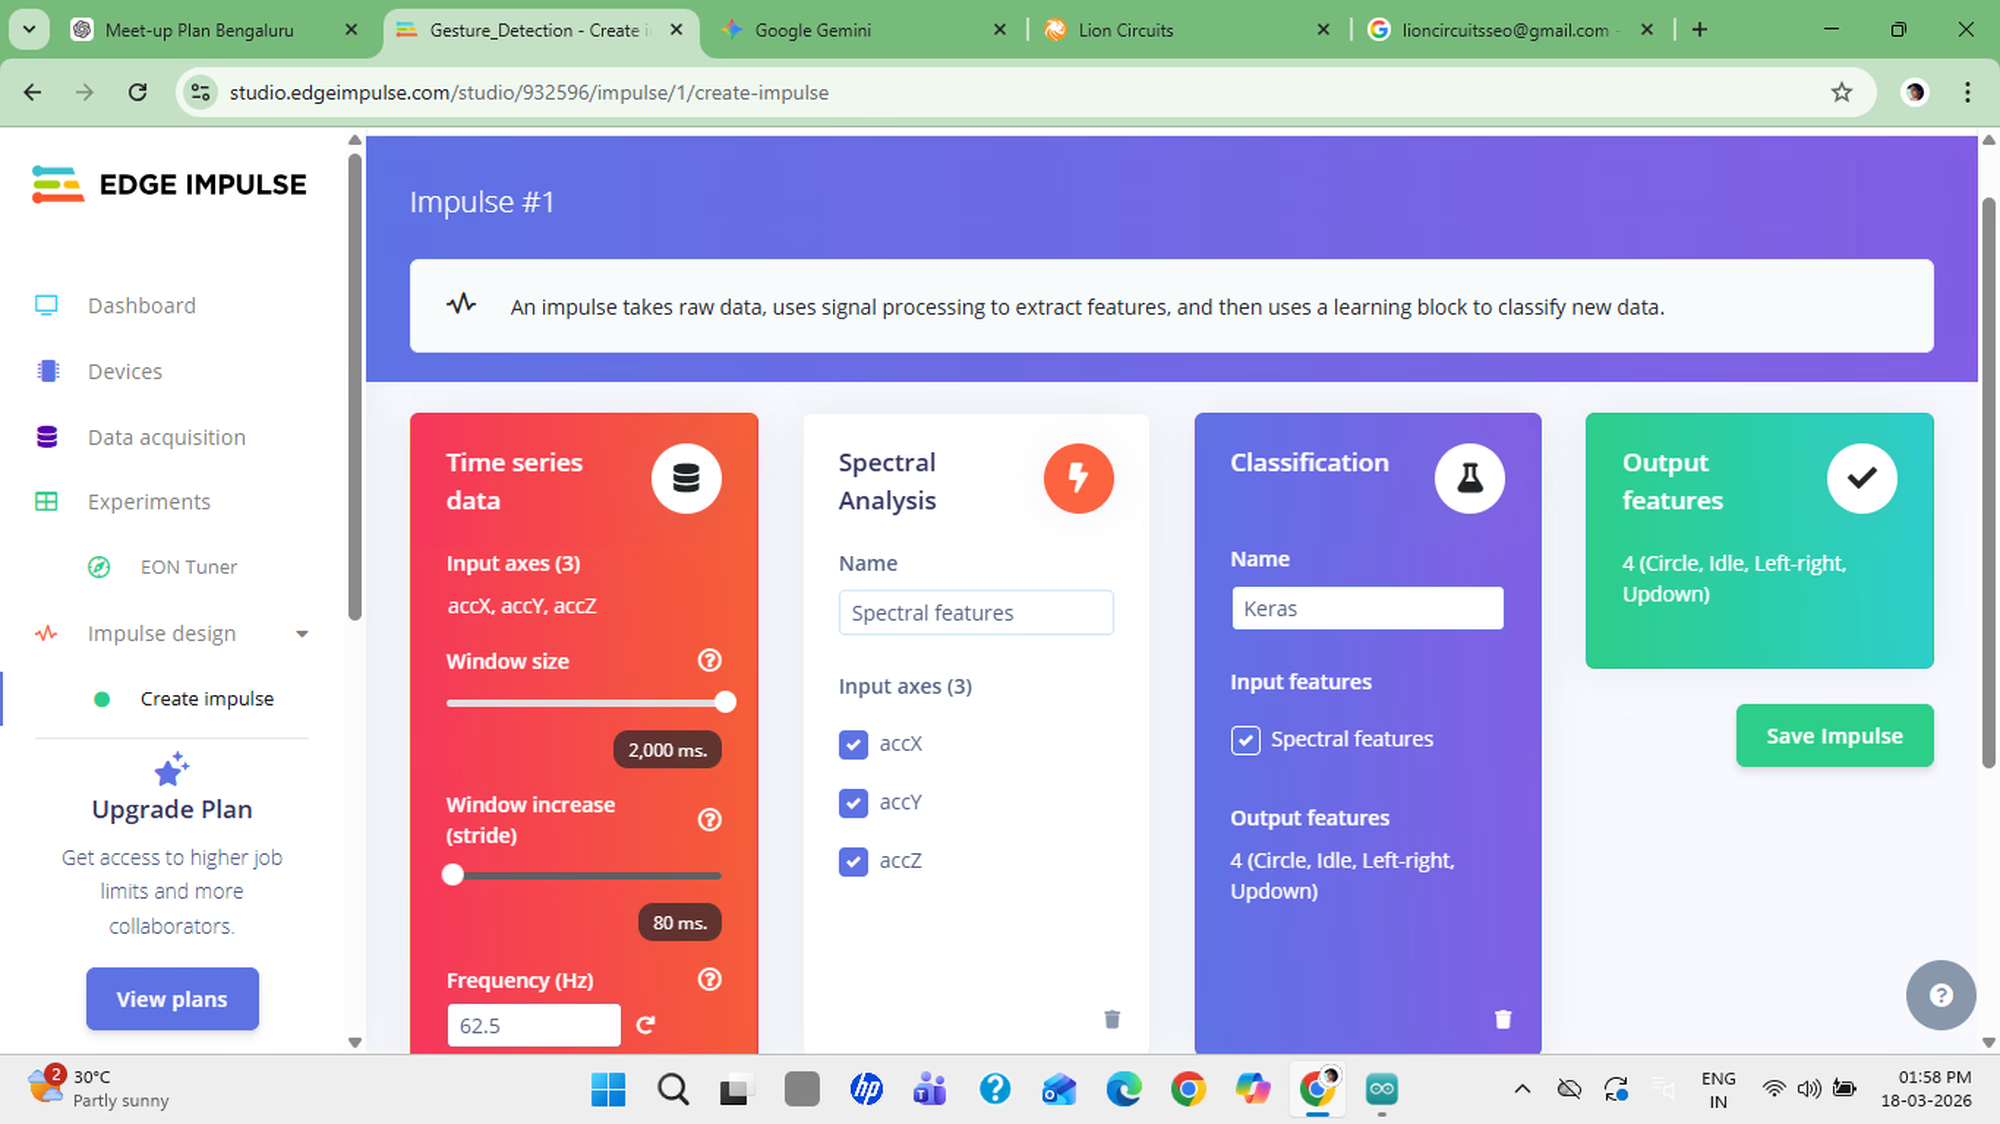
Go to **Impulse Design**:
1. Set **Window Size** to \~2 seconds.
2. Add **Spectral Analysis** as the processing block.
3. Add **Neural Network** as the learning block.
### Step 5: Check Accuracy
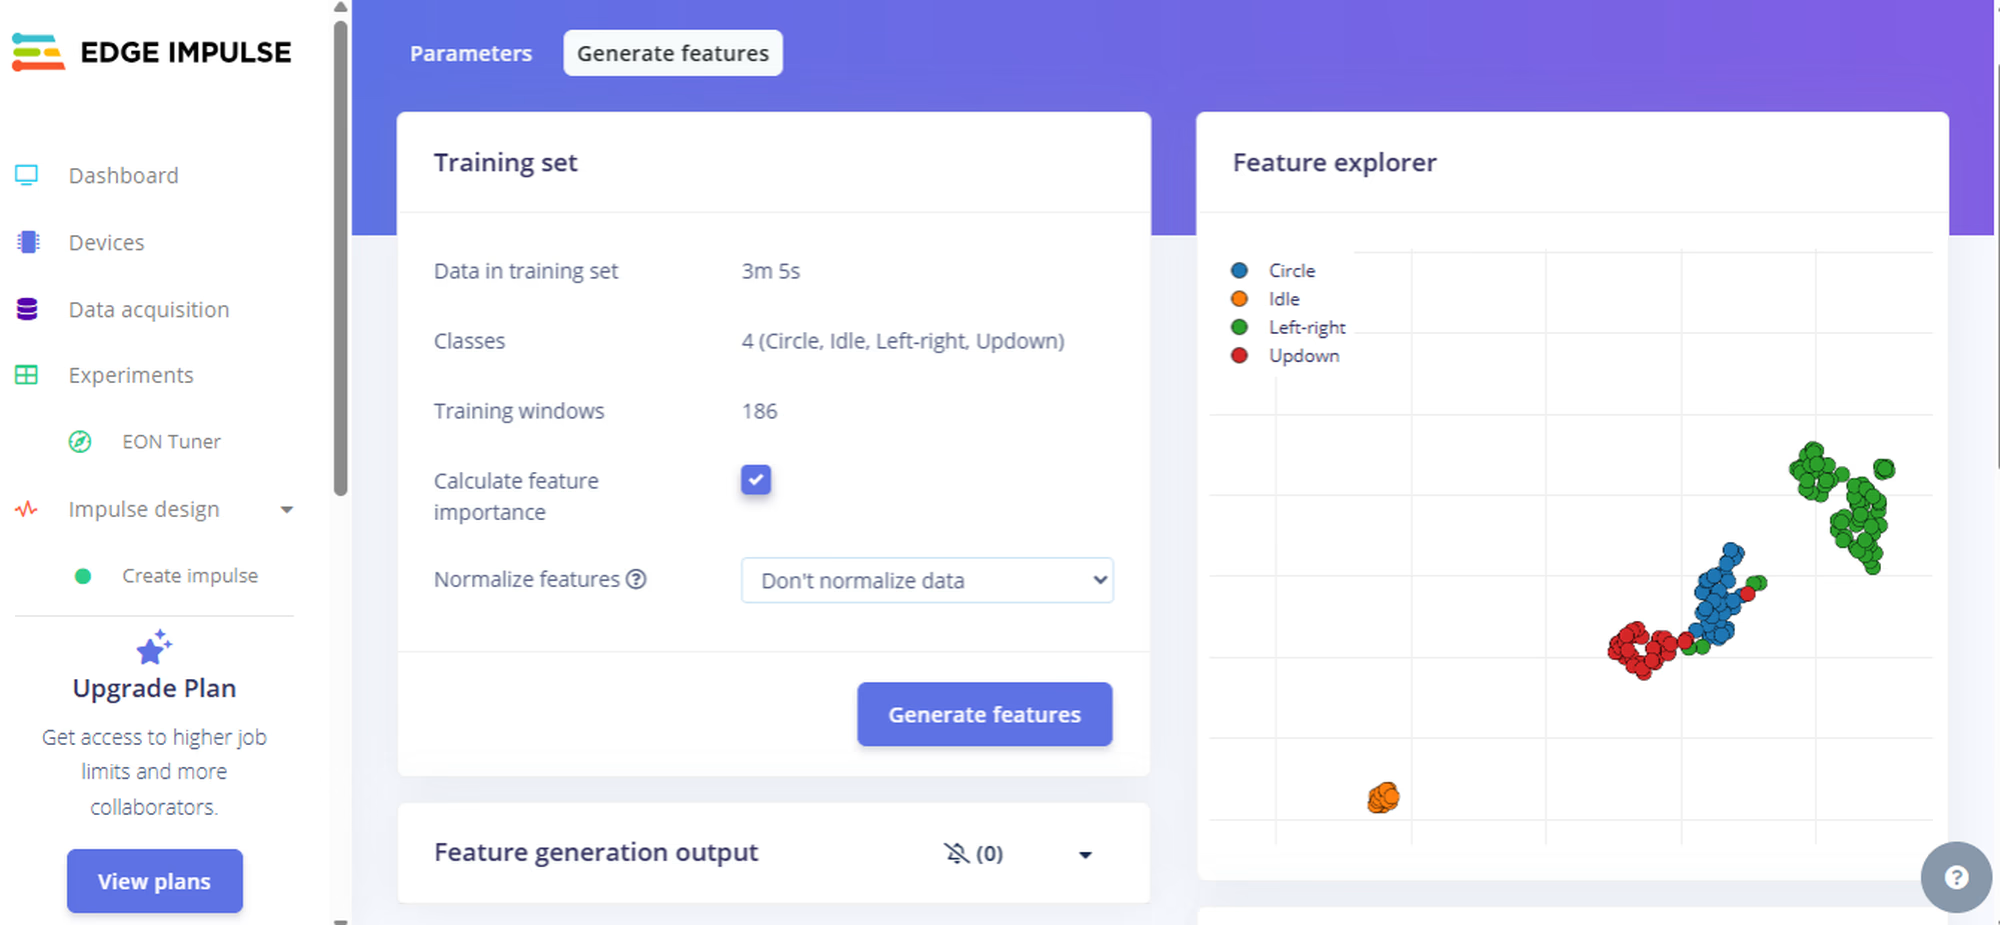
Open **Feature Explorer** and check that your gestures form separate clusters. The more separated they are, the better your accuracy will be.
***
### Step 6: Train the Model
Go to the **Classifier** tab and hit **Start Training**. Expect around 80–90% accuracy.
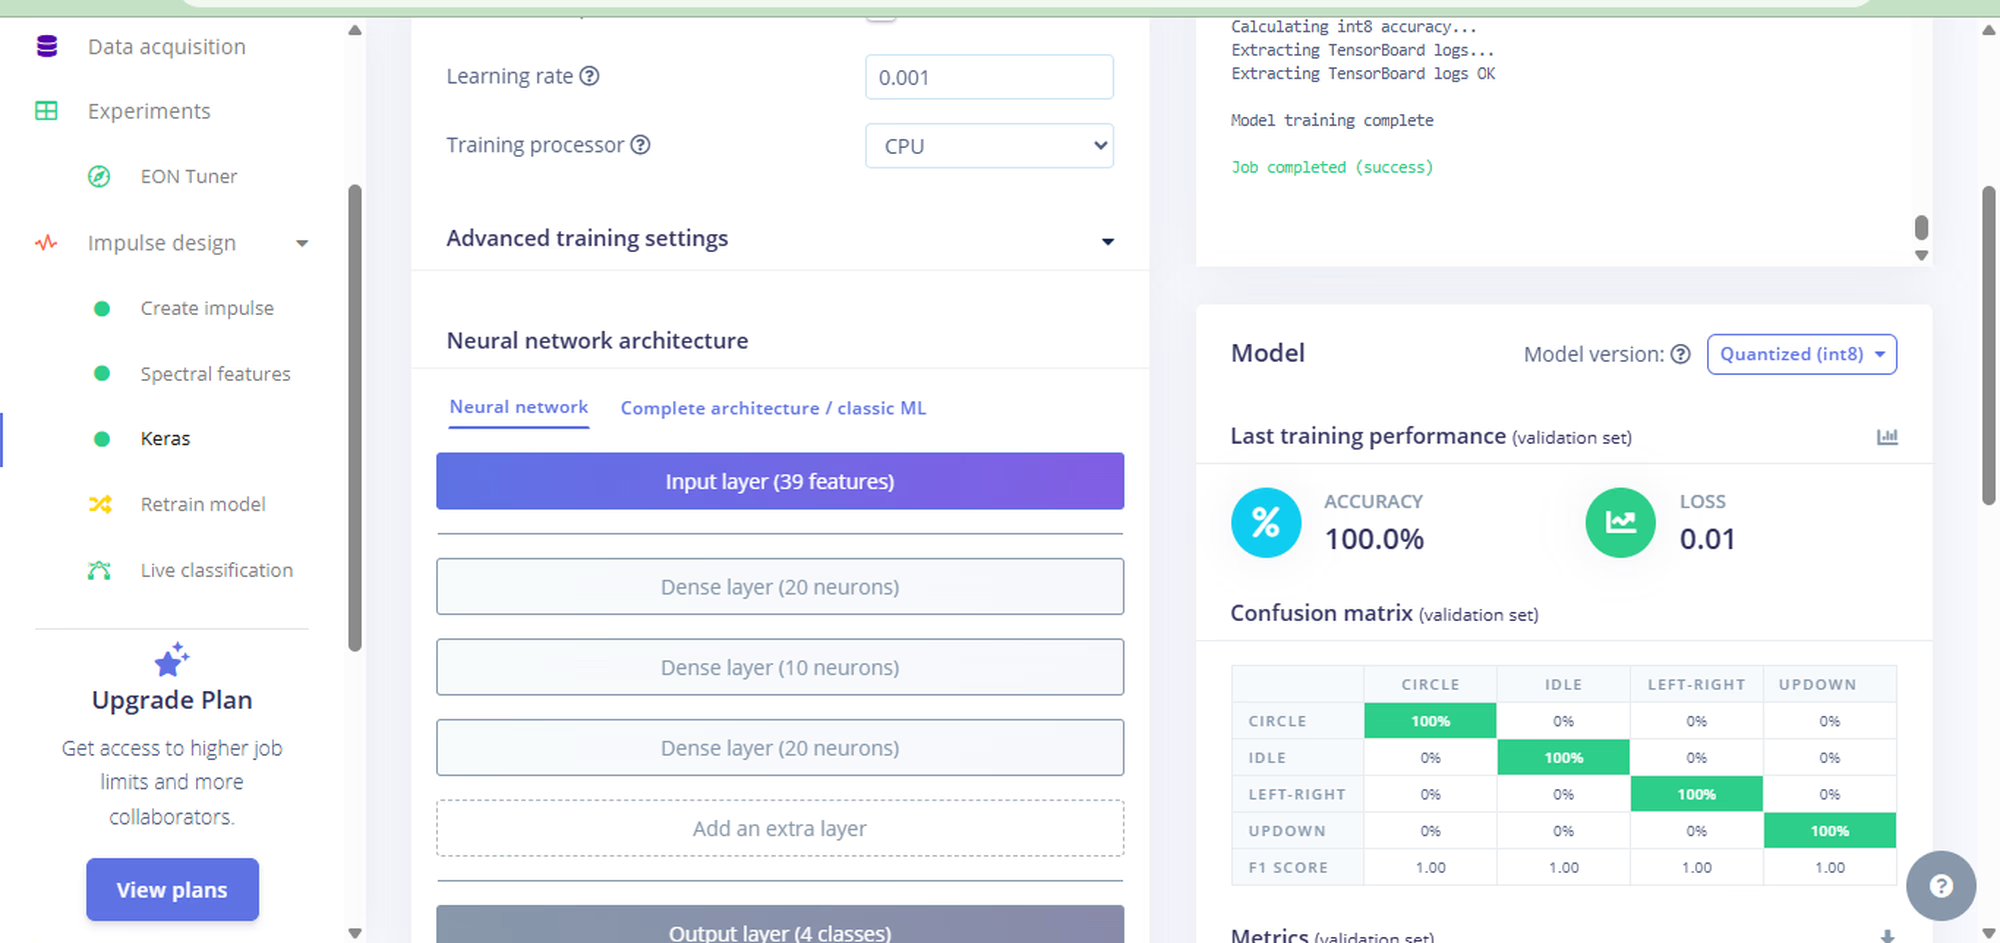
If accuracy is low, collect more data or be more consistent with your gestures.
### Step 7: Export as Code
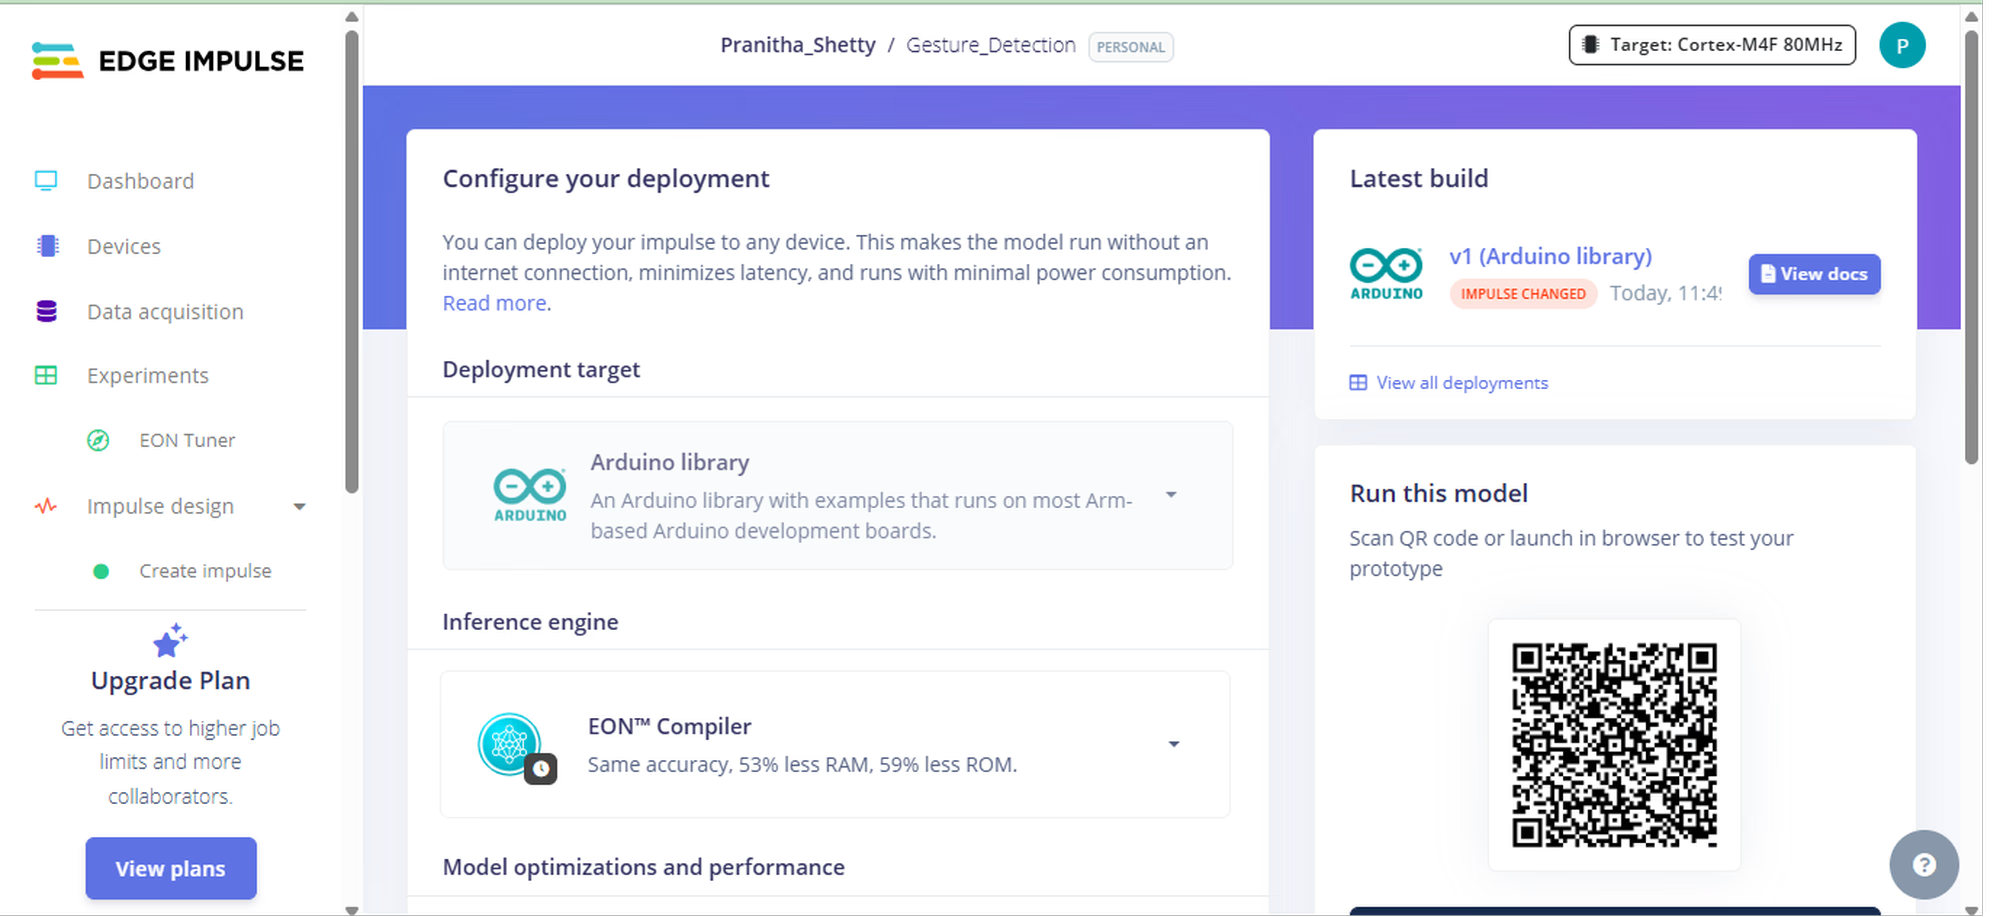
Go to **Deployment**, select **Arduino Library**, and download the ZIP file. This is your AI model exported as standard C++ code.
### Step 8: Upload to ESP32
1. Extract the ZIP file.
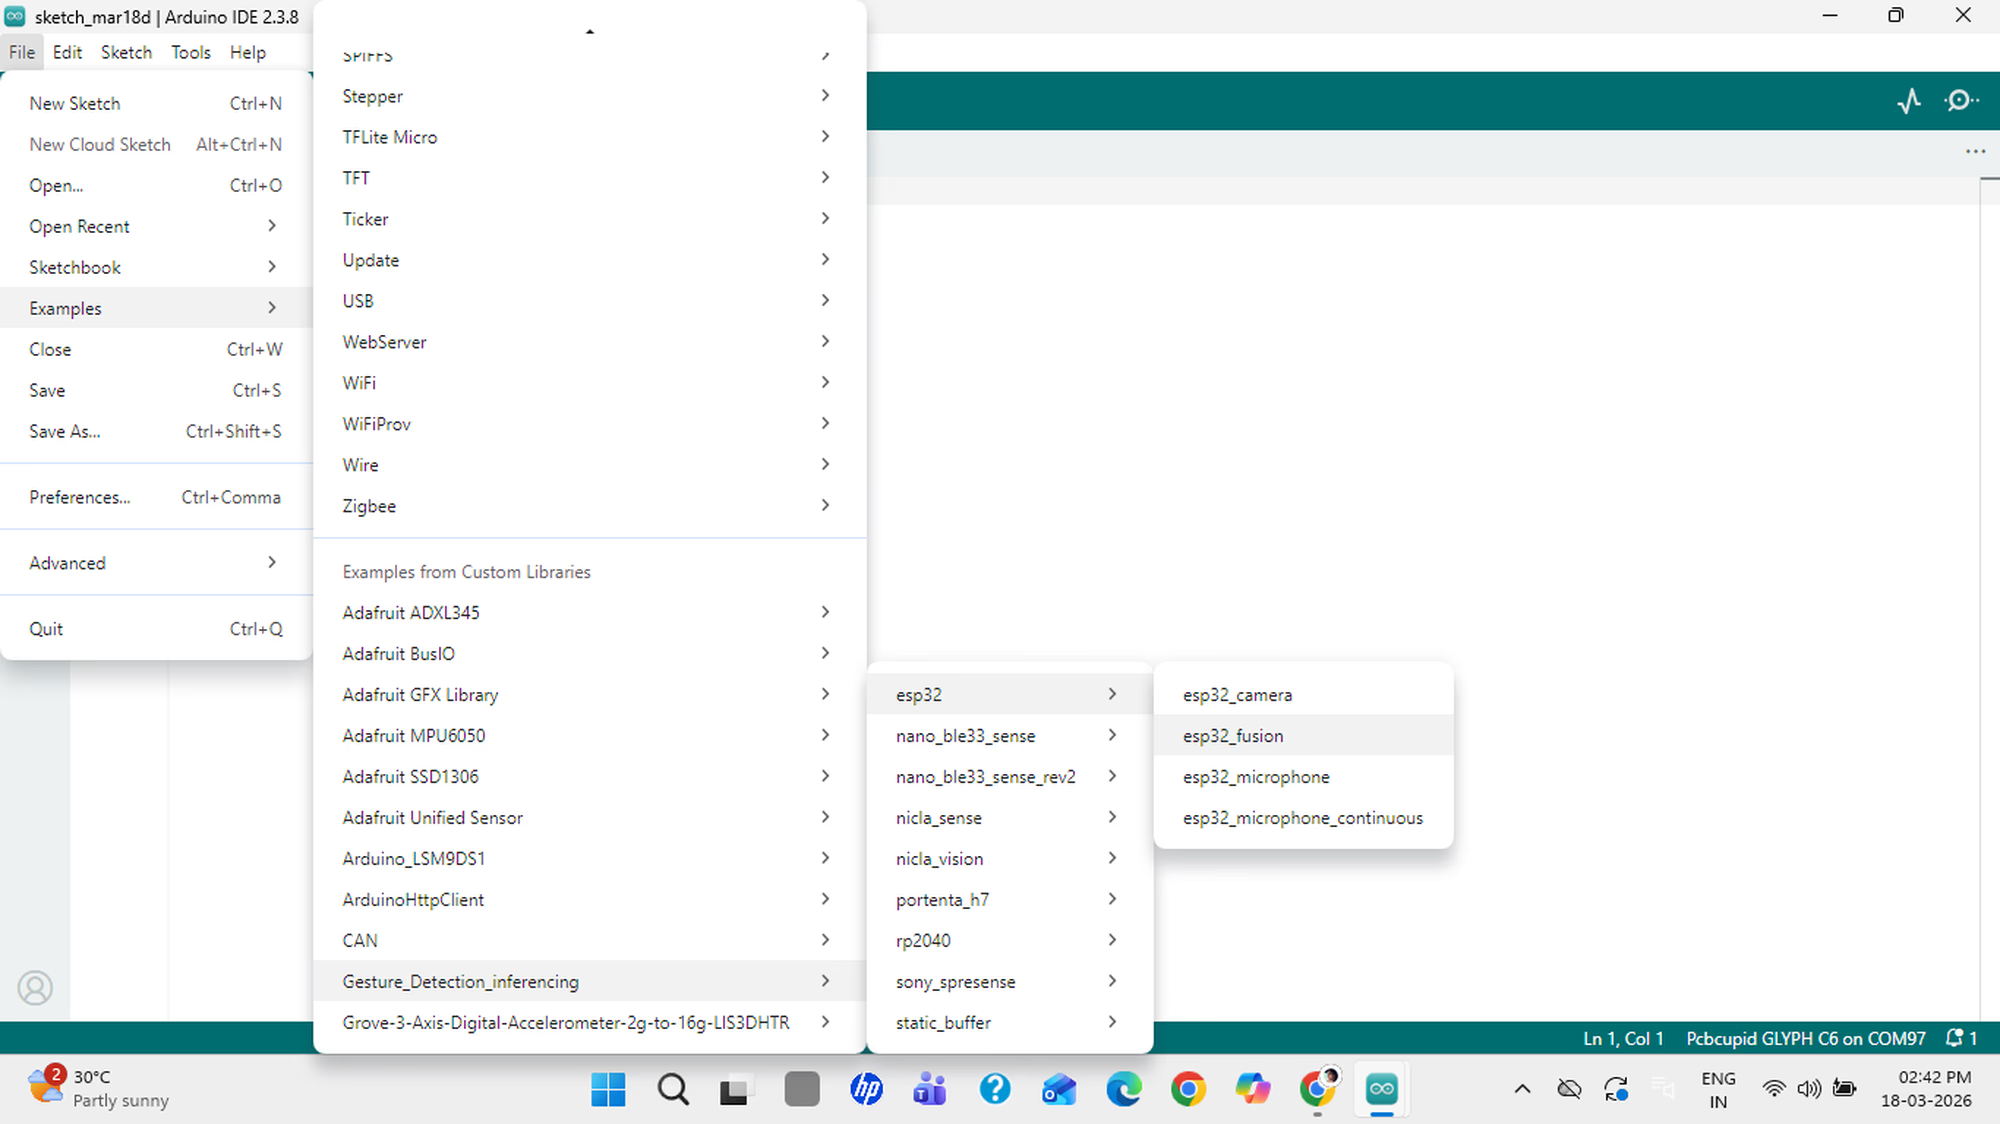
2. Open Arduino IDE and go to **File → Examples → \[Your Project Name] → ESP32 → ESP32 Fusion**.
3. Install the ESP32 board package, wire up your ESP32 + IMU sensor, select the right board and COM port, then click **Upload**.
Click to see Example Code (C++)
```cpp theme={null}
/* Edge Impulse Arduino examples - Cleaned for Glyph-C6 + ADXL345 */
#include
#include
#include
#include
/* Create the sensor object */
Adafruit_ADXL345_Unified accel = Adafruit_ADXL345_Unified(12345);
/** Struct to link sensor axis name to sensor value function */
typedef struct{
const char *name;
float *value;
uint8_t (*poll_sensor)(void);
bool (*init_sensor)(void);
int8_t status; // -1 not used 0 used(unitialized) 1 used(initalized) 2 data sampled
} eiSensors;
/* Constant defines -------------------------------------------------------- */
#define N_SENSORS 7
/* Forward declarations ------------------------------------------------------- */
float ei_get_sign(float number);
static bool ei_connect_fusion_list(const char *input_list);
bool init_IMU(void);
bool init_ADC(void);
uint8_t poll_IMU(void);
uint8_t poll_ADC(void);
/* Private variables ------------------------------------------------------- */
static const bool debug_nn = false;
static float data[N_SENSORS];
static int8_t fusion_sensors[N_SENSORS];
static int fusion_ix = 0;
/** Used sensors value function connected to label name */
eiSensors sensors[] =
{
"accX", &data[0], &poll_IMU, &init_IMU, -1,
"accY", &data[1], &poll_IMU, &init_IMU, -1,
"accZ", &data[2], &poll_IMU, &init_IMU, -1,
"adc", &data[6], &poll_ADC, &init_ADC, -1,
};
void setup()
{
Serial.begin(115200);
while (!Serial);
/* Connect used sensors */
if(ei_connect_fusion_list(EI_CLASSIFIER_FUSION_AXES_STRING) == false) {
return;
}
/* Init sensors */
for(int i = 0; i < fusion_ix; i++) {
if (sensors[fusion_sensors[i]].status == 0) {
sensors[fusion_sensors[i]].status = sensors[fusion_sensors[i]].init_sensor();
}
}
}
void loop()
{
// Wait between samples
delay(2000);
float buffer[EI_CLASSIFIER_DSP_INPUT_FRAME_SIZE] = { 0 };
for (size_t ix = 0; ix < EI_CLASSIFIER_DSP_INPUT_FRAME_SIZE; ix += EI_CLASSIFIER_RAW_SAMPLES_PER_FRAME) {
int64_t next_tick = (int64_t)micros() + ((int64_t)EI_CLASSIFIER_INTERVAL_MS * 1000);
for(int i = 0; i < fusion_ix; i++) {
if (sensors[fusion_sensors[i]].status == 1) {
sensors[fusion_sensors[i]].poll_sensor();
sensors[fusion_sensors[i]].status = 2;
}
if (sensors[fusion_sensors[i]].status == 2) {
buffer[ix + i] = *sensors[fusion_sensors[i]].value;
sensors[fusion_sensors[i]].status = 1;
}
}
int64_t wait_time = next_tick - (int64_t)micros();
if(wait_time > 0) {
delayMicroseconds(wait_time);
}
}
signal_t signal;
numpy::signal_from_buffer(buffer, EI_CLASSIFIER_DSP_INPUT_FRAME_SIZE, &signal);
ei_impulse_result_t result = { 0 };
int err = run_classifier(&signal, &result, debug_nn);
if (err != EI_IMPULSE_OK) return;
// --- CLEAN OUTPUT ONLY ---
bool found = false;
for (size_t ix = 0; ix < EI_CLASSIFIER_LABEL_COUNT; ix++) {
// Lowered threshold slightly to 0.70 to help with "Circle" detection
if (result.classification[ix].value > 0.70) {
Serial.print("DETECTED GESTURE: ");
Serial.println(result.classification[ix].label);
found = true;
break;
}
}
if(!found) {
Serial.println("DETECTED GESTURE: Unknown");
}
}
/** IMU and Helper Functions **/
bool init_IMU(void) {
static bool init_status = false;
if (!init_status) {
Wire.begin(4, 5); // SDA Pin 4, SCL Pin 5
if(!accel.begin()) return false;
accel.setRange(ADXL345_RANGE_2_G);
init_status = true;
}
return init_status;
}
uint8_t poll_IMU(void) {
sensors_event_t event;
accel.getEvent(&event);
data[0] = event.acceleration.x;
data[1] = event.acceleration.y;
data[2] = event.acceleration.z;
return 0;
}
static int8_t ei_find_axis(char *axis_name) {
for(int ix = 0; ix < N_SENSORS; ix++) {
if(strstr(axis_name, sensors[ix].name)) return ix;
}
return -1;
}
static bool ei_connect_fusion_list(const char *input_list) {
char *input_string = (char *)ei_malloc(strlen(input_list) + 1);
if (input_string == NULL) return false;
strcpy(input_string, input_list);
memset(fusion_sensors, 0, N_SENSORS);
fusion_ix = 0;
char *buff = strtok(input_string, "+");
while (buff != NULL) {
int8_t found_axis = ei_find_axis(buff);
if(found_axis >= 0 && fusion_ix < N_SENSORS) {
fusion_sensors[fusion_ix++] = found_axis;
sensors[found_axis].status = 0;
}
buff = strtok(NULL, "+ ");
}
ei_free(input_string);
return true;
}
bool init_ADC(void) { return true; }
uint8_t poll_ADC(void) { data[6] = analogRead(A0); return 0; }
float ei_get_sign(float number) { return (number >= 0.0) ? 1.0 : -1.0; }
```
### Step 9: Test Your Gestures
Open the **Serial Monitor** and perform your gestures. You will see real-time predictions like `"Gesture: up-down"`. It runs fully offline on the ESP32!

Have fun with your mini AI Assistant!