> ## Documentation Index
> Fetch the complete documentation index at: https://learn.pcbcupid.com/llms.txt
> Use this file to discover all available pages before exploring further.
> Install Espressif's ESP-IDF toolchain to build C/C++ firmware for Glyph ESP32 boards, including Zigbee examples between the Glyph C6 and Glyph H2.
# ESP-IDF Setup for Glyph Boards
# Installing ESP-IDF via VS Code Extension
This guide explains how to set up the ESP-IDF (Espressif IoT Development Framework) development environment using Visual Studio Code (VS Code) and the ESP-IDF extension.
## Prerequisites
Before starting, ensure you have the following tools installed:
#### 1. **Visual Studio Code (VS Code)**
* Download from [https://code.visualstudio.com](https://code.visualstudio.com).
#### 2. **Git**
* Install Git from [https://git-scm.com](https://git-scm.com).
#### 3. **Python 3.x**
* ESP-IDF requires Python 3.7 or later. Install it from [https://www.python.org](https://www.python.org).
### Step 1: Install VS Code Extension for ESP-IDF
1. **Open Visual Studio Code.**
2. **Access Extensions Marketplace.**
* In VS Code, click the Extensions icon on the left sidebar, or press `Ctrl+Shift+X` (Windows/Linux) or `Cmd+Shift+X` (macOS).
* Search for `ESP-IDF` in the search bar.
3. **Install ESP-IDF Extension.**
* Find the official ESP-IDF extension by Espressif Systems and click Install.
Make sure you have the latest version of VS Code for compatibility with the ESP-IDF extension.
### Step 2: Set Up ESP-IDF in VS Code
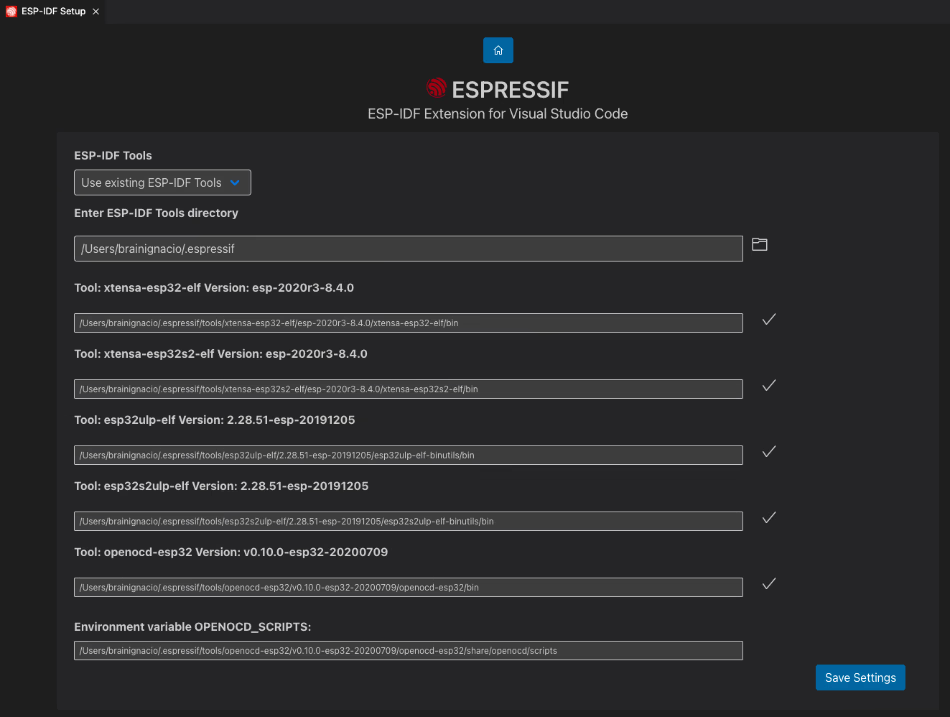
After installing the extension, the ESP-IDF setup wizard will guide you through the installation process.
#### 2.1: **Open ESP-IDF Setup Wizard**
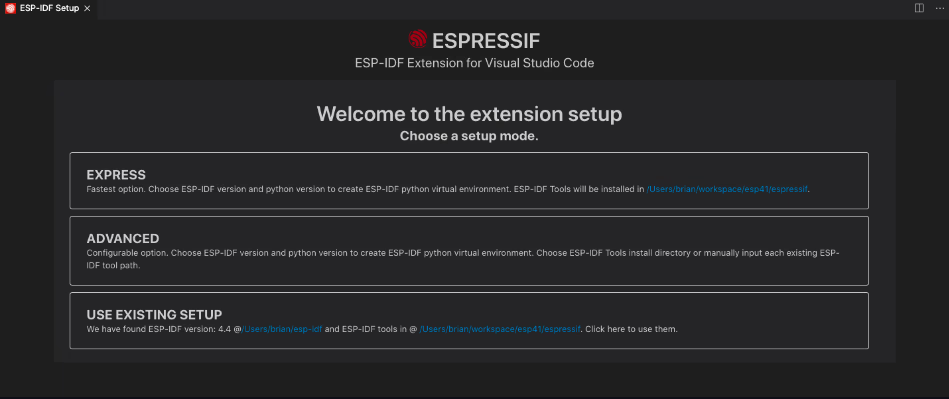
1. **Launch Command Palette:**
* Press `Ctrl+Shift+P` (or `Cmd+Shift+P` on macOS).
2. **Search for ESP-IDF Configuration:**
* Type `ESP-IDF: Configure ESP-IDF extension` and select it.

Make sure your internet connection is stable. An interrupted connection can result in incomplete setup.
#### **2.2: Install ESP-IDF**
1. The wizard will ask if you want to install ESP-IDF. Click Yes to proceed.
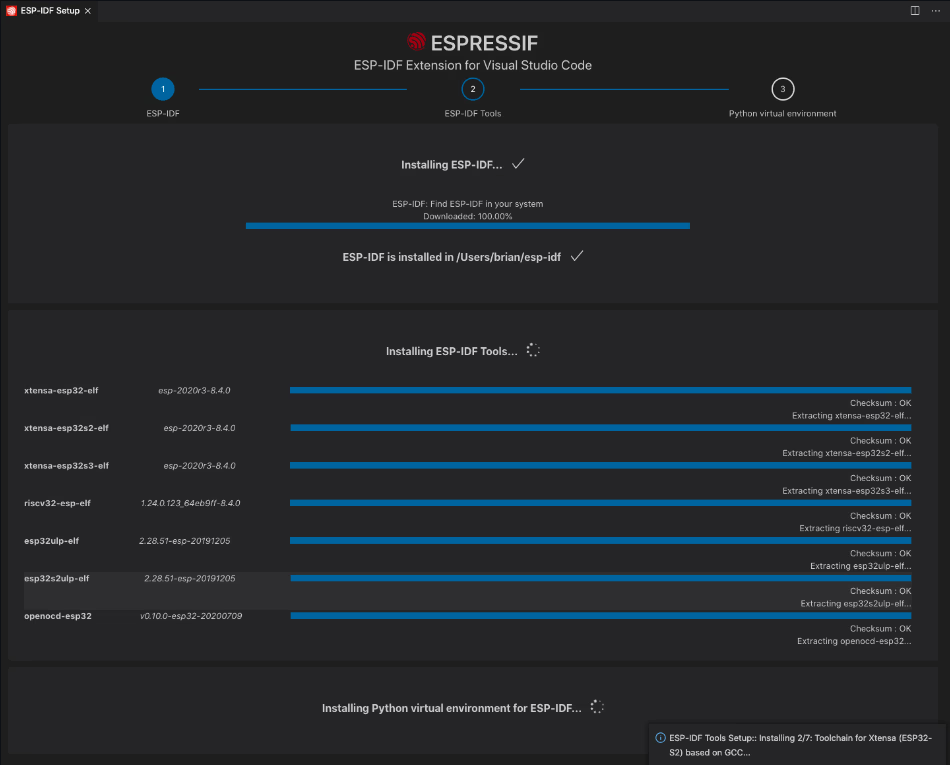
#### **2.3 Toolchain Installation:**
* The wizard will also download and configure the required toolchain, including compilers and other essential tools.
* On Windows, it may install MSYS2, a collection of development tools.
* On macOS and Linux, it will configure the necessary packages via the package manager.
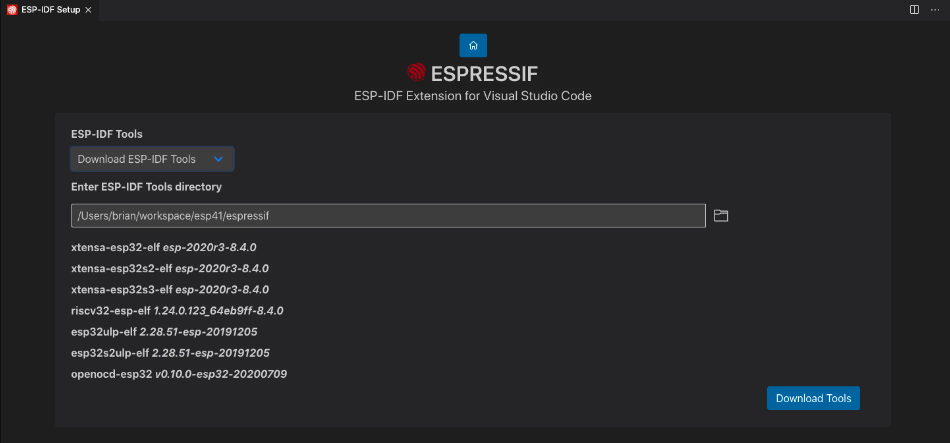
Avoid changing system PATH manually. Misconfiguring PATH could interfere with other applications. The ESP-IDF installer handles this automatically.
#### **2.4. Verify Installation:**
* The wizard will verify that the installation was successful by running a series of checks.

### Step 3: Create an ESP-IDF Project
#### **3.1: Start a New Project**
1. **Open Command Palette**(`Ctrl+Shift+P` or `Cmd+Shift+P`).
2. **Create New Project:**
* Type `ESP-IDF: Create New Project` and select it.\
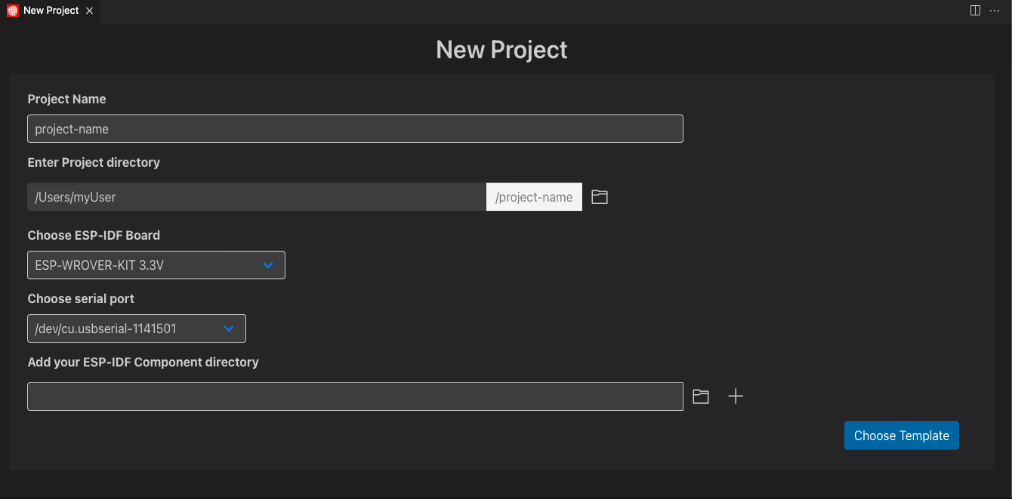
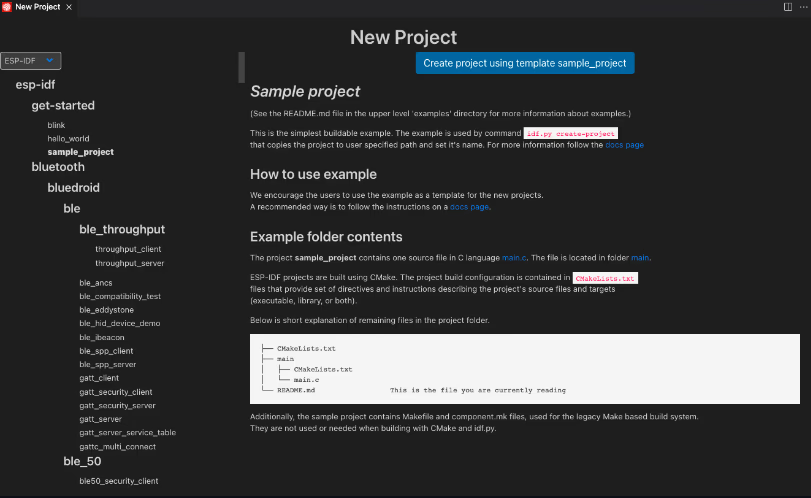
Choose hello\_world or blink template for a quick, functional test of your setup.
3. **Choose Project Template:**
* Pick a template for your project (e.g., `blink`, `hello_world`).
4. **Pick Folder for Project:**
* Choose or create a folder where the project will be created.
#### **3.2: Configure Project**
1. Once the project is created, go to the ESP-IDF menu in the top bar of VS Code.
2. Select ESP-IDF: Set up ESP-IDF tools to configure your project settings.
Avoid moving files within the project folder. ESP-IDF relies on a specific structure, and moving files may break project builds.
3. Inside the project folder, modify the `main` files as needed. You will see a `CMakeLists.txt` file and a `main` directory where your code resides.
### Step 4: Build and Flash the Project
#### **4.1: Build the Project**
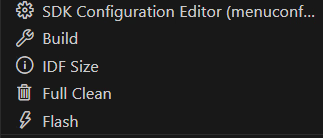

1. **Open Command Palette**(`Ctrl+Shift+P` or `Cmd+Shift+P`).
2. **Build Project:**
* Type `ESP-IDF: Build Project` and select it. This will start the build process using the `idf.py build` command.
If the build fails, check your code for syntax errors. Some project templates may require specific ESP-IDF configurations.
#### **4.2: Flash to the Device**
1. **Connect ESP Device:**
* Connect your ESP32 or ESP8266 device to your computer via USB.
2. **Flash the Project:**
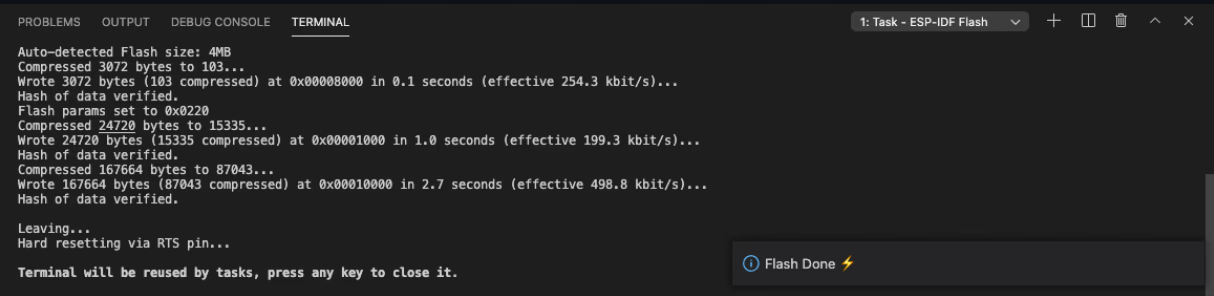
* In the Command Palette, type `ESP-IDF: Flash Project` and select it. This will flash your code to the connected device.
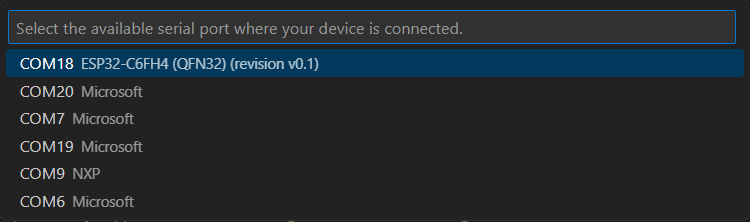
3. **Select COM/Serial Port:**
* Ensure the correct COM port (Windows) or serial port (Linux/macOS) is selected in the `menuconfig`.
Be cautious when flashing devices connected to mains power. Always isolate your ESP device from power sources before flashing.
#### **4.3: Monitor the Output**
1. **Open Serial Monitor:**
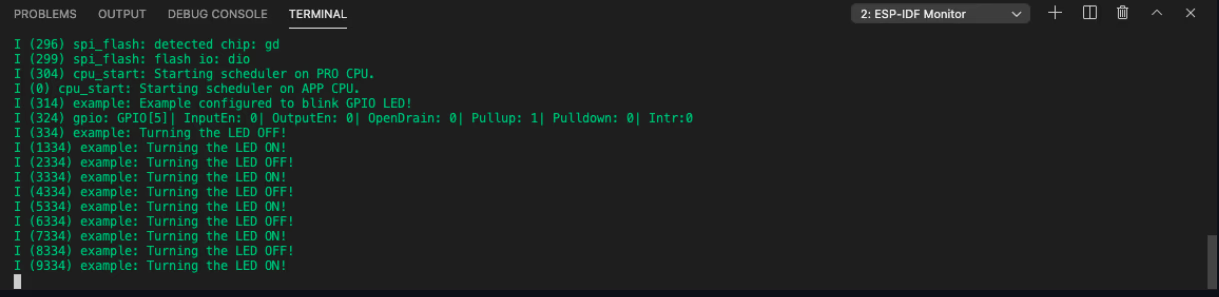
* In the Command Palette, type `ESP-IDF: Monitor` and select it to view serial output from your device.
### Step 5: Additional Tips
* **Update ESP-IDF**: Periodically run `idf.py update` to keep ESP-IDF up to date.
* **Verify ESP-IDF Version**: Use `idf.py --version` to check the current ESP-IDF version.
* **Multiple ESP-IDF Versions**: You can use specific ESP-IDF versions by setting the path or using version tags (e.g., `v4.4`, `v5.0`).
#### Troubleshooting
* **Python Errors**: If you see Python-related issues, make sure you are using a supported version of Python (3.7 or later).
* **Toolchain Issues**: Ensure that the toolchain has been properly installed and added to the system PATH.
* **Permission Issues**: On Linux or macOS, make sure you have the proper permissions for files and directories. You may need to run some commands with `sudo` on these systems.
Avoid using sudo on commands unless required. Misuse of elevated privileges can compromise your system.