> ## Documentation Index
> Fetch the complete documentation index at: https://learn.pcbcupid.com/llms.txt
> Use this file to discover all available pages before exploring further.
> Install CircuitPython on a PCB Cupid GLYPH board, connect it to Thonny, and save your first program to the board.
# CircuitPython Setup Guide
CircuitPython runs Python programs directly on your GLYPH board. This guide covers flashing the firmware with Thonny or esptool, connecting with Thonny, and saving a program that runs whenever the board starts.
Flashing CircuitPython replaces the firmware currently on the board. Save any existing sketches or files you need before continuing. Download the firmware for your **exact** GLYPH model; a different board's image can have the wrong flash layout or pin definitions.
## Download Thonny and your board firmware
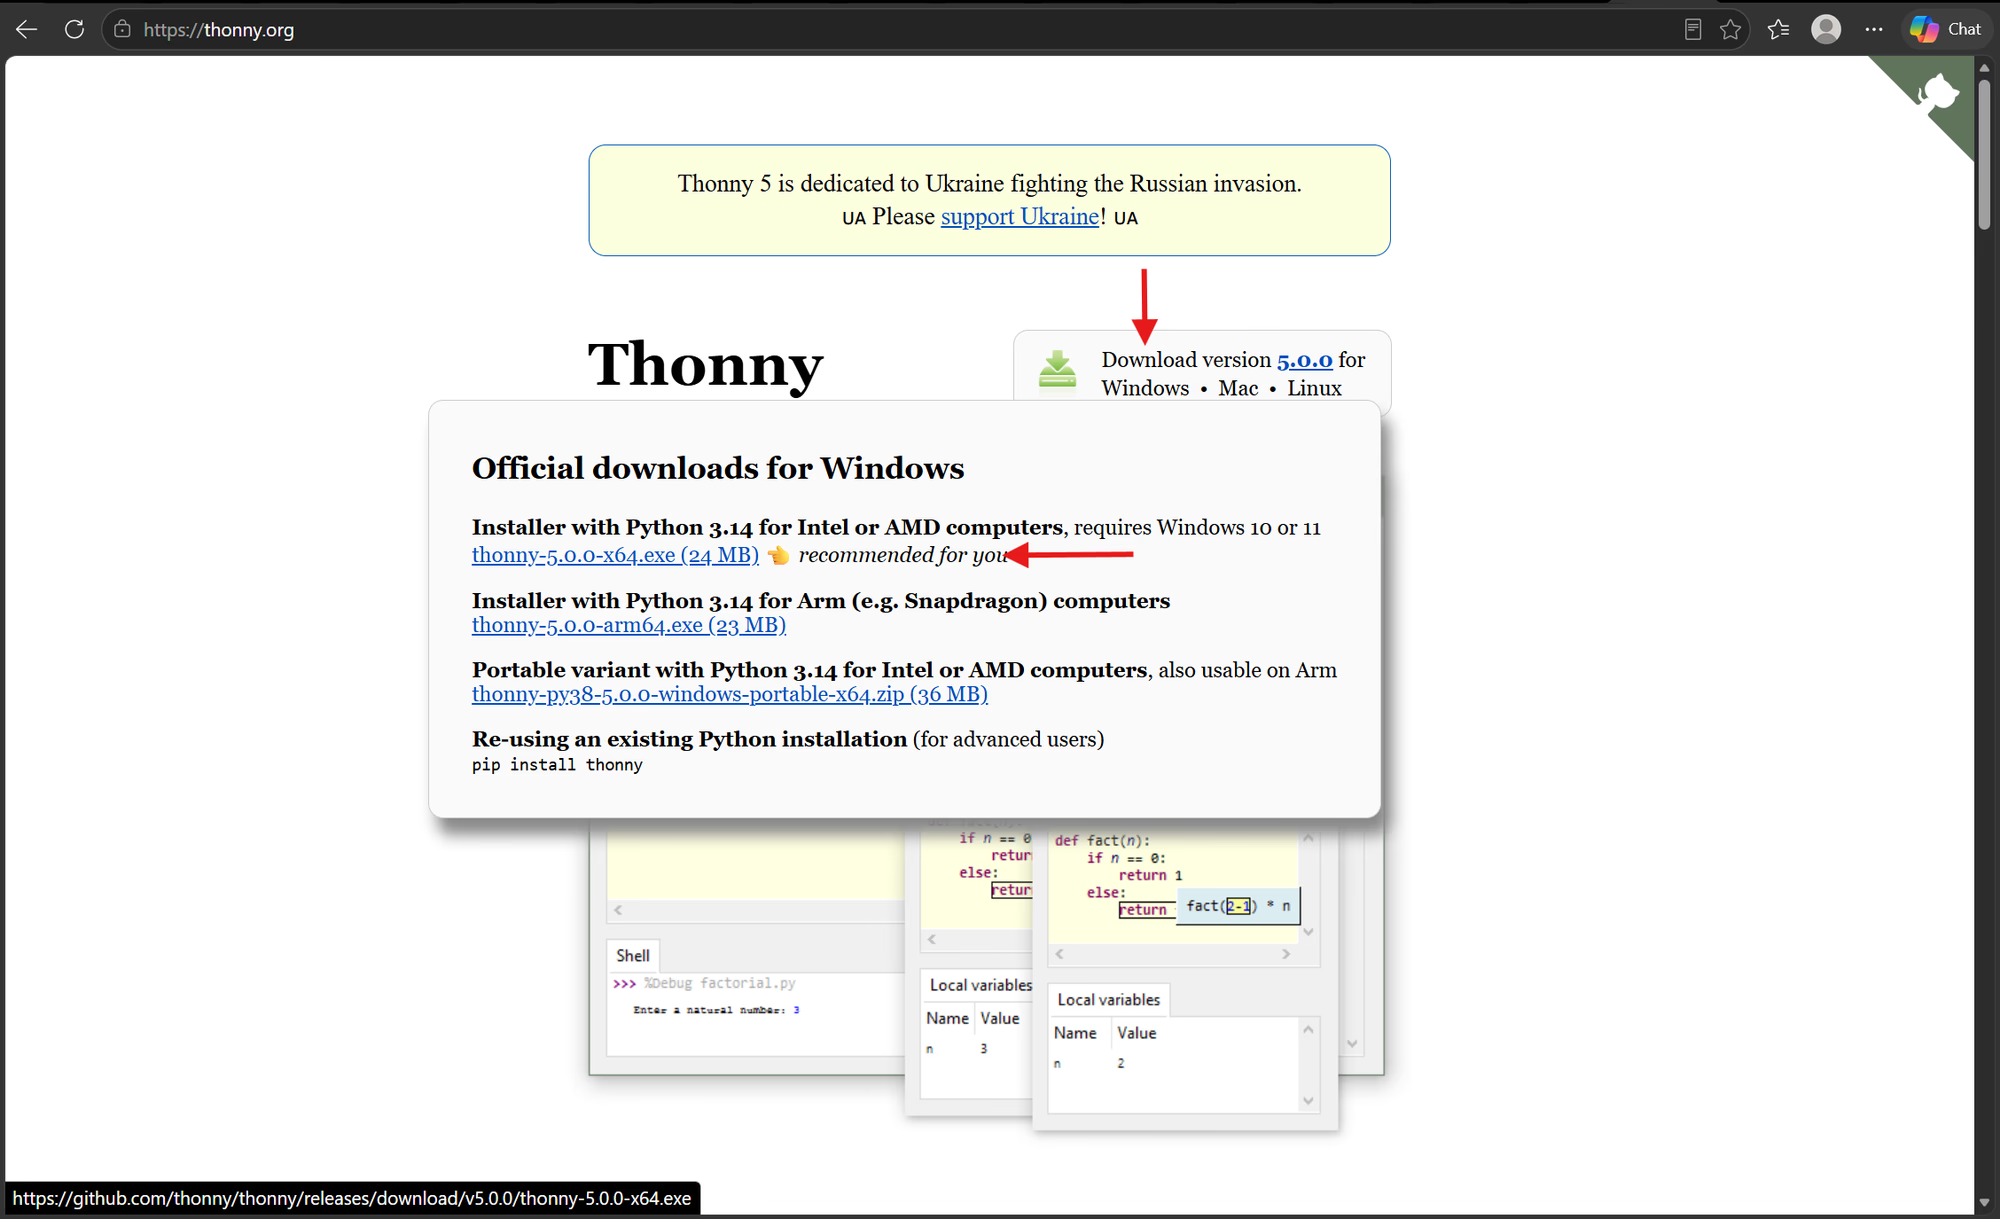
1. Install [Thonny](https://thonny.org/) for your operating system.
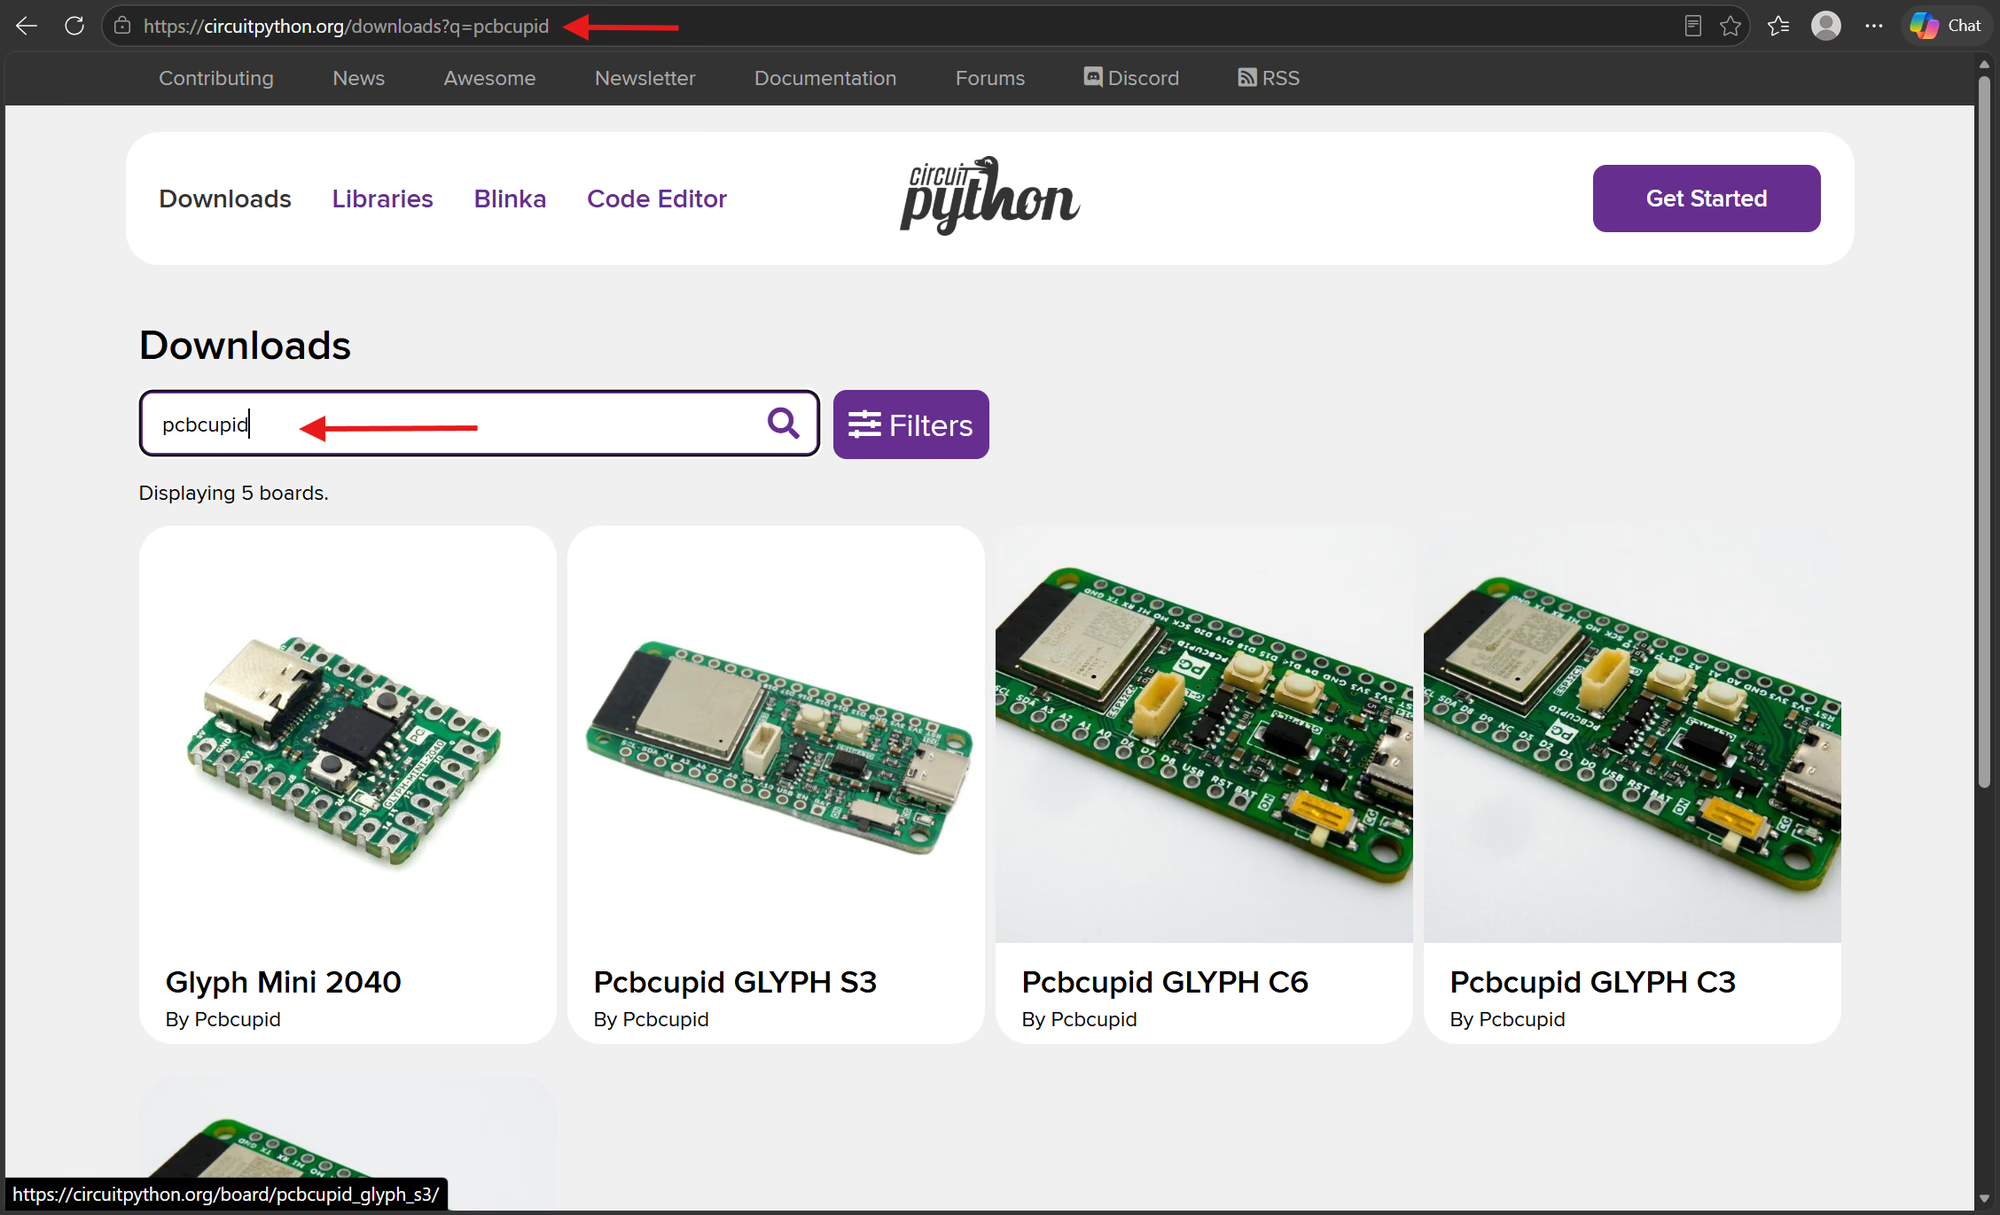
2. Open the CircuitPython download page for your board: [GLYPH C3](https://circuitpython.org/board/pcbcupid_glyph_c3/), [GLYPH C6](https://circuitpython.org/board/pcbcupid_glyph_c6/), [GLYPH H2](https://circuitpython.org/board/pcbcupid_glyph_h2/), or [GLYPH S3](https://circuitpython.org/downloads/) (search for **PCBCupid GLYPH S3**).
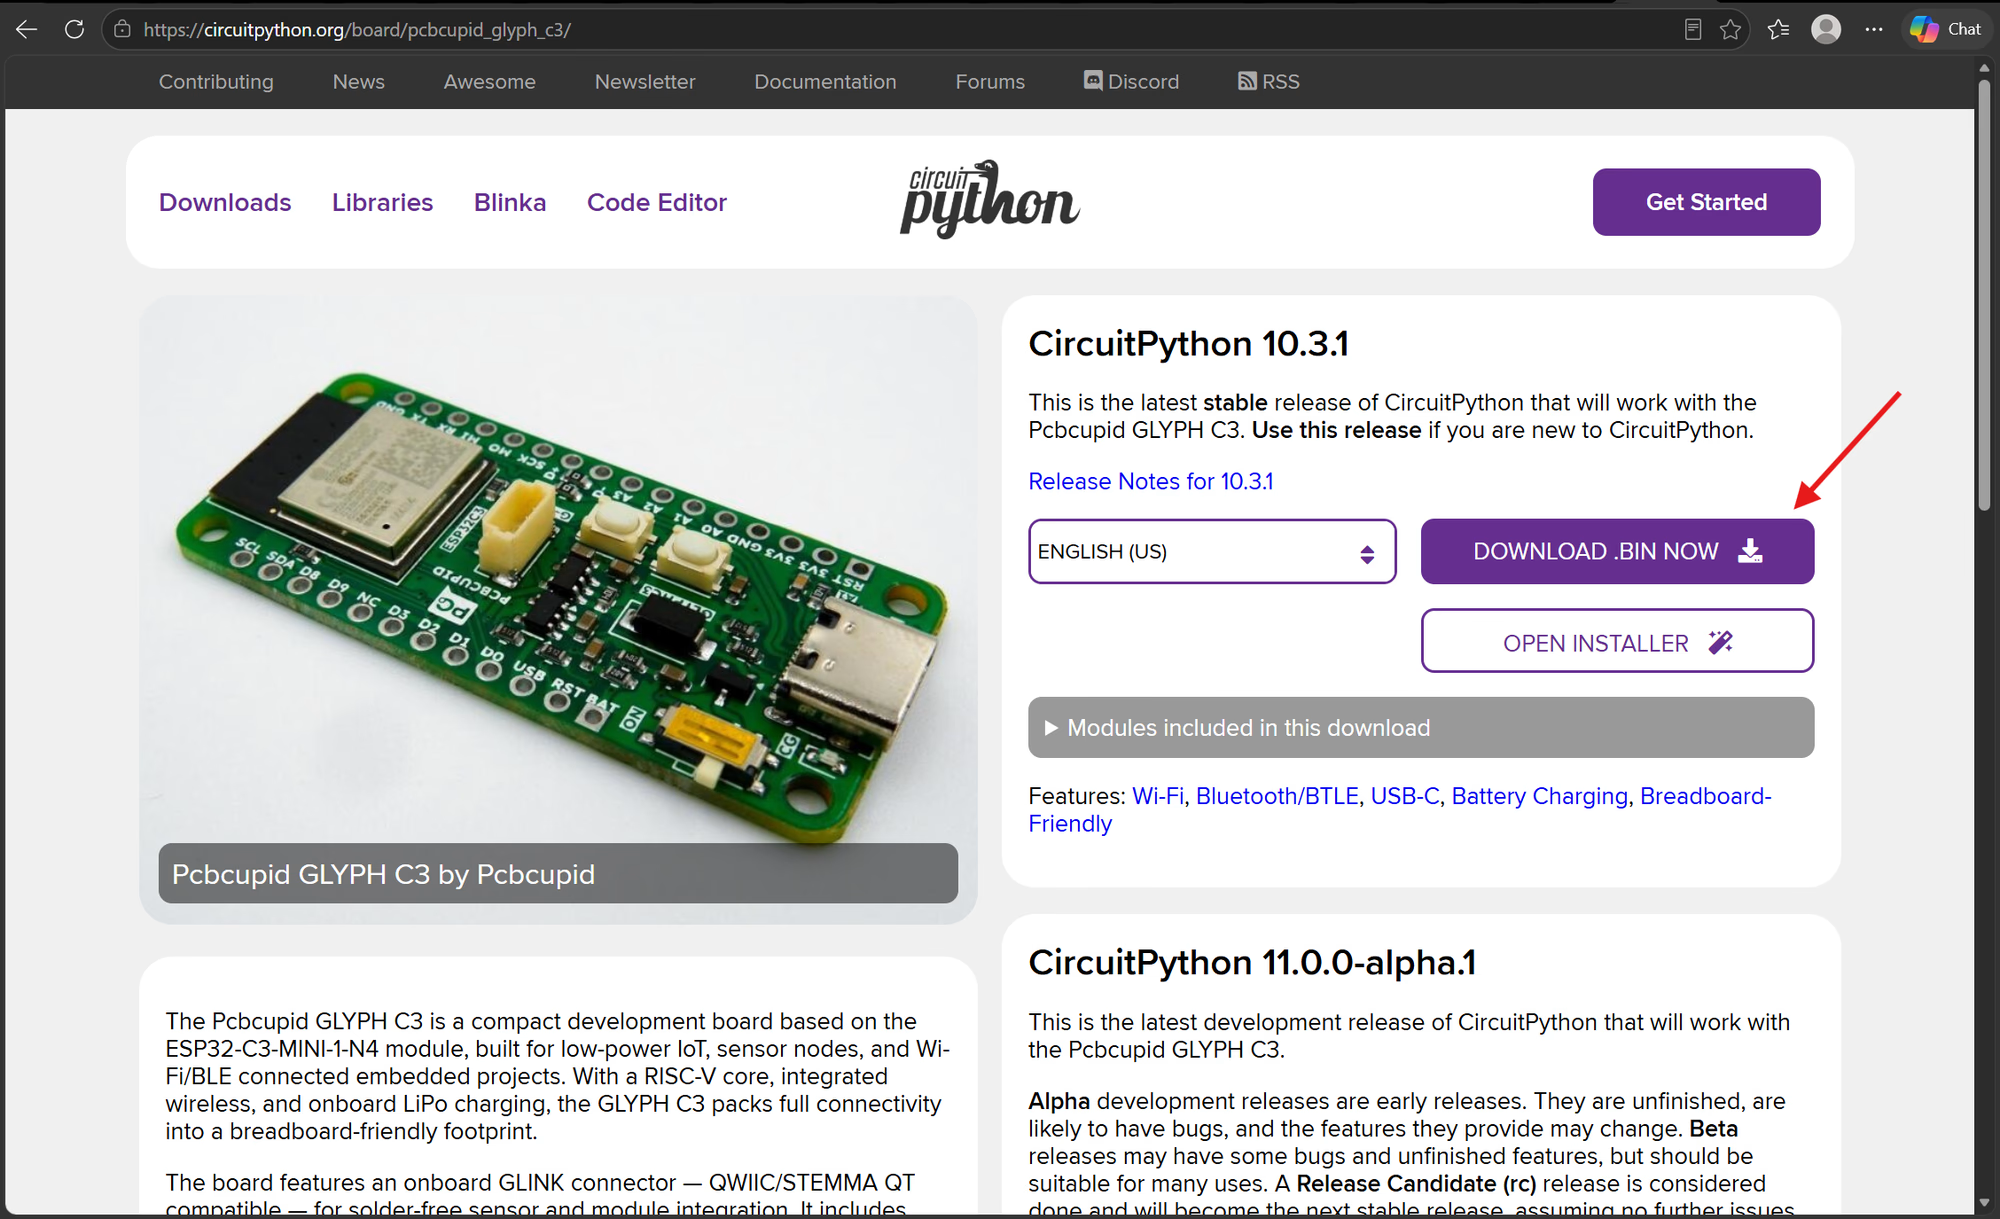
3. Download the latest stable **`.bin`** firmware for that board. Keep track of where the file was saved.
4. Connect the GLYPH to your computer with a USB **data** cable.
## Flash CircuitPython with Thonny
1. Hold **BOOT**, press and release **RESET**, then release **BOOT**. If the board has no RESET button, hold BOOT while plugging in the USB cable. The board should appear as a serial port.
2. In Thonny, open **Tools → Options → Interpreter** and select the ESP32 interpreter to access **Install or update firmware**. Open the firmware installer.
3. Select the serial port for your GLYPH, choose the `.bin` file you downloaded, and set the **start address to `0x0`**. CircuitPython ESP32 images must be flashed at `0x0`, even if a MicroPython preset suggests another address.
4. Click **Install** and wait for the success message. Disconnect and reconnect the board, or press RESET with BOOT released.
If Thonny does not offer the correct chip or start address, use the **OPEN INSTALLER** button on the board's CircuitPython download page to flash the same firmware, then return to Thonny for editing. Close Thonny's serial connection before opening the browser installer.
## Install esptool in a terminal
If you prefer flashing from a terminal, install [Python 3.10 or newer](https://www.python.org/downloads/) and run:
```sh theme={null}
python -m pip install esptool
python -m esptool --help
```
The second command confirms that esptool is available. On macOS or Linux, use `python3` instead of `python` if that is how Python is installed. If your system blocks a global pip install, follow Espressif's [virtual environment instructions](https://docs.espressif.com/projects/esptool/en/latest/esp32/installation.html#virtual-environment-installation).
## Flash CircuitPython with esptool
1. Download the `.bin` file for your exact GLYPH model from the link above. Close Thonny and any serial monitor so esptool can use the port.
2. Put the board in bootloader mode: hold **BOOT**, press and release **RESET**, then release **BOOT**. If there is no RESET button, hold BOOT while plugging in USB.
3. Open a terminal in the folder containing the downloaded `.bin` file. Replace `COM5` with your board's serial port (for example, `/dev/ttyACM0` on Linux or `/dev/cu.usbmodem...` on macOS) and `firmware.bin` with the actual downloaded filename:
```sh theme={null}
python -m esptool --port COM5 write-flash 0x0 firmware.bin
```
4. Wait for esptool to finish writing and verifying the image. Press **RESET** with BOOT released, or unplug and reconnect the board. Then [connect with Thonny](#connect-thonny-and-run-code) to save `code.py`.
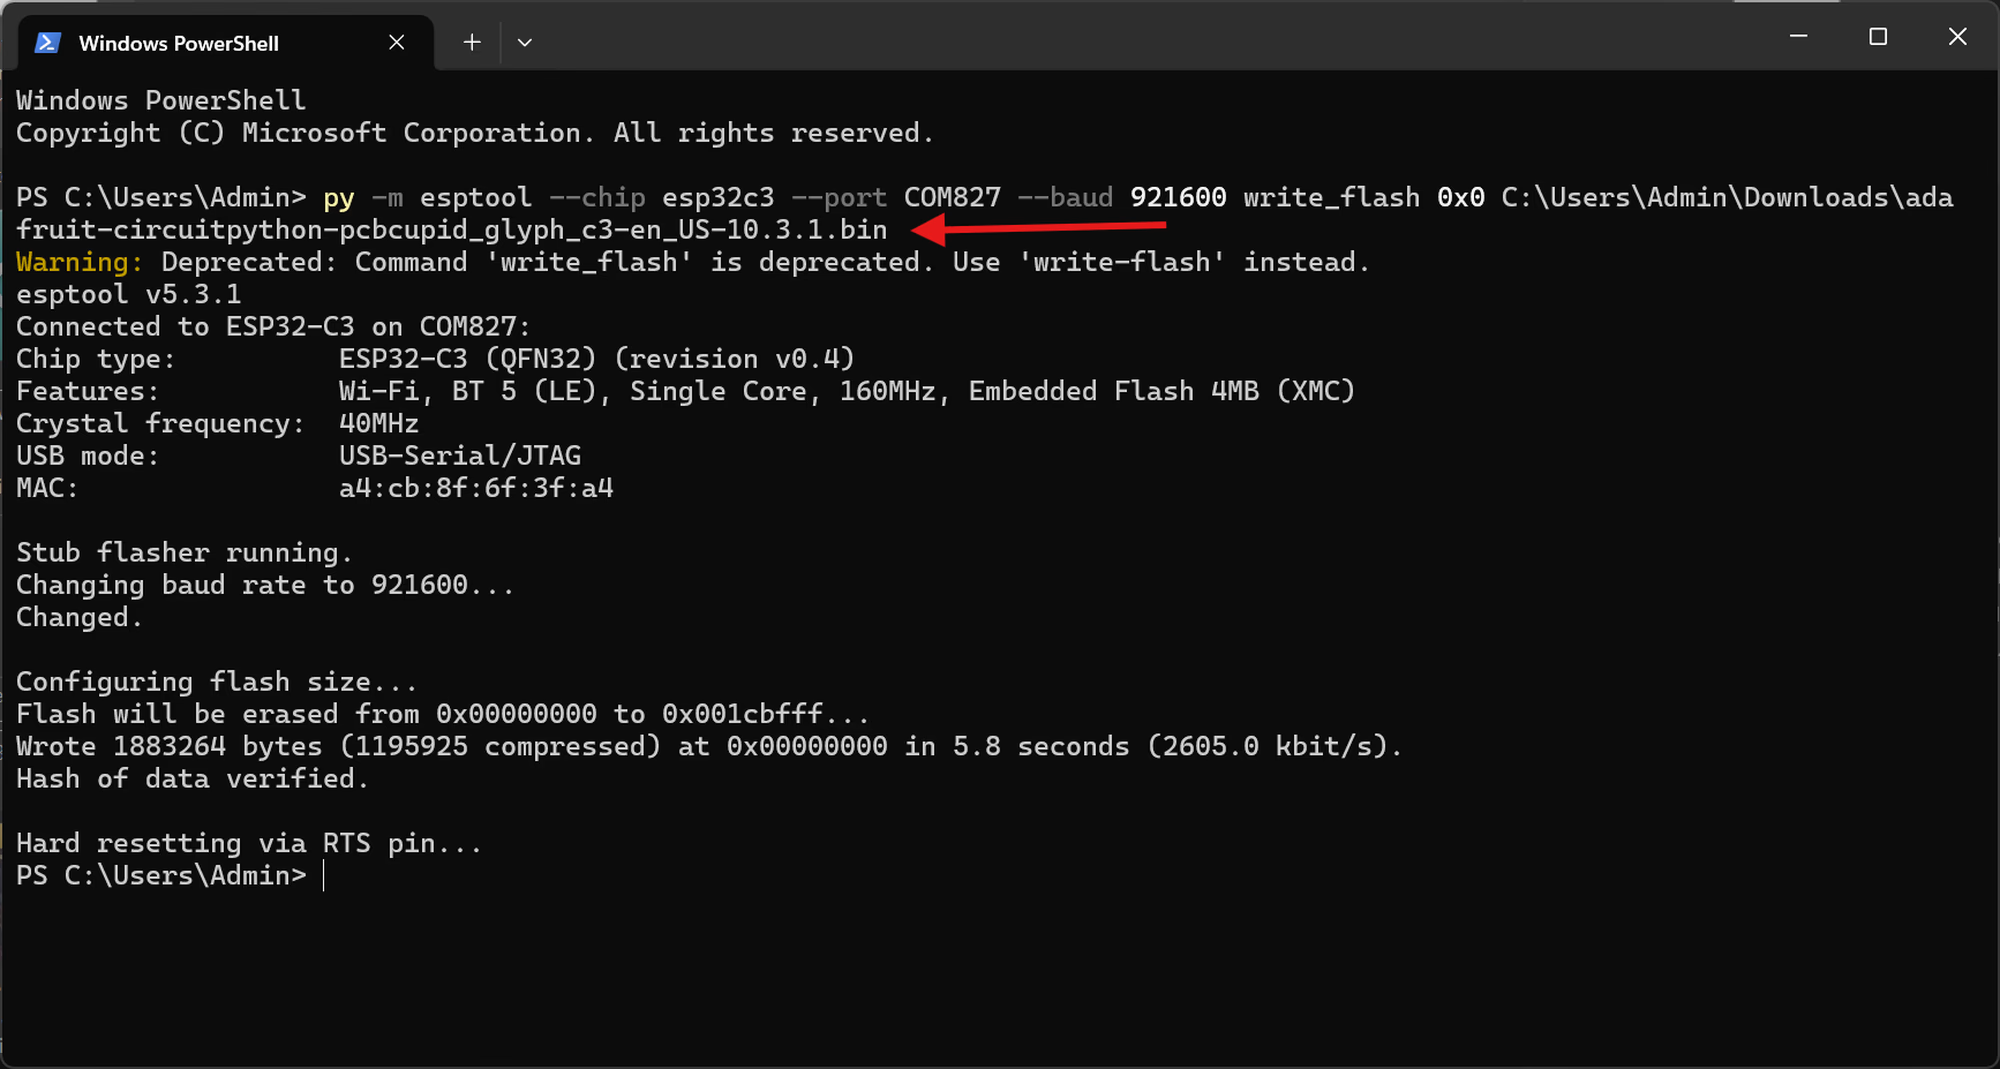
Use `python3 -m esptool` if you installed esptool with `python3`. The `0x0` flash address is required for the downloaded CircuitPython ESP32 `.bin` image; see Espressif's [write-flash command reference](https://docs.espressif.com/projects/esptool/en/latest/esp32/esptool/basic-commands.html#write-binary-data-to-flash-write-flash).
## Connect Thonny and run code
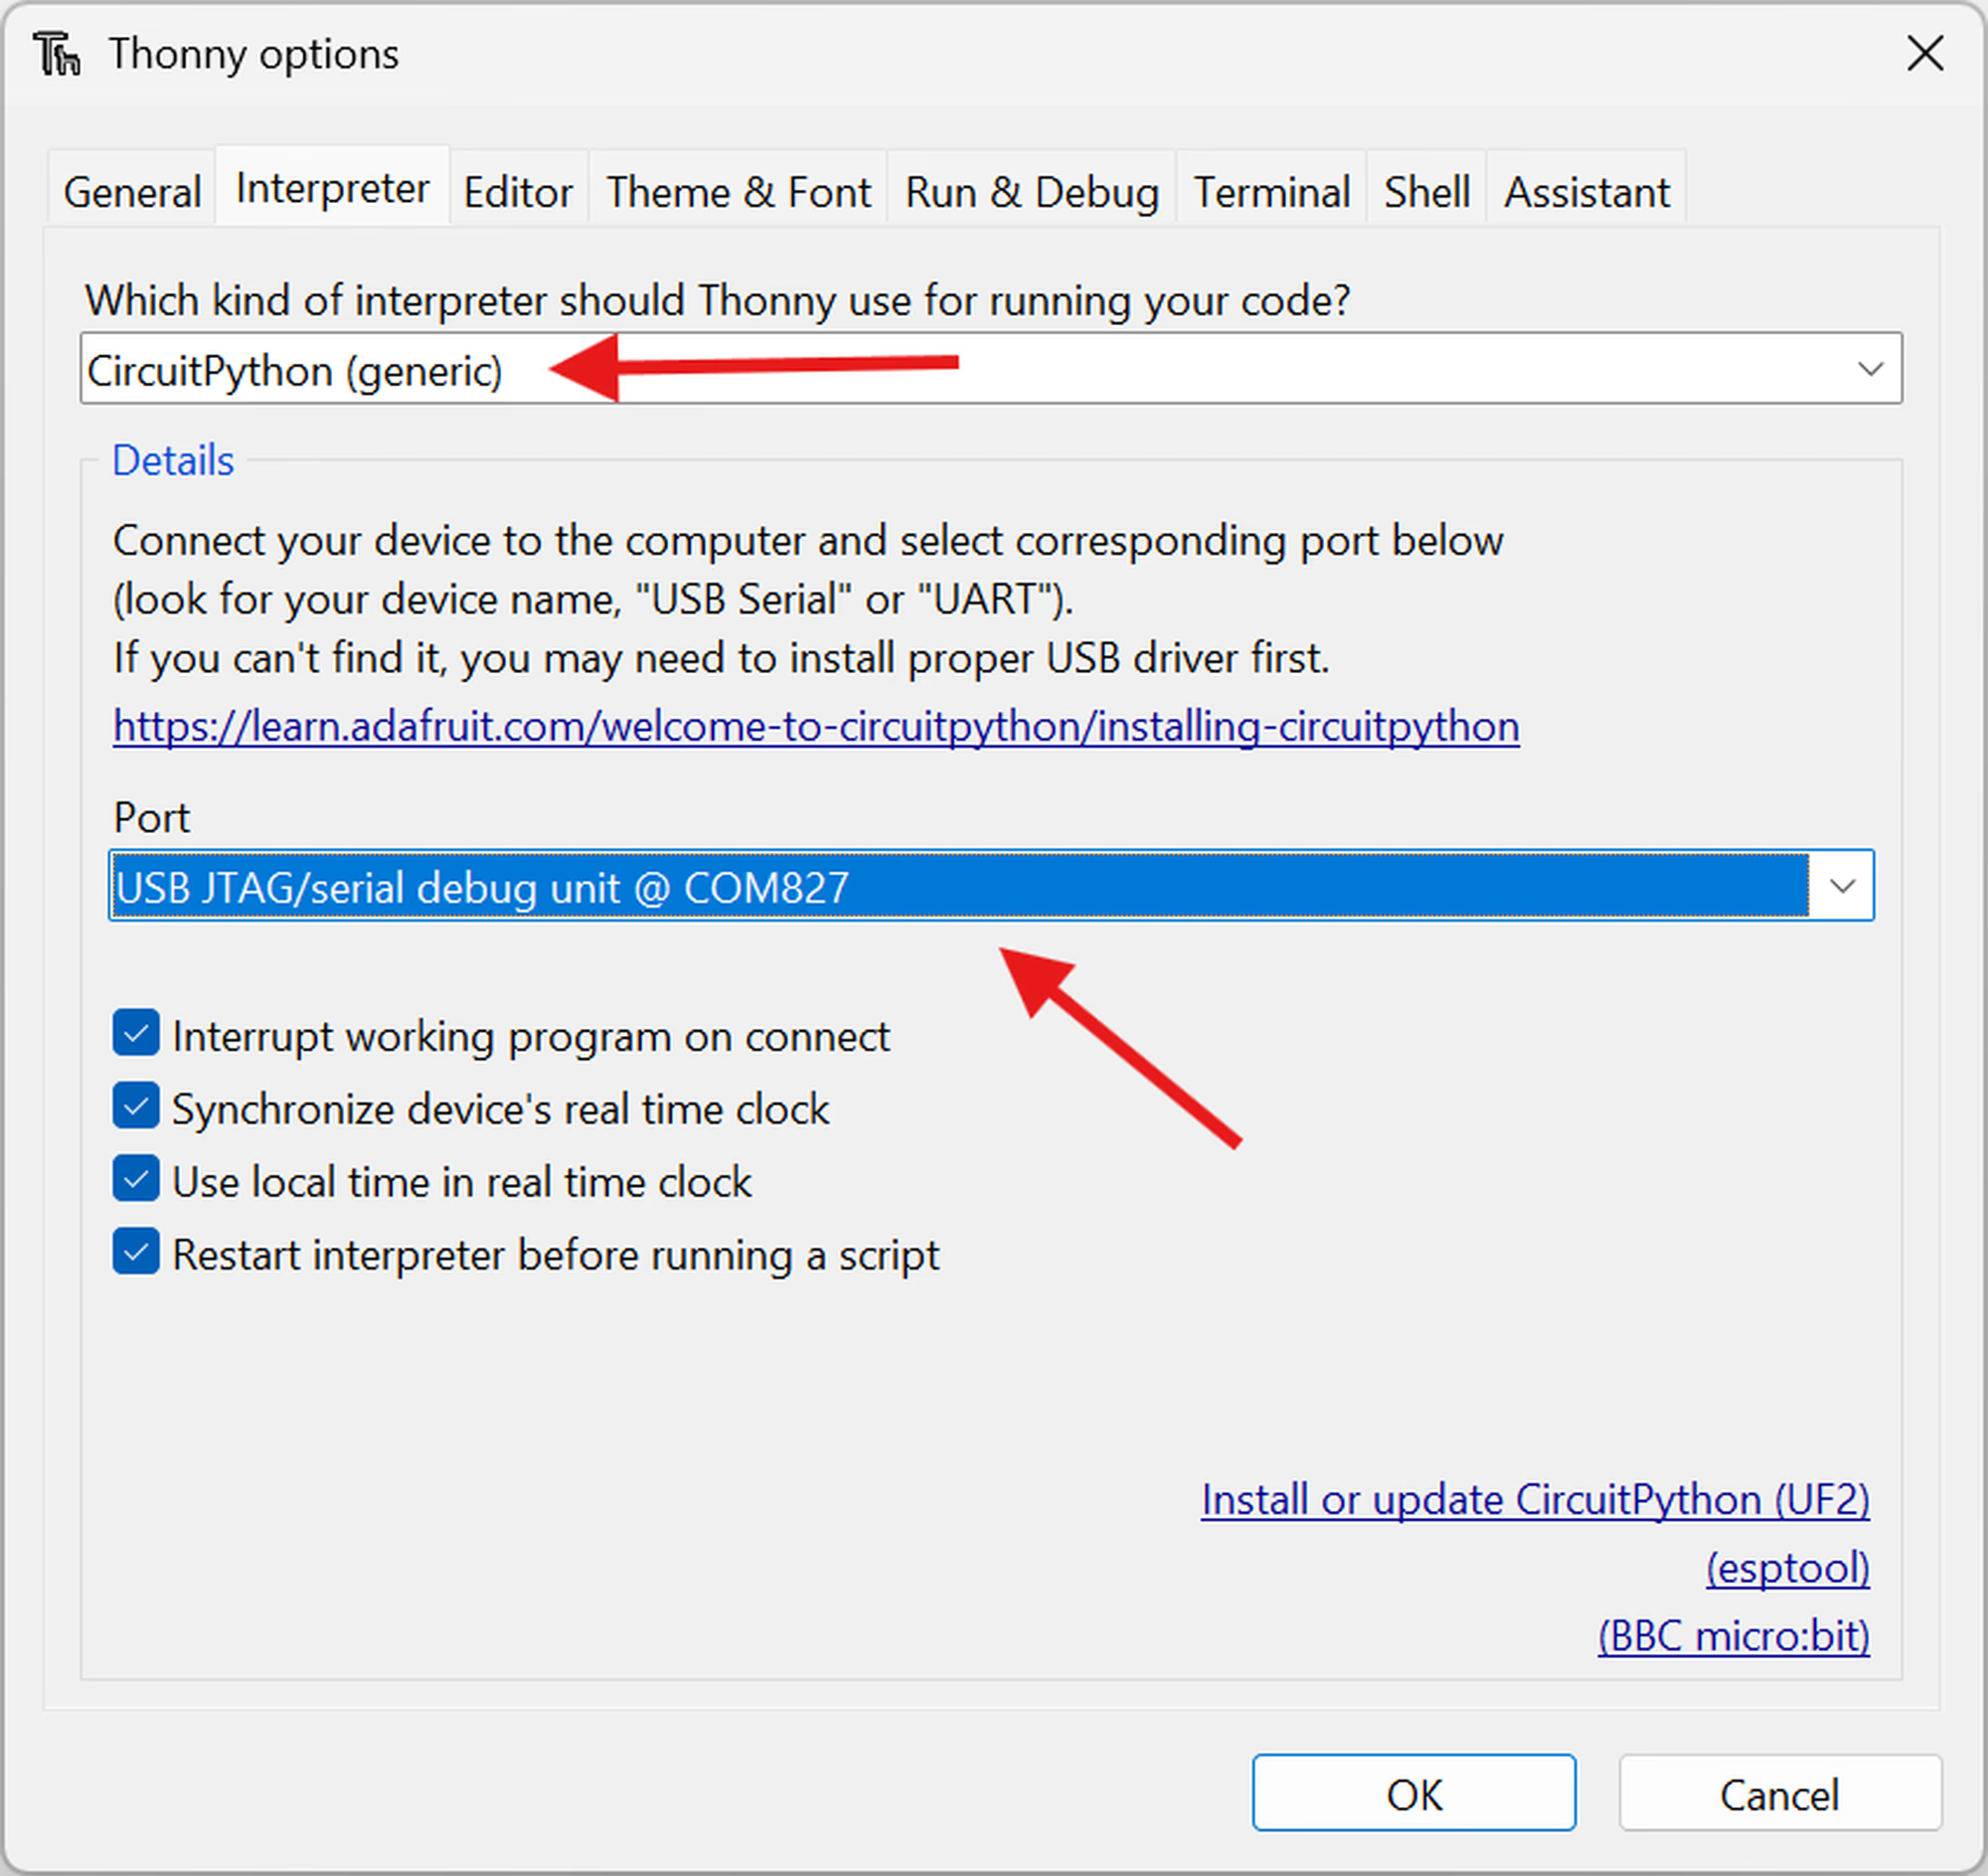
1. In **Tools → Options → Interpreter**, choose **CircuitPython (generic)** and select the GLYPH serial port. The Shell should show the CircuitPython `>>>` prompt. Press **Ctrl+C** if a running program occupies the Shell.
2. Paste the following example into a new Thonny editor tab. Change the GPIO number to your board's onboard LED: **C3: 1**, **C6: 14**, **H2: 0**. For other models, check that board's pinout.
```python theme={null}
import time
import digitalio
import microcontroller
led = digitalio.DigitalInOut(microcontroller.pin.GPIO1) # GLYPH C3 onboard LED
led.direction = digitalio.Direction.OUTPUT
while True:
led.value = True
time.sleep(1)
led.value = False
time.sleep(1)
```
3. Choose **File → Save as**, select **CircuitPython device**, and save the file as **`code.py`**. CircuitPython runs `code.py` automatically at startup and after you save it. Use the Thonny Shell for `print()` output and errors.
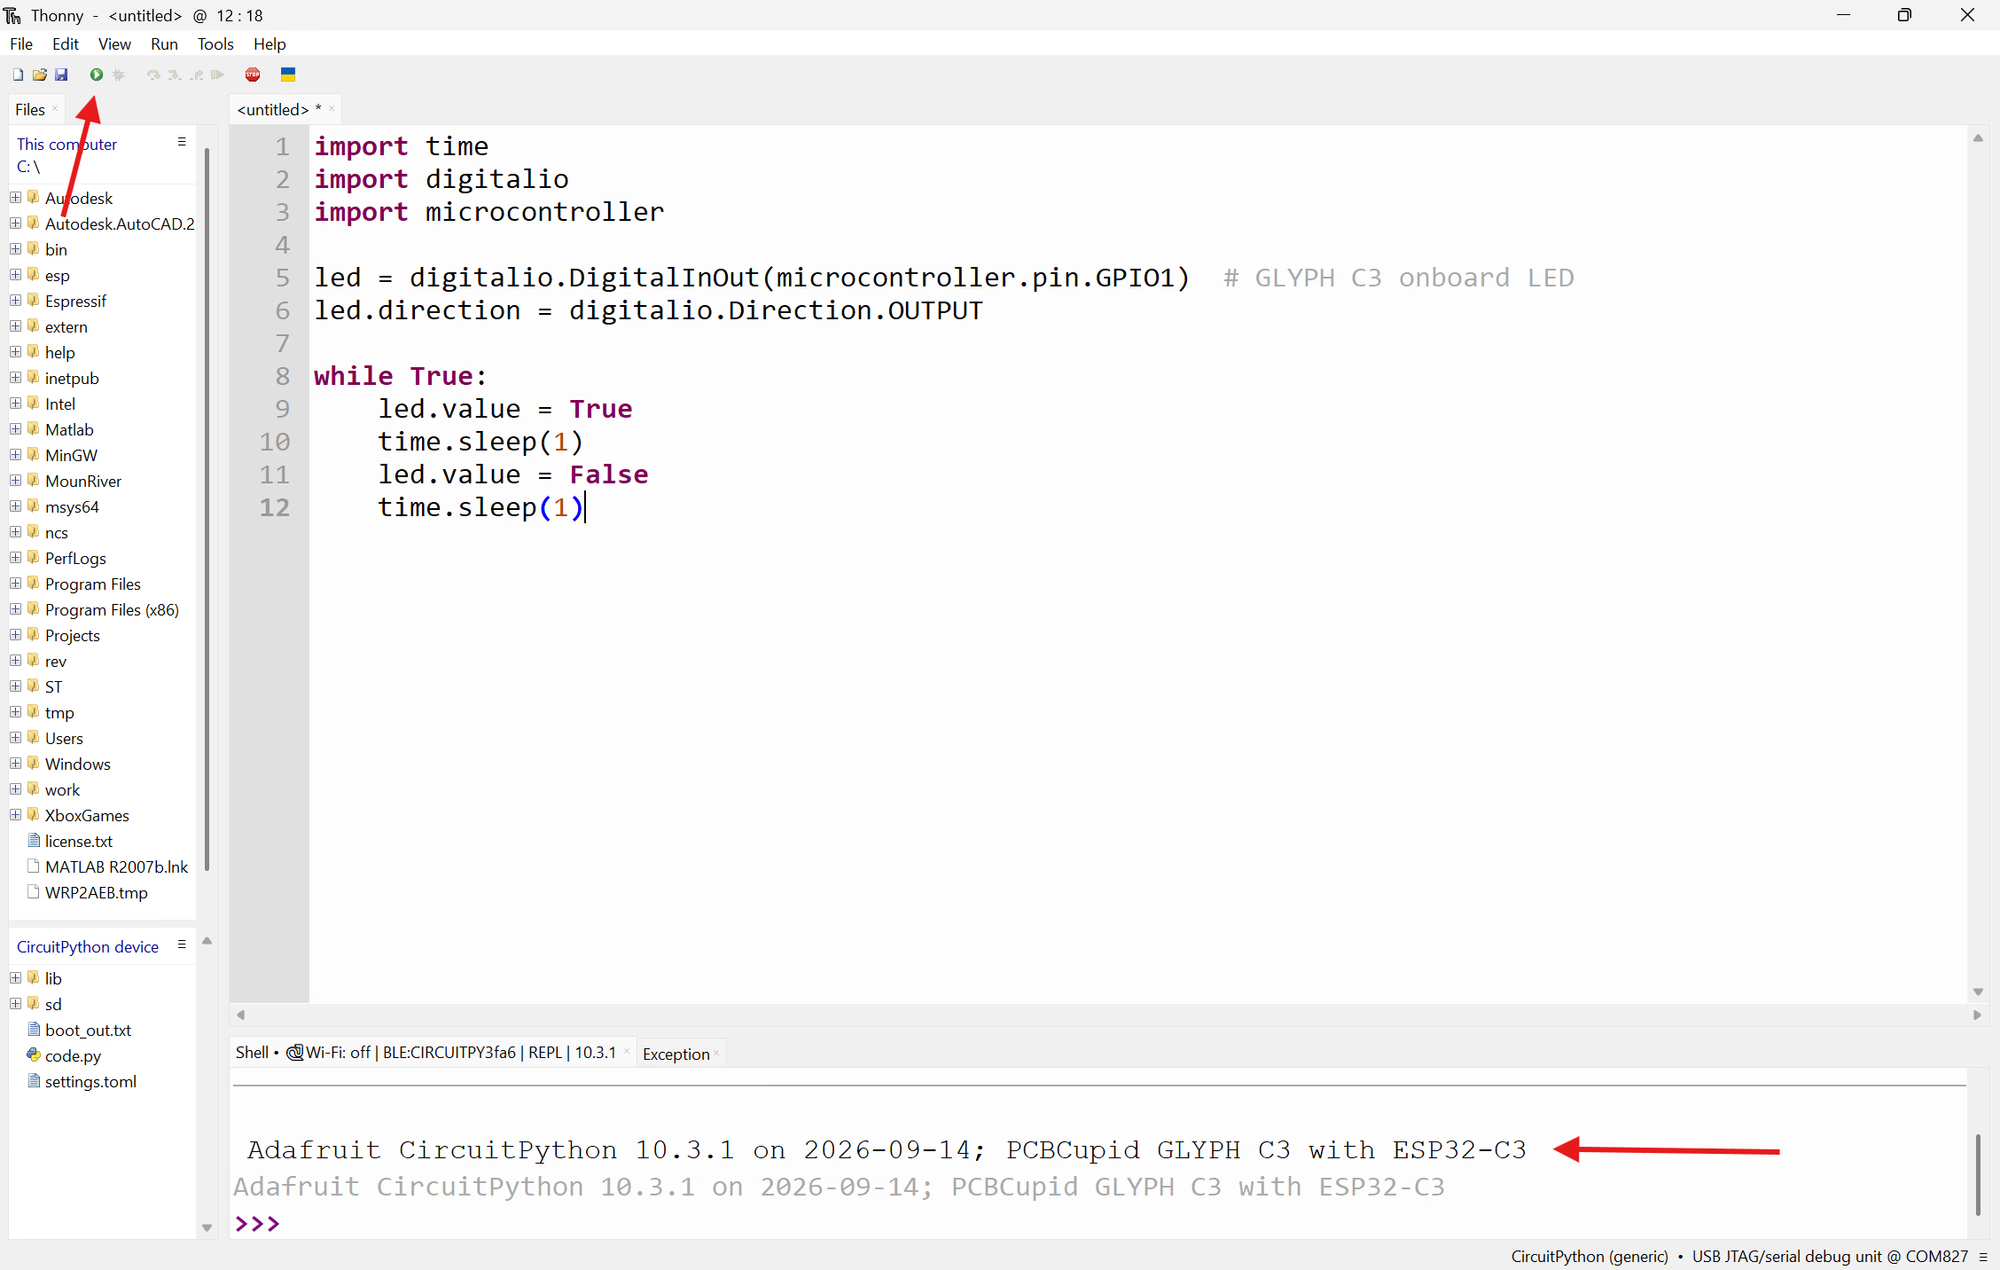
The C3, C6, and H2 use a serial connection and may not show a `CIRCUITPY` USB drive. Save files to **CircuitPython device** in Thonny. On a board that does show a `CIRCUITPY` drive, saving `code.py` there works too.
## Add libraries for the examples
The basic GPIO examples only use built-in CircuitPython modules. Sensor and display examples name any extra `adafruit_*.py` files they need. Download the [CircuitPython library bundle](https://circuitpython.org/libraries) that matches your firmware's major version, then copy the named files and their dependencies into the board's **`lib/`** directory using Thonny's device file browser. Keep the filenames and folder structure from the bundle.
## If the board is not detected
* Try a different USB data cable or port and close any other serial monitor.
* Re-enter bootloader mode with BOOT and RESET before flashing. After flashing, reset with BOOT released.
* Check that the firmware download matches the exact GLYPH board and that the flash start address is `0x0`.
* Reopen the CircuitPython interpreter and select the new serial port if its port name changed after flashing.
This documentation is built and hosted on [Mintlify](https://mintlify.com), a developer documentation platform.